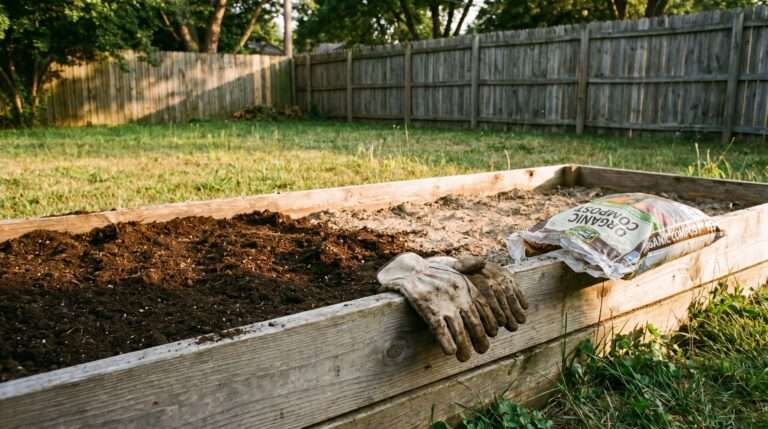
Zero-Waste Gardening: The Secret Compost System That Fits Anywhere
I still remember the first time I tried composting in a small space—it was a complete disaster. My tiny balcony smelled like something had gone horribly wrong, and I almost gave up after just one week.
Living in a compact home, I thought composting was only for people with big backyards and endless space. But here’s the truth: I was missing one simple secret. Once I figured it out, everything changed—no smell, no mess, and surprisingly, no extra effort.
In fact, my plants started thriving like never before. If you’ve ever felt stuck between wanting to reduce waste and not having the space, you’re in the right place. Below, I’ll walk you through real, practical systems that actually work in small homes.
Quick Selection Table (Best Small-Space Compost Ideas)
| Compost Method | Best For | Space Needed | Smell Control | Cost Level |
|---|---|---|---|---|
| Bokashi Bin | Apartments, Indoors | Very Small | Excellent | Medium |
| Vermicomposting | Balcony/Garden Corners | Small | Good | Low |
| Countertop Composter | Daily Kitchen Use | Tiny | Excellent | Medium |
| DIY Bucket System | Budget-Friendly Setup | Small | Moderate | Low |
| Tumbler Compost Bin | Outdoor Small Spaces | Medium | Good | Medium |
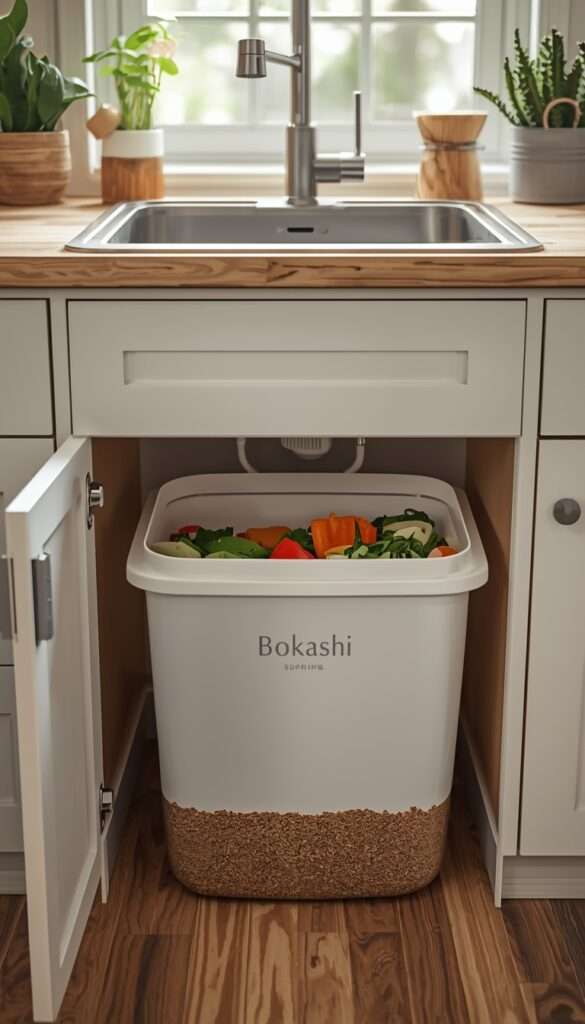
🌱 1. The Odor-Free Bokashi Bin System (Apartment-Friendly Magic)
If you’ve ever worried about compost smell indoors, the Bokashi method will feel like a miracle. I personally switched to this after my first failed compost attempt, and honestly, it changed everything. Bokashi uses fermentation instead of traditional decomposition, which means no rotting smell—just a slightly sour, pickled scent.
You can keep a Bokashi bin right under your kitchen sink. Every day, I add food scraps like vegetable peels, leftover rice, even small amounts of cooked food (which regular compost usually doesn’t allow). Then I sprinkle Bokashi bran on top. That’s it. No turning, no stress.
One thing I learned the hard way—don’t skip draining the liquid. That “compost tea” builds up quickly and can cause odor if ignored. I now drain it every 2–3 days and dilute it for watering plants. It’s like free fertilizer.
You can find Bokashi kits online or even DIY one using airtight buckets. It’s perfect if you’re serious about zero-waste living but limited on space.
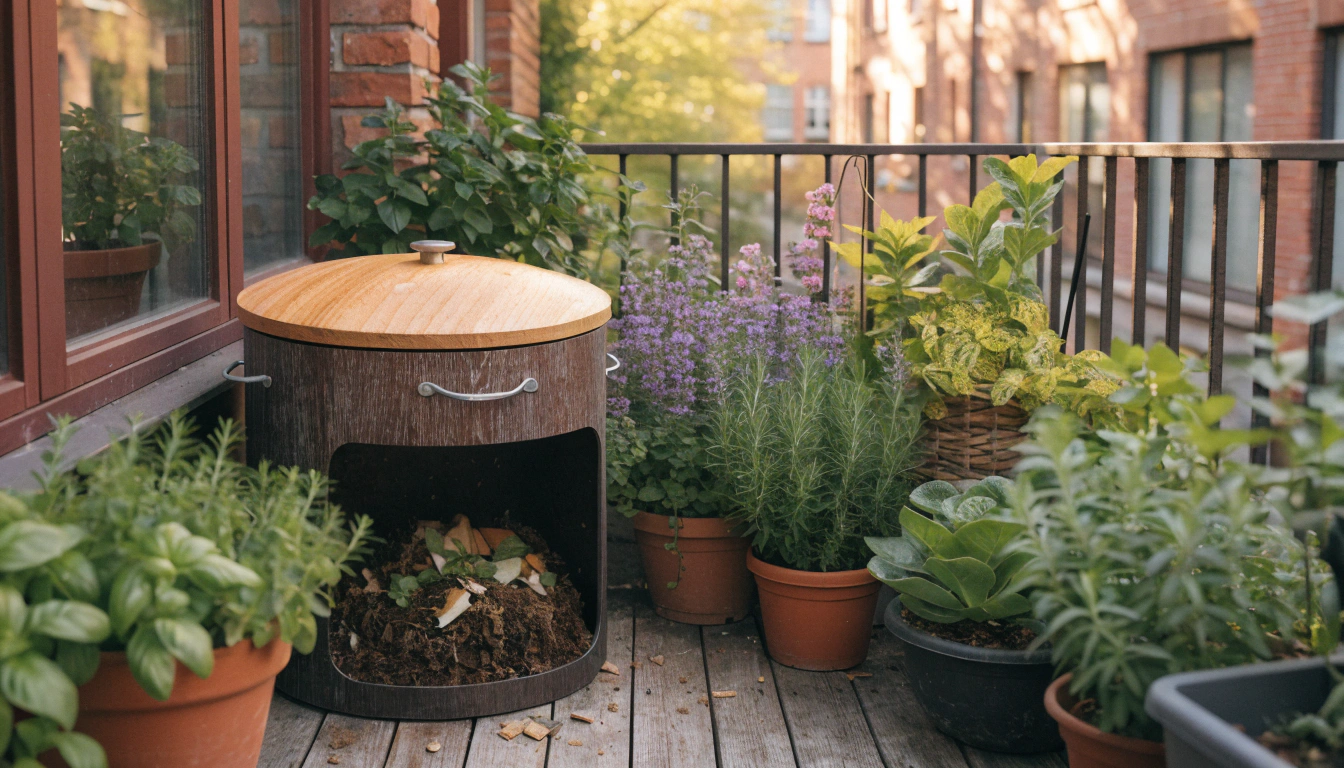
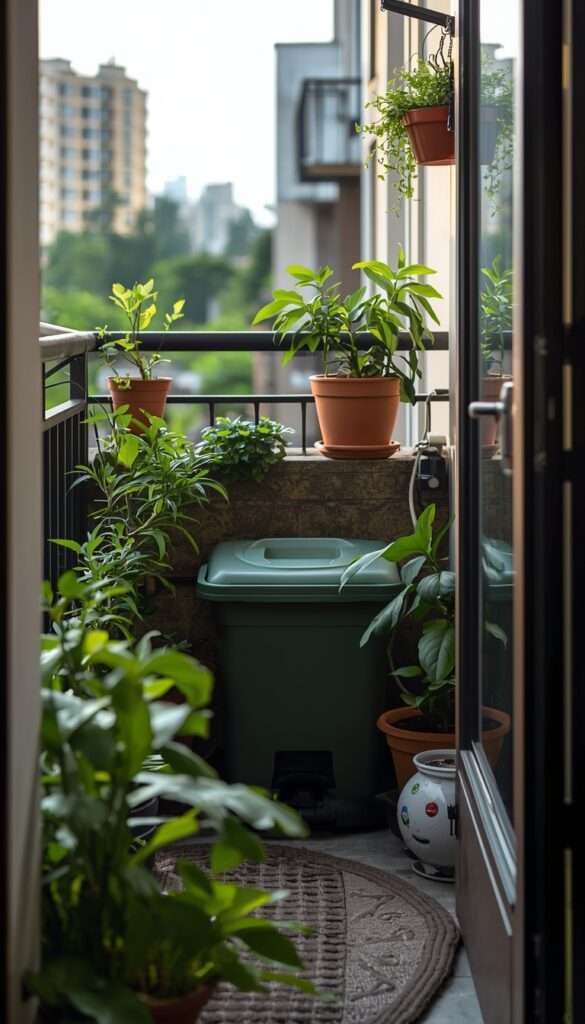
🌿 2. Vermicomposting (Worm Bin for Balcony Gardeners)
I’ll be honest—keeping worms sounded weird at first. But vermicomposting turned out to be one of the most rewarding systems I’ve tried. Once you get past the initial hesitation, it’s incredibly efficient and surprisingly clean.
All you need is a small bin, some bedding (like shredded newspaper), and red wigglers. Place it in a shaded corner of your balcony. I keep mine tucked beside my container plants, and it blends right in.
The biggest mistake beginners make? Overfeeding. I did this early on, and the bin started smelling because the worms couldn’t keep up. Now I follow a simple rule: feed small amounts and wait until it disappears before adding more.
The compost produced is incredibly rich. If you’re also growing vegetables, you’ll notice a visible difference. In fact, if you’re growing food in small spaces, pairing this with vertical systems like in Creative Vertical Vegetable Garden Ideas for Urban Balconies can create a full-circle setup where your kitchen waste feeds your crops naturally.
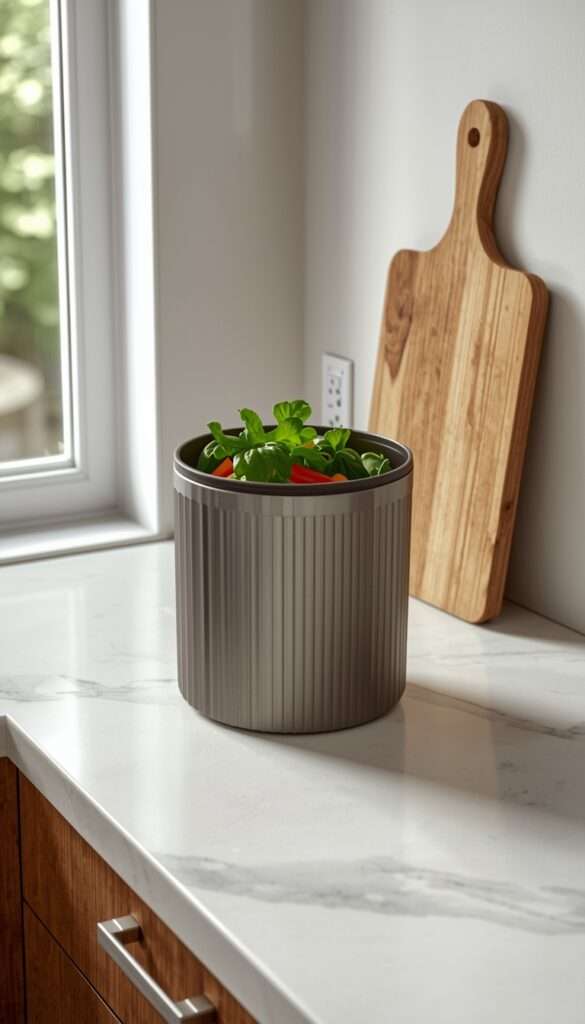
🌱 3. Countertop Compost Containers (Daily Habit Builder)
Sometimes, the hardest part of composting isn’t the system—it’s the habit. That’s where a countertop compost container comes in. It’s not your final compost solution, but it makes everything easier.
I keep a small, charcoal-filter bin next to my cutting board. Every time I chop vegetables, scraps go straight in. No running outside, no excuses. This single change made me consistent.
The key is to empty it regularly—every 1–2 days max. I once let it sit for a week (bad idea), and even with a filter, it started to smell. Now it’s part of my routine, like washing dishes.
You can connect this with any compost system—Bokashi, worm bin, or even a community compost drop-off. It’s a simple but powerful step.
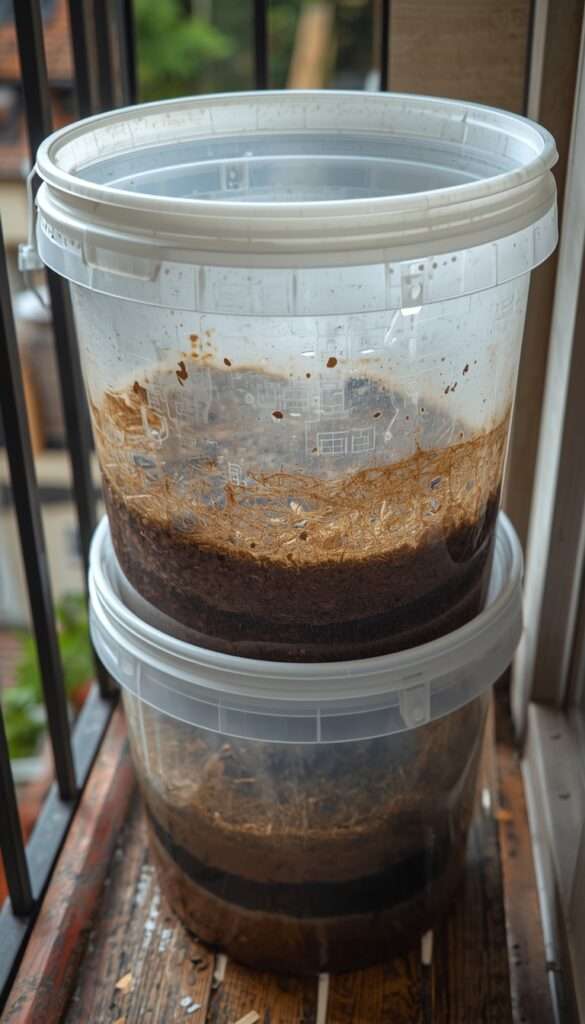
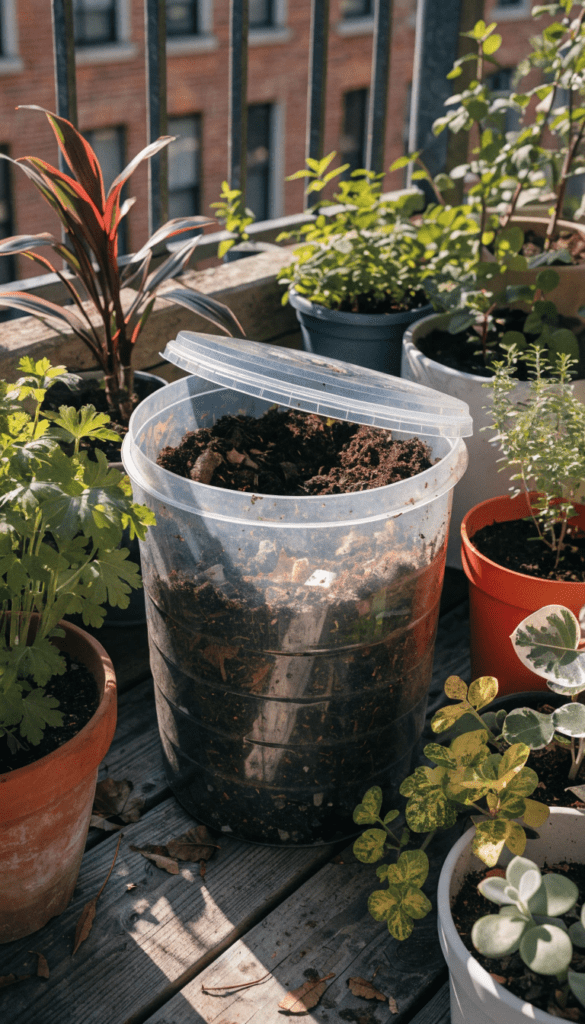
🌿 4. DIY Bucket Compost System (Budget-Friendly Hack)
If you’re on a tight budget, this is hands-down the best place to start. I built my first compost system using two plastic buckets and a drill—and it worked surprisingly well.
One bucket holds the compost, while the other collects drainage. Drill small holes for airflow. Add alternating layers of “greens” (food scraps) and “browns” (dry leaves, cardboard).
Here’s the mistake I made: I didn’t balance greens and browns properly. Too many kitchen scraps = soggy, smelly mess. Once I started adding more dry material, everything stabilized.
You can place this system on a balcony or even a utility area. It’s simple, effective, and teaches you the basics before upgrading.
🌱 5. Compact Compost Tumblers (Fast & Clean Option)
A compost tumbler is perfect if you want quicker results without much effort. I added one after struggling with manual turning—it made life so much easier.
You just add waste, close the lid, and rotate it every few days. The aeration speeds up decomposition significantly.
The biggest mistake? Overfilling. I once packed it too tight, and airflow stopped completely. Now I keep it about 70% full max.
PRO TIP
Most compost failures in small spaces come from imbalance, not space limitations. Always aim for a mix of wet (greens) and dry (browns). If it smells bad, add dry material. If it’s too dry, sprinkle a little water. Composting is less about perfection and more about observation.
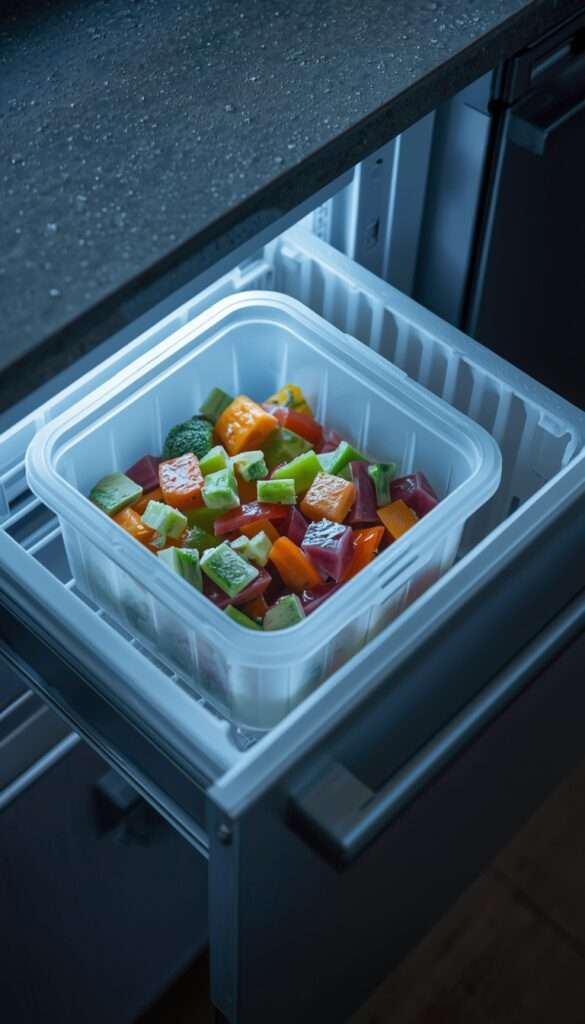
🌱 6. The Freezer Compost Storage Trick (Zero Smell Hack for Hot Climates)
If you live somewhere warm (like I do), you already know how fast kitchen waste can turn into a smelly disaster. During peak summer, I was battling fruit flies within hours—not days. That’s when I discovered the freezer compost trick, and honestly, it felt like cheating the system.
Instead of throwing scraps directly into a bin, I started storing them in a reusable container or zip bag in the freezer. Vegetable peels, fruit scraps, even coffee grounds—all go in. The cold stops decomposition completely, which means zero smell, zero insects, and zero stress.
What surprised me most was how much easier composting became. I only empty the frozen scraps into my main compost system every 2–3 days. It turned composting from a daily chore into a simple routine.
One mistake I made early on—using thin plastic bags. They tore easily and made a mess. Switching to sturdy, reusable containers solved that instantly. You can even repurpose old ice cream tubs for this.
If your composting journey keeps failing because of smell or pests, this one small habit can completely change the game.
🌿 7. Community Compost Drop-Off (Zero Space, Zero Stress Solution)
There was a phase where I simply didn’t have any space—not even a balcony. I thought composting was off the table until I discovered local compost drop-off points. It’s one of the most underrated zero-waste solutions out there.
Many urban areas now have community gardens, NGOs, or municipal programs that accept kitchen waste. All I had to do was collect my scraps and drop them off once or twice a week.
The key here is storage. I keep a small airtight container in the kitchen and empty it regularly. If I know I won’t go out for a few days, I combine this method with the freezer trick—best of both worlds.
One mistake I made initially was not checking what they accept. Some places don’t allow cooked food or citrus. Always confirm guidelines to avoid contamination.
This method is perfect if you want to reduce waste without managing compost at home. It’s simple, practical, and still makes a real impact.

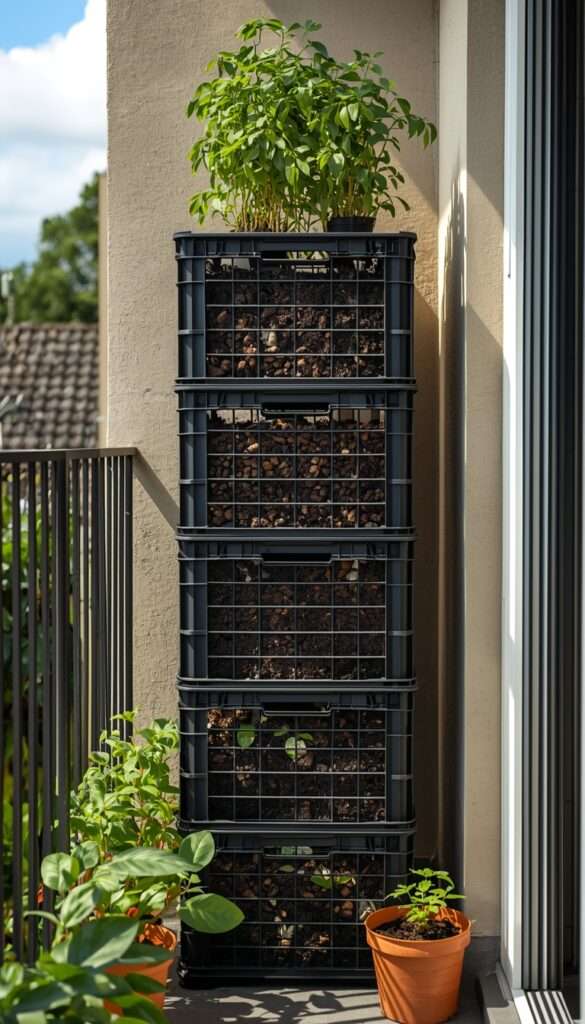
🌱 8. Stackable Crate Composting (Vertical Solution for Tiny Homes)
When floor space is limited, the only direction left is up—and that’s exactly what this system uses. Stackable crate composting is one of the smartest solutions I’ve tried for tight balconies.
You simply use 2–3 crates stacked on top of each other. The top crate is for fresh waste, while the lower ones process older compost. Over time, you rotate them.
What I love about this setup is airflow. Unlike closed bins, crates allow natural aeration, which speeds up decomposition and reduces odor. But here’s where I messed up initially—I used crates without lining them properly, and compost started falling through.
The fix? Add a layer of cardboard or breathable fabric at the base. It holds everything together while still allowing airflow.
You can find cheap crates at local markets or reuse old storage bins. It’s budget-friendly and incredibly effective.
This system works especially well If you’re already maximizing vertical space, combining this with layouts from Creative Vertical Vegetable Garden Ideas for Urban Balconies makes your entire setup more efficient and productive. —like using ideas from creative vertical vegetable garden setups—so your compost feeds your plants directly.
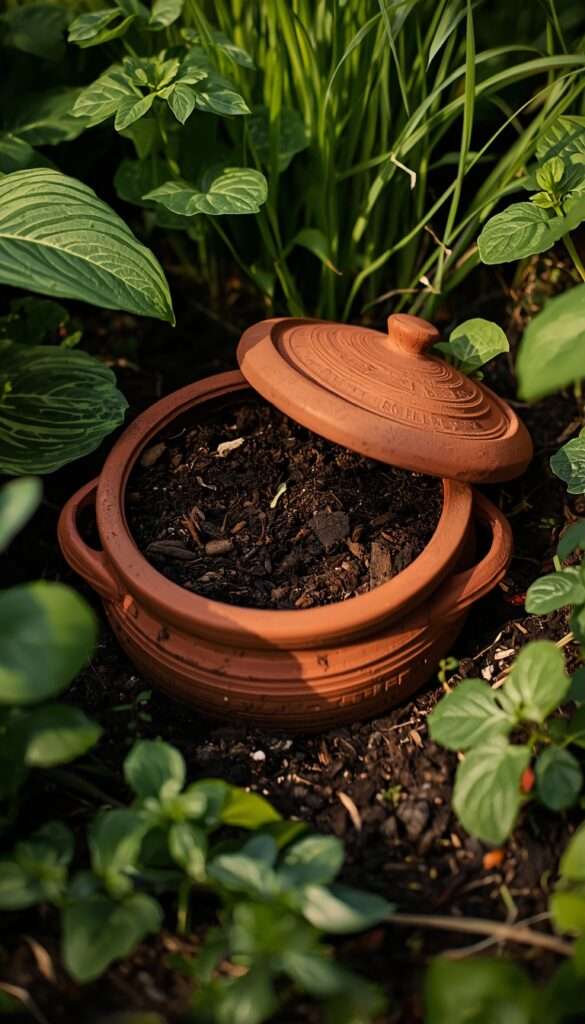
🌿 9. Clay Pot Composting (Terracotta Digester for Natural Living)
This is one of my favorite methods—not just because it works, but because it actually looks beautiful. Clay pot composting blends seamlessly into your garden or balcony.
You take a terracotta pot, drill a few holes, and partially bury it in soil (or place it in a large planter). Add kitchen scraps inside and cover it. The surrounding soil and microbes do the rest.
What I love most is how low-maintenance it is. There’s no turning, no complicated setup. It’s slow, but incredibly natural.
One mistake I made? Leaving the lid loose. That attracted ants. Once I sealed it properly, the problem disappeared.
This method is perfect if you want something discreet and aesthetic. It doesn’t look like a compost system—it just looks like part of your garden.
And if you already enjoy decorative gardening styles, This blends beautifully into natural layouts inspired by Stunning DIY Garden Path Ideas on a Budget, making your compost system feel like part of the design—not an add-on.
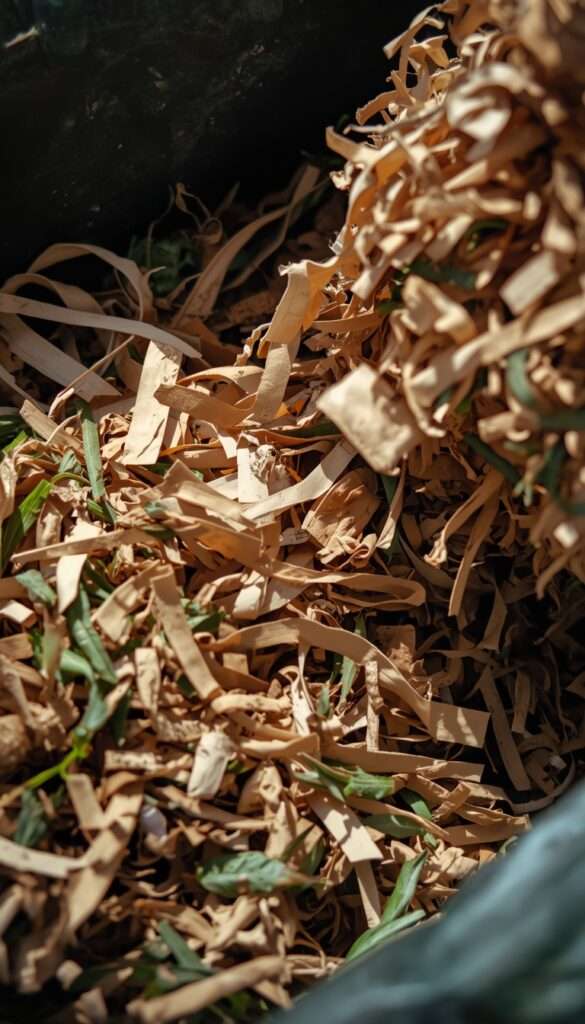
🌱 10. Paper & Cardboard Compost Balance Method (Fix Wet Compost Instantly)
This isn’t a compost system—it’s a lifesaver. Almost every beginner (including me) struggles with wet, smelly compost at some point. The solution? Paper and cardboard.
Whenever my compost starts looking soggy or smelling off, I immediately add shredded newspaper, cardboard, or even egg cartons. These act as “browns,” balancing moisture and restoring airflow.
The trick is shredding. I once added large cardboard pieces, and they took forever to break down. Now I tear everything into small bits—it works much faster.
Another tip: always keep a dry stash nearby. I store shredded paper in a small box near my compost bin so I can fix issues instantly.
This method works with any compost system—Bokashi, worm bins, buckets, tumblers—everything.
It’s simple, free, and incredibly effective. Honestly, this one habit alone saved my compost more times than I can count.
PRO TIP
ZERO-WASTE SECRET:
Your compost is only as good as what you feed it. Avoid oily food, meat, and dairy in small systems—they’re the fastest way to attract pests and create odor.SMALL-SPACE SECRET:
If you’re struggling to stay consistent, don’t rely on just one compost method. Combine 2–3 simple systems (like freezer storage + worm bin + micro-composting). This creates a flexible routine that adapts to your lifestyle instead of overwhelming it.
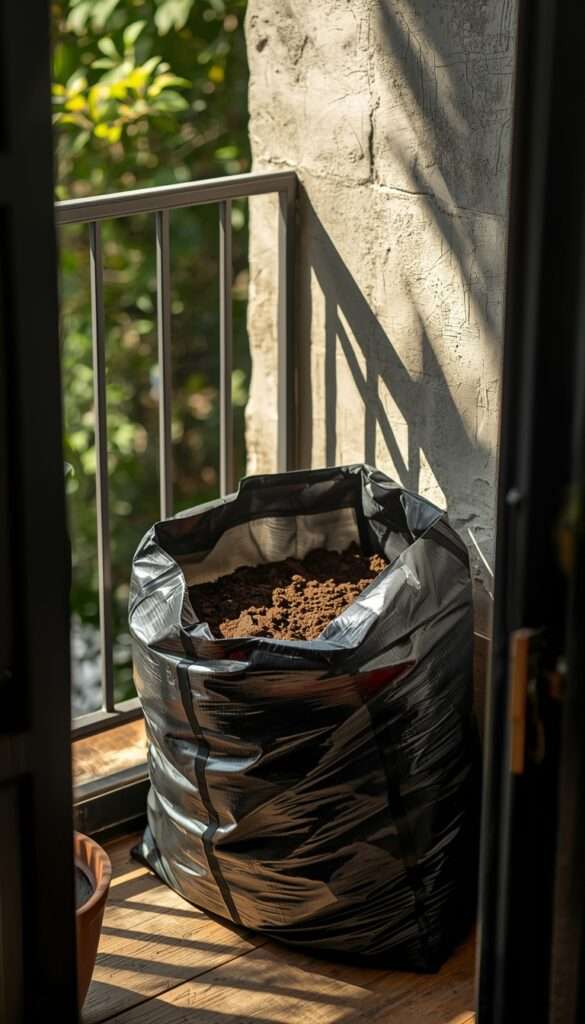
🌿 11. The “No-Turn” Compost Bag Method (Lazy-Friendly Composting That Works)
If you’ve ever felt like composting is just too much work, this method is going to feel like a relief. I discovered the no-turn compost bag method during a particularly busy month when I simply didn’t have the energy to maintain bins.
All you need is a sturdy compostable bag or even a thick black garbage bag. Add your kitchen scraps, mix in some dry materials like shredded paper, tie it up, and let it sit. That’s it. No turning, no checking every day.
I kept mine tucked in a shaded corner of my balcony, and within a few weeks, it started breaking down surprisingly well. The heat trapped inside the bag actually speeds things up.
Now, here’s where I made a mistake—overfilling the bag. Without enough air space, the compost turned slimy instead of crumbly. The fix was simple: fill it only halfway and poke a few tiny holes for minimal airflow.
This method is perfect if you want something low-effort. It’s not the fastest, but it’s incredibly beginner-friendly and requires almost no setup cost.
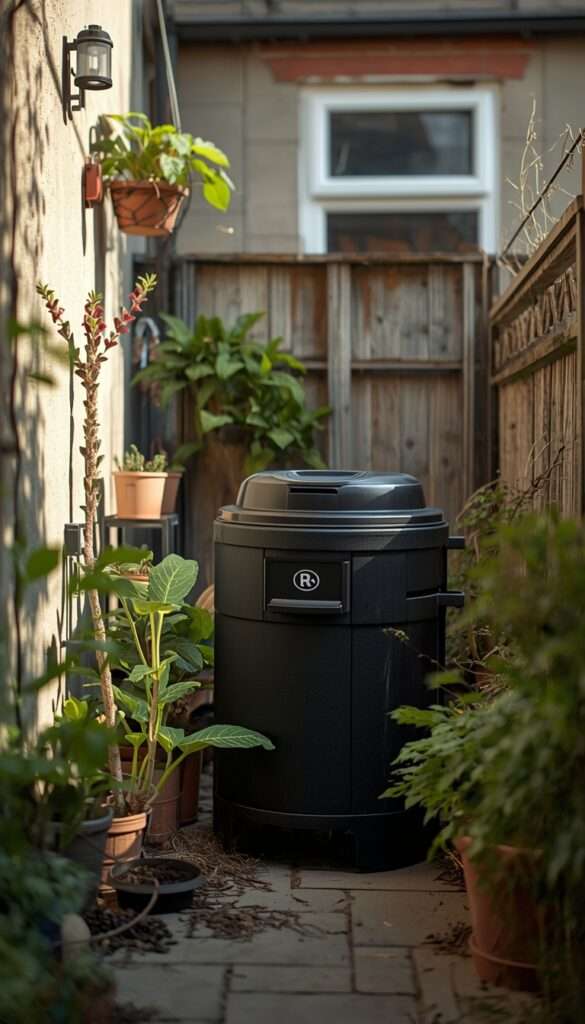
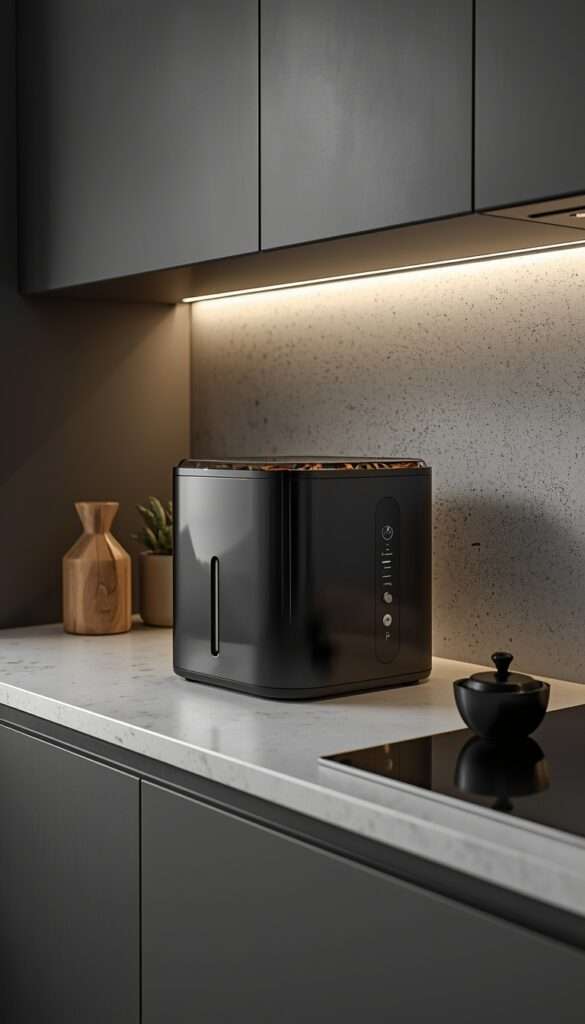
🌱 12. Indoor Electric Composter (Modern, High-Speed Solution)
If you want the fastest and cleanest composting solution, this is it. I was skeptical at first—an electric composter felt like overkill—but after trying one, I understood the hype.
You simply add food waste, press a button, and within a few hours, it dries and grinds everything into a soil-like material. No smell, no pests, no waiting months.
I personally found this incredibly useful during monsoon season when outdoor composting became difficult. It kept everything contained and hassle-free.
But here’s the catch—it’s not “true compost” immediately. It’s more like pre-compost, and it works best when added to soil or a compost bin to finish breaking down.
The biggest mistake? Putting in large chunks. I once added whole vegetable pieces, and the process slowed down significantly. Now I chop everything smaller before adding.
Yes, it’s an investment—but if convenience matters to you, it’s worth considering.
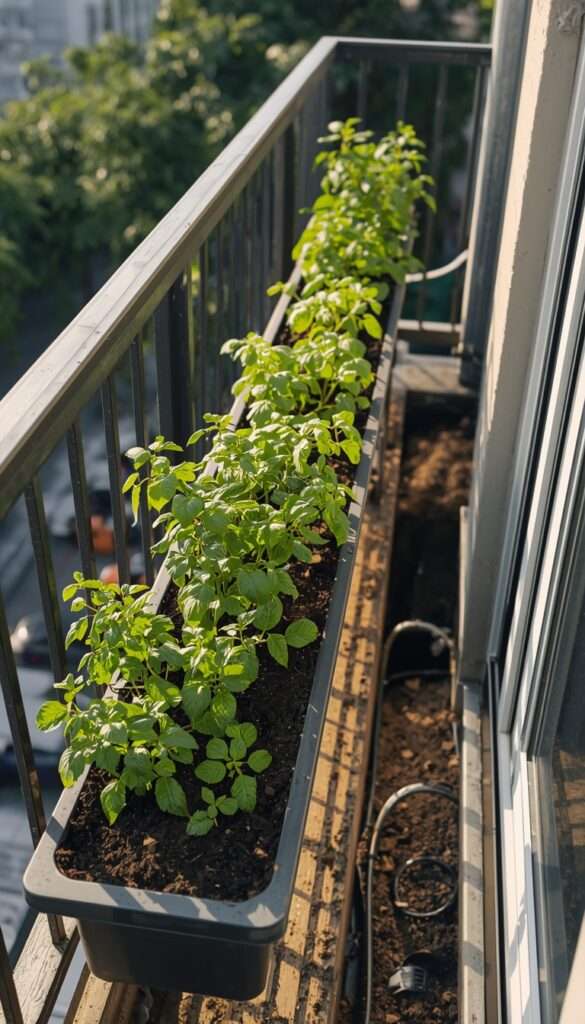
🌿 13. Balcony Railing Compost Planters (Dual-Purpose Space Saver)
This idea came out of pure experimentation—and it ended up being one of my favorites. I wanted to maximize my balcony space, so I tried combining composting and planting into one system.
Using deep railing planters, I started layering compost at the bottom (kitchen scraps + browns) and soil on top for plants. Over time, the compost breaks down and feeds the plants directly.
The result? Healthier plants and less need for fertilizers. It’s like a mini ecosystem in one container.
My first mistake was adding fresh scraps too close to the roots. That caused temporary odor and attracted tiny flies. Now I always bury scraps deeper and cover them well with soil.
This method works beautifully for herbs, leafy greens, or flowering plants. If you’re already exploring small balcony vegetable gardening ideas, this can upgrade your setup instantly.
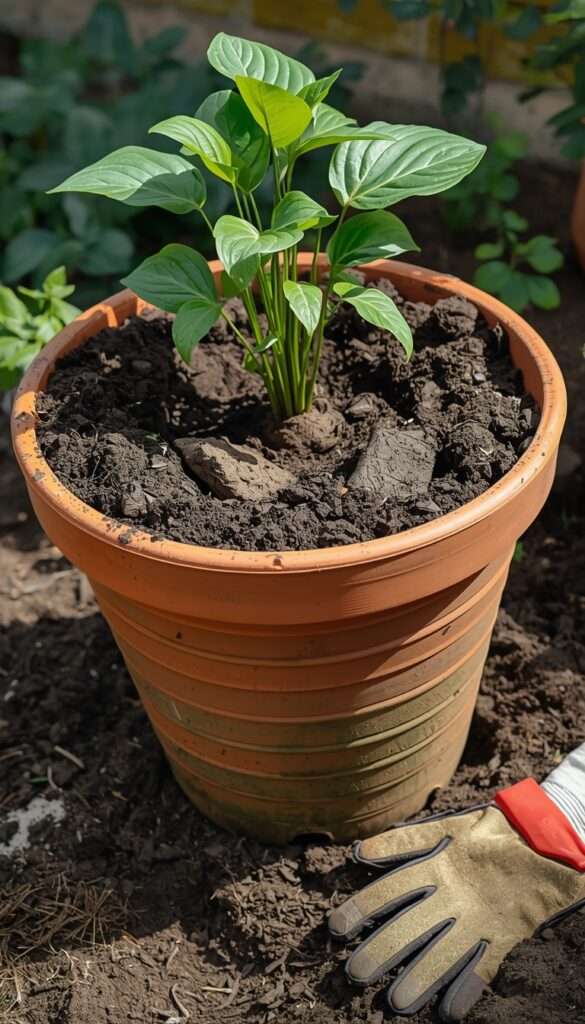
🌱 14. Trench Composting in Pots (Hidden Compost System)
This is one of the simplest and most underrated composting methods—especially for small spaces. I use this when I don’t want any visible compost system at all.
Here’s how it works: dig a small trench or hole in a large pot, add your kitchen scraps, and cover it with soil. That’s it. Nature does the rest.
I’ve used this method in my larger containers, especially for plants that need rich soil. Over time, the scraps break down and enrich the pot from within.
The mistake I made initially was adding too much at once. It slowed decomposition and created a slight smell. Now I add small amounts regularly instead of dumping everything together.
It’s completely hidden, requires zero maintenance, and is perfect for beginners who want a no-fuss method.
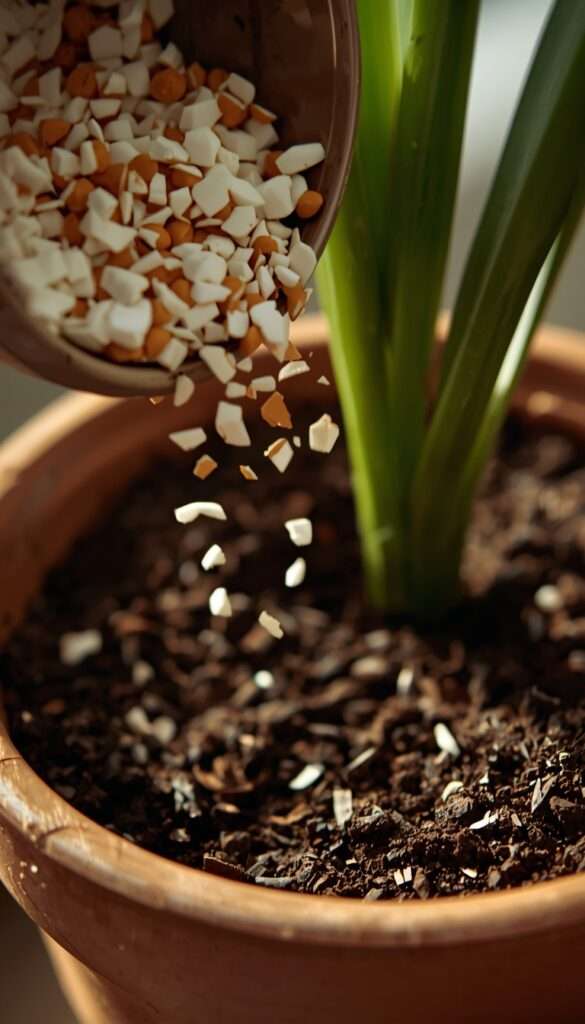
🌿 15. Eggshell & Coffee Ground Micro-Composting (Quick Nutrient Boost)
Sometimes, composting doesn’t need to be complicated. This micro-composting method focuses on two of the most common kitchen wastes—eggshells and coffee grounds.
I started doing this daily without even realizing it was composting. After making coffee or breakfast, I’d crush eggshells and sprinkle them directly into plant pots.
Eggshells add calcium, while coffee grounds improve soil texture and provide nitrogen. It’s a simple habit, but over time, it makes a noticeable difference.
One mistake I made early on was adding large eggshell pieces—they took forever to break down. Now I crush them into a fine powder before using.
Also, don’t overdo coffee grounds. Too much can make soil acidic. I use a light sprinkle and mix it well.
This method is perfect if you want instant results without managing a full compost system. It’s small, simple, and surprisingly effective.
PRO TIP
SMALL-SPACE SECRET:
If you’re struggling to stay consistent, don’t rely on just one compost method. Combine 2–3 simple systems (like freezer storage + worm bin + micro-composting). This creates a flexible routine that adapts to your lifestyle instead of overwhelming it.
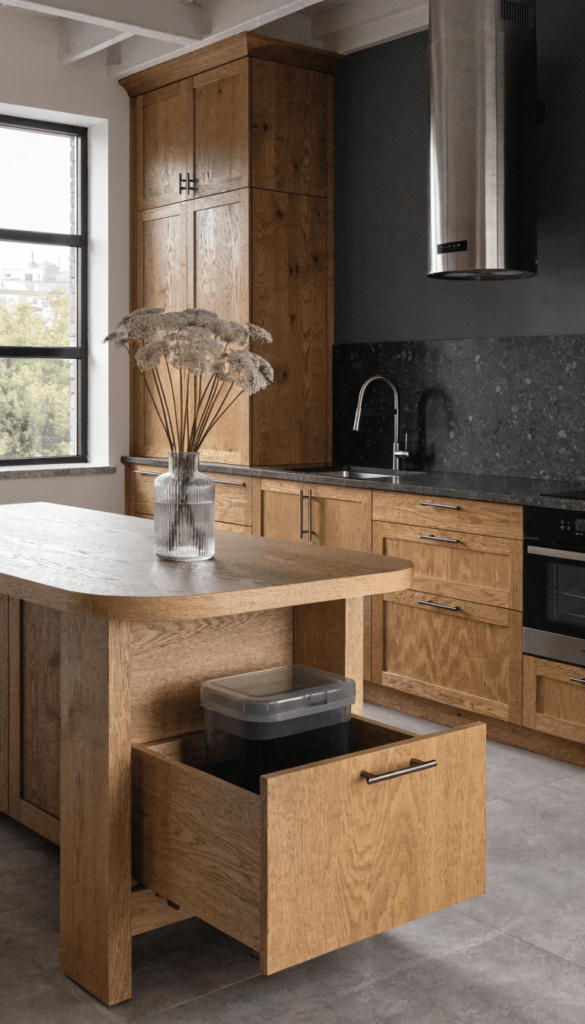
🌱 16. The “Compost-in-a-Drawer” System (Hidden Kitchen Compost Hack)
This idea came out of a problem I didn’t expect—visual clutter. Even a small compost bin on the counter started bothering me in a tiny kitchen. That’s when I experimented with a hidden drawer system.
I repurposed an old pull-out drawer and placed a compact, sealed compost container inside it. Now, every time I chop vegetables, I just slide the drawer open and drop scraps in. No visual mess, no interruption in workflow.
What surprised me most was how much more consistent I became. Composting felt invisible—like it was just part of my kitchen routine.
The mistake I made early on was not using a proper sealed container inside the drawer. Moisture built up and caused a slight odor. Adding a charcoal-filter bin fixed it immediately.
This setup works beautifully if you love clean, minimal spaces. It keeps everything hidden while still making composting effortless.
🌿 17. Bokashi + Soil Factory Combo (Advanced Zero-Waste Loop)
Once I got comfortable with Bokashi, I realized something important—it doesn’t finish composting on its own. That’s where the “soil factory” method comes in.
After your Bokashi bin is full and fermented, you transfer the contents into a container filled with soil. Over the next few weeks, it breaks down completely into rich compost.
I set up a simple soil factory using a large storage bin on my balcony. It quietly does its job while I continue filling my Bokashi bin indoors.
The mistake I made at first? Opening the soil bin too often. It disturbed the process and released odor. Now I leave it undisturbed for at least 2–3 weeks.
This method creates a full closed-loop system—kitchen waste → fermentation → soil → plants. It’s incredibly satisfying and perfect if you want to take composting seriously.
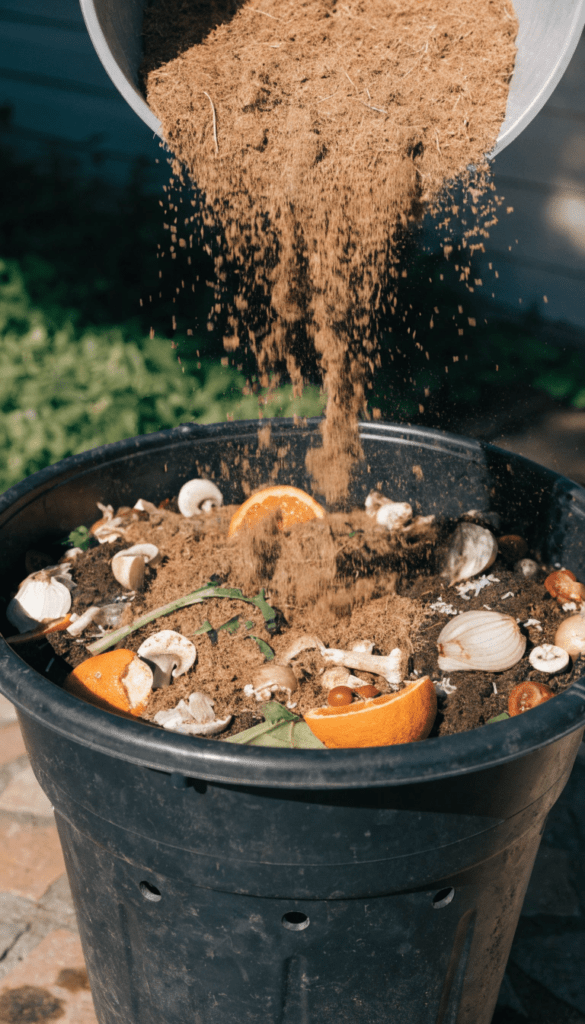
🌱 18. Composting with Coconut Coir (Perfect for Indian Homes)
This was a game-changer for me, especially in humid weather. Coconut coir (coco peat) is easily available and works beautifully as a compost “brown.”
Instead of relying only on dry leaves or cardboard, I started adding coir to my compost mix. It absorbs excess moisture, improves airflow, and prevents that soggy, smelly mess.
I usually keep a small bag nearby and add a handful whenever the compost looks too wet. It’s lightweight, clean, and easy to handle—even indoors.
One mistake I made was using it dry straight from the pack. It didn’t mix well. Now I lightly moisten it before adding—it blends much better.
If you’re composting in humid regions, this is one of the easiest upgrades you can make. It stabilizes your system instantly.
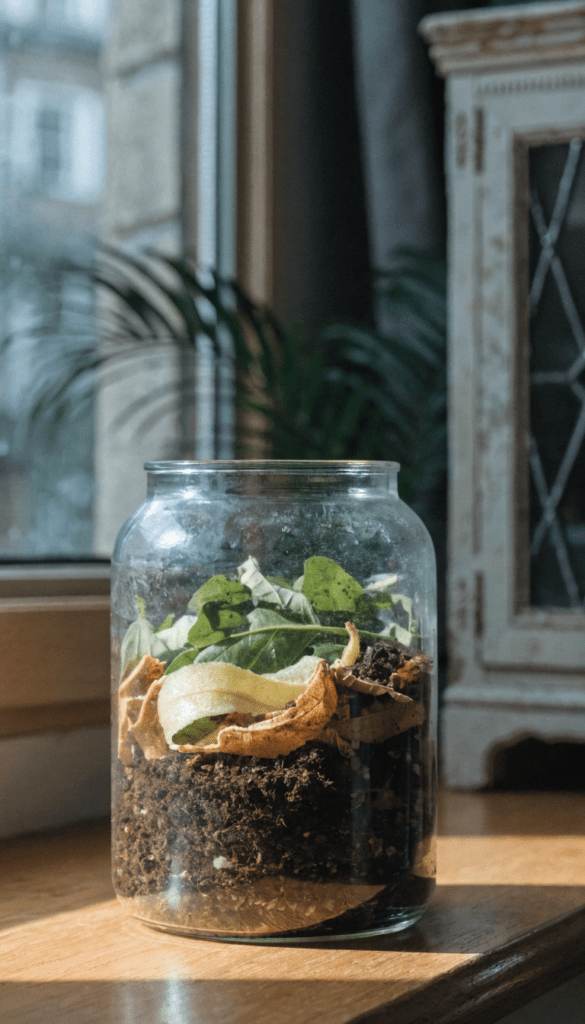
🌿 19. Mini Compost Jar for Kids & Beginners (Learning-Friendly Setup)
This idea started as a fun experiment—and turned into one of the most educational tools I’ve used. A mini compost jar lets you see the process happen.
Take a glass jar and layer soil, food scraps, and dry material. Over time, you can watch decomposition happen right in front of you.
I’ve recommended this to beginners who feel overwhelmed. It simplifies composting into something visual and easy to understand.
The mistake I made initially was sealing the jar completely. That caused condensation and slowed the process. Now I keep the lid slightly loose for airflow.
It’s not meant for large-scale composting—but it’s perfect for learning, teaching kids, or building confidence before starting a bigger system.
This idea came from a simple realization—why compost alone when you can share the effort?
In my building, a few of us teamed up and created a shared compost bin in a common area. Each household contributes scraps, and we take turns managing it.
It reduced individual effort dramatically while increasing compost output. Plus, it created a sense of community around sustainability.
The biggest mistake? No clear system. Initially, people added the wrong materials, and it caused issues. We fixed it by labeling bins and setting simple rules.
If you have even 2–3 willing neighbors, this method can work beautifully. It’s efficient, social, and surprisingly motivating.

🌿 21. Compost + Grow Bag Combo (Ultimate Small-Space Loop)
This is where everything comes together—a complete mini ecosystem in one setup. I started experimenting with grow bags as both composting and planting units, and the results were incredible.
At the bottom of the grow bag, I add compost layers (scraps + browns). On top, I add soil and plant vegetables or herbs. As the compost breaks down, it feeds the plant continuously.
The first time I tried this, I noticed faster growth and healthier leaves compared to regular soil. It’s like your plant has a constant nutrient supply.
One mistake I made was not maintaining proper layering. Mixing fresh scraps too close to roots caused temporary stress. Now I keep a clear separation between compost and planting layers.
This method is perfect if you want maximum output from minimal space. It combines composting and gardening into one seamless system—ideal for urban living.

FINAL PRO TIP
ULTIMATE ZERO-WASTE SECRET:
The most successful small-space composters don’t rely on one “perfect” system—they build a flexible ecosystem. Combine fast methods (countertop, freezer) with slow ones (soil, worms). That’s how you stay consistent long-term.
FAQ
1. Does composting smell in small spaces?
Not if done correctly. Odor usually means imbalance—add dry materials immediately.
2. Can I compost cooked food?
Yes, but only in systems like Bokashi.
3. How long does compost take?
Anywhere from 2 weeks (Bokashi) to 2–3 months (traditional).
4. What if I see insects?
Reduce moisture and cover scraps with browns.
5. Is composting worth it in apartments?
Absolutely—it reduces waste and improves plant health significantly.
Step-by-Step Beginner Guide
- Choose your system (start with Bokashi or DIY bucket)
- Set up a daily scrap collection habit
- Balance greens and browns
- Monitor moisture weekly
- Harvest compost and use in plants
Common Mistakes
- Overfeeding compost
- Ignoring moisture balance
- Not adding enough browns
- Keeping bin in direct sunlight
- Expecting instant results
Final Thoughts
I used to think composting required space, time, and effort I didn’t have. But once I started small, it became second nature. The biggest shift wasn’t the system—it was my mindset. Composting isn’t about being perfect; it’s about being consistent. Even in the smallest home, you can create something valuable out of what you’d normally throw away. And honestly, there’s something deeply satisfying about turning waste into life.
Aagam – Founder of SpruceTouch
Hi, I’m Aagam — the creator behind SpruceTouch. I’m a home and garden enthusiast who shares practical ideas for backyard design, garden projects, patio decor, and small outdoor spaces. Through SpruceTouch, I focus on simple and budget-friendly ways to improve outdoor living spaces.