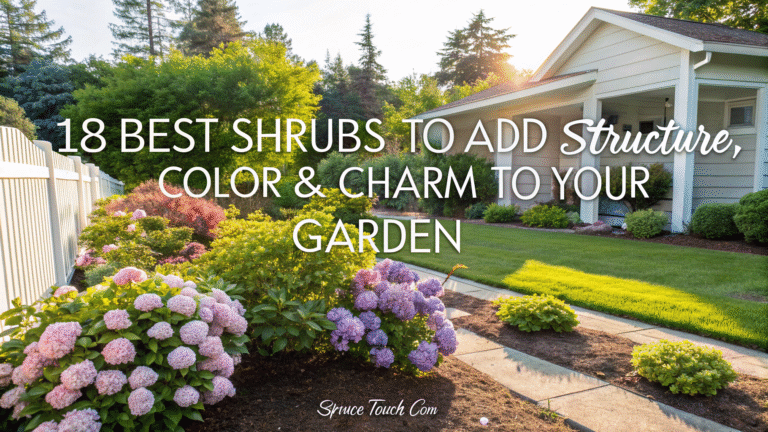
Cottage Garden Privacy: My Top 5 Shrubs for a “Living Floral Wall” (Zone 6-9)
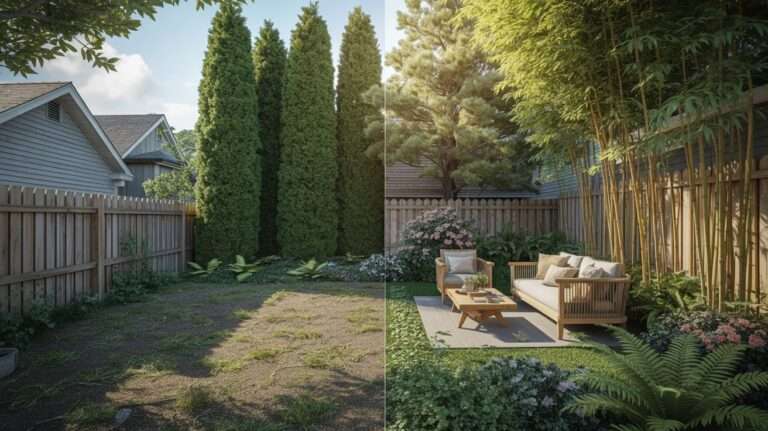
After about 17 years of digging in the dirt, I’ve learned that “privacy” in a garden shouldn’t feel like a prison sentence. When I first started out, I did what everyone does: I ran to the big box store and bought a row of those stiff, pointy Emerald Green Arborvitaes.
I lined them up like little green soldiers. It looked terrible. It felt cold, and frankly, one of them died in the first year, leaving a “missing tooth” in my fence line that mocked me every time I drank my morning coffee.
That’s when I fell in love with the idea of a living floral wall. A cottage garden is all about romance, movement, and a bit of controlled chaos. You want privacy, sure, but you also want butterflies, scent, and flowers that change with the seasons.
But here’s the kicker: not every “pretty” shrub can handle the job of blocking out a neighbor’s leaf blower or a nosy street view. I’ve spent the last decade testing which shrubs actually grow thick enough to provide cover while still fitting that whimsical cottage aesthetic in Zones 6-9.
Quick Check: Is a Living Wall Right for You?
Before we dive into my top five picks, ask yourself these three things. I learned these the hard way so you don’t have to:
- Do you have 4–6 feet of depth? Shrubs aren’t flat like fences; they need elbow room.
- Are you okay with “seasonal” privacy? Some of the best flowering shrubs are deciduous (they drop leaves in winter).
- How’s your patience? Most of these take 2-3 years to really “fill the gap.”
- Do you have a watering plan? New shrubs are thirsty—check out my guide on watering plants correctly to avoid early heartbreak.
The Reality of “Green Fences” vs. Floral Walls
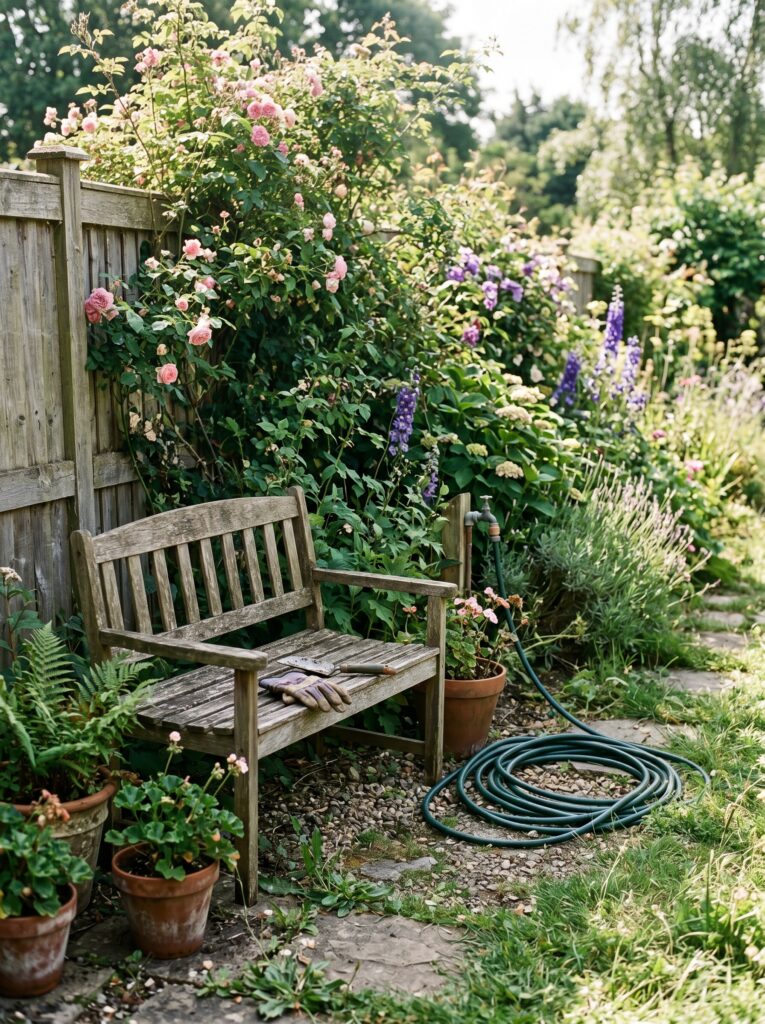
One thing I noticed over the years is that people confuse “hedging” with “screening.” A hedge is usually clipped tight—think of those fancy English estates. But a cottage garden floral wall? That’s different. You want the shrubs to touch, to mingle, and to bloom at different heights.
Most gardening blogs never mention this, but if you prune a flowering shrub into a perfect square, you’re usually cutting off all the flower buds. I learned this the hard way with my first Forsythia. I sheared it like a sheep in February, and I didn’t see a single yellow flower that spring.
For a true cottage feel, you have to let the plants be themselves. You’re looking for that “secret garden” vibe where the flowers are practically spilling over the path. This approach also helps with cottage garden design because it creates natural shadows and pockets for smaller perennials to hide in.
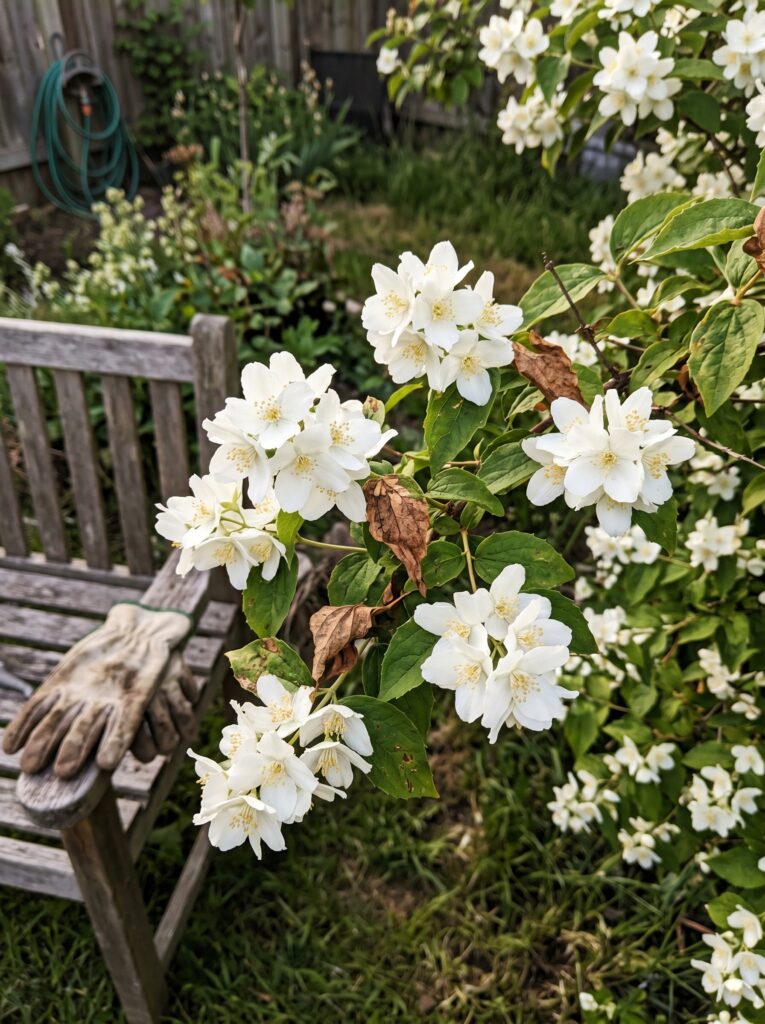
1. Mock Orange (Philadelphus): The Scent of Secret Gardens
If you want your backyard to smell like a dream in late spring, Mock Orange is your best friend. I planted mine near my back porch, and every May, it’s like a perfume factory exploded. The scent is somewhere between orange blossoms and jasmine, and it carries on the evening breeze perfectly.
It grows in this beautiful, fountain-like shape. The branches arch over, covered in white blossoms that look like tiny stars. In terms of privacy, it’s a powerhouse because it gets dense and bushy. If you plant the Philadelphus coronarius variety, it can easily reach 10 to 12 feet tall.
What I Learned: I once planted a Mock Orange in a spot that stayed too soggy. It hated it. The leaves turned yellow, and it just sat there pouting for two years. These guys need well-drained soil. If your ground feels like a sponge after rain, check out this soil health guide before you plant anything expensive.
Common Mistake: Buying the “dwarf” variety when you actually need a screen. I see this at the garden center all the time. People see a cute 2-foot plant and think it will grow into a wall. If the tag says “Buckley’s Quill” or “Snowbelle,” it’s going to stay short. Look for the “Straight Species” or “English Dogwood” types for height.
2. Doublefile Viburnum: The Layered Architect
Doublefile Viburnum (Viburnum plicatum f. tomentosum) is the “architect” of the cottage garden. It doesn’t just grow up; it grows out in horizontal tiers. It creates a very structural, sophisticated look that still feels wild.
It reminds me of a wedding cake. In spring, the branches are smothered in white lacecap flowers that sit on top of the leaves. By summer, it’s a thick, dark green wall that completely hides whatever is on the other side. The leaves have this deep, pleated texture that looks amazing even when the flowers are gone.
But here’s the kicker: these things get wide. I planted one too close to my walkway once and ended up having to do a “shrub-ectomy” because I couldn’t get to my front door without getting smacked by a branch. Give it at least 8 to 10 feet of horizontal space.
The Wildlife Factor: The best part? The birds love the berries that follow the flowers. I’ve watched catbirds and cardinals fight over the fruit in my hedge for years. If you’re interested in more than just privacy, this shrub is a biodiversity magnet. Just make sure your soil is prepped well; a little beginner gardening tips knowledge on organic matter goes a long way here.
Simple Fix: If your Viburnum looks a bit thin at the bottom (which happens as they age), don’t panic. You don’t need to rip it out. Just plant some shorter shade-loving perennials like Hostas or Coral Bells around the base to “fill the skirt.”
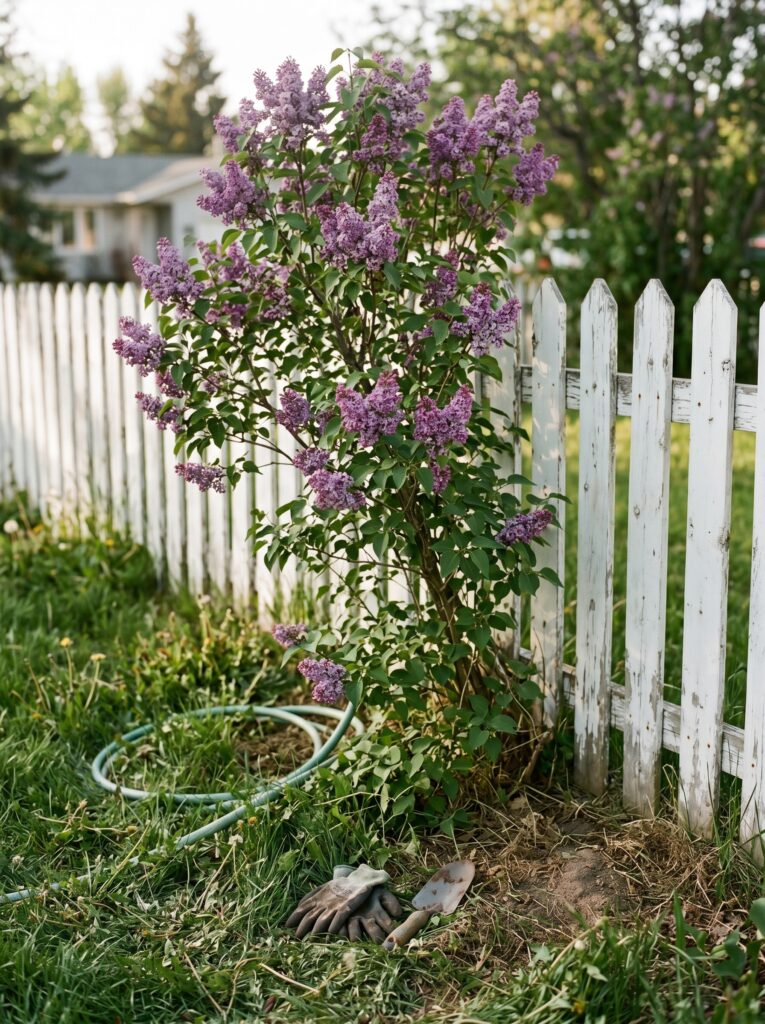
3. Lilacs: The Nostalgic Powerhouse
You can’t have a cottage garden without a Lilac. It’s practically a law. For Zones 6-7, the common French Lilac (Syringa vulgaris) is king. If you’re further south in Zone 8 or 9, look for “low-chill” varieties like ‘Josee’ or ‘Lavender Lady’—otherwise, they won’t get cold enough in winter to set flowers.
Lilacs provide excellent privacy because they tend to “sucker.” This means they send up new shoots from the ground, eventually creating a thick thicket that is impossible to see through.
I learned this the hard way: Powdery mildew is the Lilac’s nemesis. It’s that white, dusty film that shows up on the leaves in August. It doesn’t usually kill the plant, but it looks ugly. The fix? Airflow. Don’t jam your Lilacs right against a solid wooden fence. Leave a foot or two of space so the wind can move through the leaves.
A Real Observation: My neighbor has a Lilac hedge that hasn’t been trimmed in ten years. It’s 15 feet tall and looks a bit wild, but I can’t see a single inch of his house. In a cottage garden, “wild” is often exactly what you want. If they get too tall and “leggy,” you can use the “Rule of Thirds”: cut the oldest third of the stems down to the ground every year for three years. This totally rejuvenates the plant.
4. Rose of Sharon (Hibiscus syriacus)
I love Rose of Sharon because it’s the “procrastinator” of the garden. It blooms when everything else is tired. In the heat of July and August, when my other plants are drooping and the phlox is crisping up, this thing is covered in tropical-looking flowers.
It has a very upright, vase-shaped growth habit. This makes it perfect for smaller yards where you want height but don’t have 10 feet of width to spare. You can plant them 4 feet apart and they will form a solid, vertical wall of flowers.
The “Zombies” of Spring: Every year in April, I get emails from friends asking if their Rose of Sharon died. It’s just a bunch of grey sticks while the rest of the world is green. Don’t dig it up! It’s one of the last plants to leaf out. By June, it’ll be lush and providing total privacy.
But wait, there’s a catch: The older varieties are “prolific seeders.” That’s a polite way of saying they drop thousands of seeds that turn into mini-trees all over your garden. If you don’t want to spend your weekends weeding out “baby hibiscuses,” look for sterile varieties like ‘Azurri Blue Satin’ or the ‘Chiffon’ series.
5. Oakleaf Hydrangea: The Year-Round Performer
While most people go for the blue mophead hydrangeas, the Oakleaf (Hydrangea quercifolia) is the true champion for privacy. It’s native to the US, it’s tough as nails, and it handles the heat of Zone 9 better than almost any other hydrangea.
It provides a “living wall” that actually changes with the calendar:
- Summer: Massive cone-shaped white flowers.
- Fall: Deep burgundy and purple foliage (some of the best fall color in any shrub).
- Winter: Peeling, cinnamon-colored bark that looks beautiful against snow or bare dirt.
Even when the leaves drop, the branch structure is so thick and “twiggy” that it still acts as a visual screen. It’s perfect for those “shady” spots under large trees where other flowering shrubs struggle. If you find your soil is a bit too sandy or dry for these, check out composting at home to build up that moisture-holding capacity.
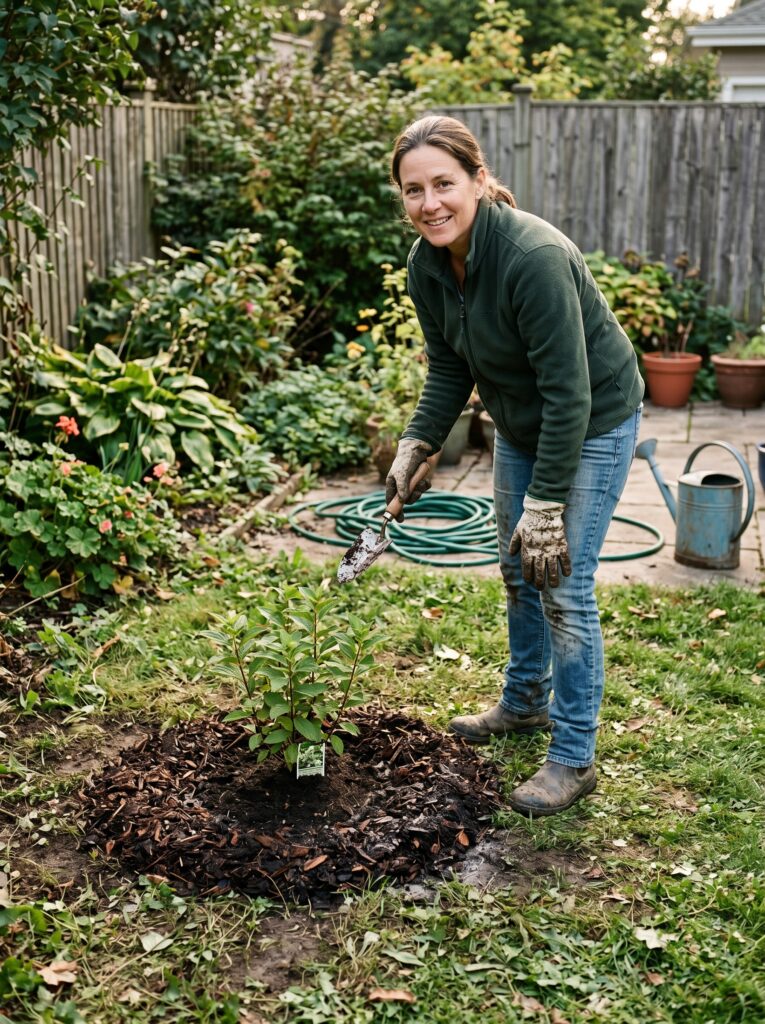
What Actually Works: Planting Your Living Wall
If you want these shrubs to grow fast—and I mean “hide the neighbor’s RV in two seasons” fast—you can’t just plop them in a hole. Here is the routine I use for every living wall I install:
1. The Wide-Hole Strategy
Don’t dig a deep hole; dig a wide one. Roots like to spread out sideways, not just down. I usually make my hole three times as wide as the pot the plant came in. It breaks up the surrounding soil and makes it easy for the new roots to colonize.
2. Ditch the “Store-Bought” Soil Fix
A lot of people fill the hole with 100% expensive potting soil. Don’t do that. Your plant needs to get used to the native dirt. I mix about 20% compost with 80% of the dirt I just dug out. This encourages the roots to venture out of the hole rather than staying “root-bound” in a pocket of fancy soil.
3. The “Mound” Secret
If you live in an area with heavy clay (looking at you, Georgia and North Carolina), plant your shrubs slightly high. I leave about 2 inches of the root ball sticking above the ground and then mound mulch up to it. This prevents “crown rot,” which kills more shrubs than pests ever will.
4. Mulching Like You Mean It
Skip the dyed red mulch. It looks fake. Use shredded hardwood or even pine needles. Use 3 to 4 inches of it, but—and this is vital—keep the mulch away from the actual trunk of the shrub. “Mulch volcanoes” trap moisture against the bark and rot the plant.
Connecting the Dots: Maintenance and Growth
Once your wall is in, the work doesn’t stop, but it does get easier. The first year is all about water. I tell people to think of a new shrub like a toddler—it can’t feed or water itself yet.
If you’re worried about the cost of keeping a 30-foot line of shrubs hydrated, you might want to look into watering plants correctly to learn about drip irrigation or soaker hoses. It’s much cheaper than replacing a $50 Mock Orange.
And don’t forget the “Black Gold.” Every spring, I top-dress my privacy wall with an inch of fresh compost. If you haven’t started your own pile yet, my guide on composting at home will show you how to turn kitchen scraps into high-octane shrub fuel for free.
Realistic Budget (US-Friendly Estimates)
Let’s talk money. Gardening is a “pay now or pay later” hobby. If you buy tiny sticks, you pay with your time (waiting 5 years for privacy). If you buy big plants, you pay with your wallet.
For a standard 20-foot privacy stretch, here’s a realistic breakdown:
| Item | Quantity | Estimated Cost (USD) |
| 3-Gallon Flowering Shrubs | 5 | $175 – $250 |
| Bulk Compost (or 5 bags) | 1 | $40 – $60 |
| Premium Wood Mulch | 6 bags | $30 – $45 |
| Starter Fertilizer (Osmocote) | 1 jug | $18 |
| Total Estimated Cost | $263 – $373 |
Pro Tip: If you’re on a budget, shop in September. Most garden centers in the US want to clear their inventory before winter and will mark these shrubs down by 50% or more. They might look a little raggedy, but the roots are fine.
Mistakes I Made (The “Experience” Part)
I’ve killed a lot of plants. It’s the only way to really learn. Here are the big ones:
The “Pruning Panic” When I started, I thought I had to trim everything every year. I ended up with “leggy” shrubs that had no leaves at the bottom because I was cutting off the growth tips. Now, I barely touch them for the first three years. Let them get established first.
The “Watering Ghost” I used to spray the leaves with a hose for five minutes and think I was done. The water never actually reached the roots. Now I use the “Deep Soak” method—slow, steady water at the base. If you’re struggling with plant health, it’s usually a water issue. Check out my soil health guide for more on how different soils hold (or lose) that water.
Ignoring the Mature Size I once planted three Doublefile Viburnums in a space meant for one. It became a tangled, moldy mess because there was no airflow. Always read the tag, then add a foot just in case.
Planting in “The Dip” I planted a row of Lilacs in a low spot in my yard where water pooled. They lasted exactly three months before the roots turned to mush. If you have a low spot, either fix the drainage or plant something that loves wet feet, like a Willow or a Red Twig Dogwood.
FAQ: Real Questions from the Garden Gate
If you start with 3-gallon pots, you’re looking at 2 to 3 years for a “loose” screen and 5 years for a “solid” wall.
None of these five have invasive, “house-eating” roots like a Willow or a Silver Maple. However, I always recommend planting at least 5 feet away from any structure just to be safe.
No! Over-fertilizing flowering shrubs often leads to lots of green leaves but zero flowers. I feed mine once in early spring with a balanced, slow-release food and let them be.
Most are fine, but be careful with Lilacs and Viburnums—while not usually deadly, eating a bunch of leaves can give a pup an upset stomach. Always check the ASPCA list if you have a “chewer.”
Clay is actually very nutrient-rich; it’s just hard for roots to breathe in. Don’t give up! Use the soil health guide tips to learn how to open up that clay with organic matter.
The Rose of Sharon can handle a large pot for a few years, but the others really want to be in the ground. They are big plants with big dreams.
Sun and pruning timing. Most of these (except the Hydrangea) need at least 6 hours of sun. And remember: prune immediately after the flowers die.
The “Secret Sauce” Setup Guide
If you want a professional-looking “Living Wall” on a DIY budget, follow this 4-step setup:
- Mark the Line: Use a garden hose to lay out a gentle curve. Straight lines look like fences; curves look like gardens.
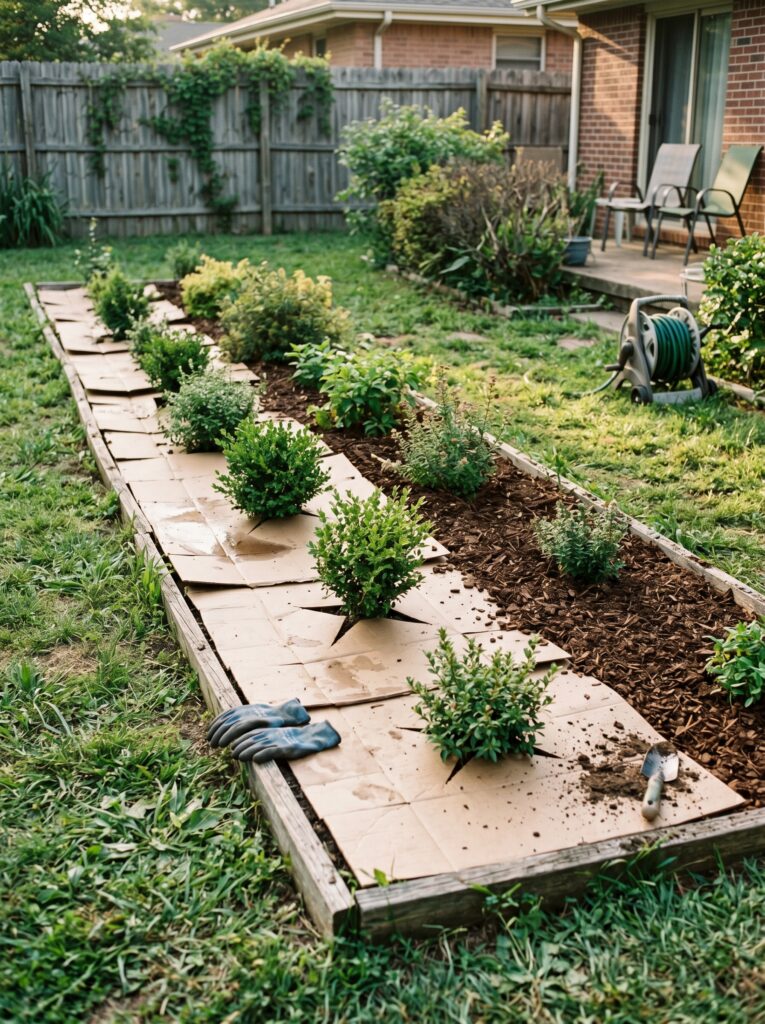
- The Cardboard Trick: Instead of digging up grass (which is back-breaking), lay down plain brown cardboard over the grass where the shrubs will go.
- Cut the “X”: Cut an X in the cardboard where each shrub goes, dig your hole right through it, and plant.
- Cover Everything: Cover all the cardboard with 4 inches of mulch. The cardboard kills the grass and weeds, turns into soil, and keeps your new shrubs happy. It’s the ultimate beginner gardening tips hack.
Privacy doesn’t have to be a boring wooden fence or a wall of plastic-looking evergreens. When you use flowering shrubs, you’re building a habitat. You’ll start seeing birds nesting in the thick branches of your Viburnum and hear the hum of bees in the Mock Orange blossoms.
It takes a little longer than calling a fence contractor, but the view—and the smell—is a whole lot better. Once you get the first few shrubs in the ground, the rest of the garden starts to fall into place.
Just take it one hole at a time. Once you understand the basics, this gets much easier.
Most advice in this article comes from personal gardening experience over the years. Results can vary slightly depending on climate, soil, and growing conditions. Always check your local extension office if you’re unsure about a specific plant’s requirements in your specific county.
Aagam – Founder of SpruceTouch
Hi, I’m the creator behind SpruceTouch. i am a home and garden enthusiast who shares practical ideas for backyard design, garden projects, patio decor, and small outdoor spaces. Through SpruceTouch, he focuses on simple and budget-friendly ways to improve outdoor living spaces.