Why My Vertical Garden Failed: Real Lessons on Small Space Management
I’ve spent the last two decades with my hands in the dirt, and if there’s one thing I’ve learned, it’s that nature has a funny way of humbling you just when you think you’ve got it figured out. This post is about one of those humbling moments—specifically, the time I decided to “go vertical” and ended up with a wall of crispy, sad-looking vines instead of the lush oasis I’d pictured.
I’m sharing this because I want to save you the frustration (and the money) I wasted. You’re going to learn the mechanical realities of vertical gardening—things like weight distribution, micro-climates, and the honest truth about watering—that the glossy Pinterest photos usually leave out.
The truth is, I got overconfident. I thought that because I knew soil health basics, I could just slap some pots on a wall and call it a day. I was wrong, and my porch looked like a plant graveyard for a solid three months.
But hey, that’s how we actually learn, right? Let’s get into the weeds of why it fell apart and how you can actually make it work.
The Allure of the “Living Wall”
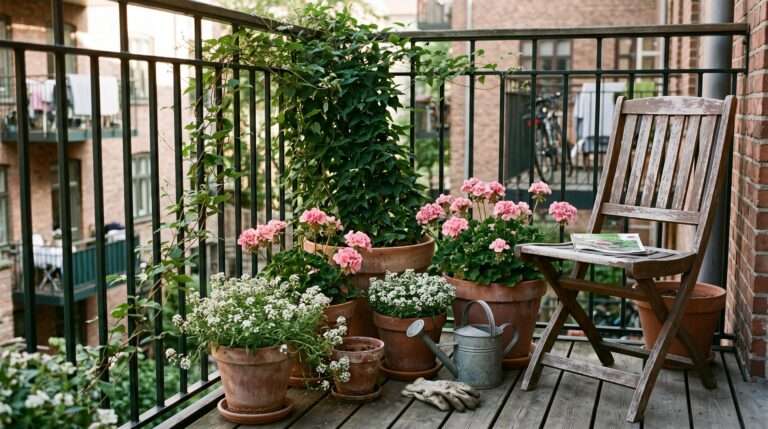
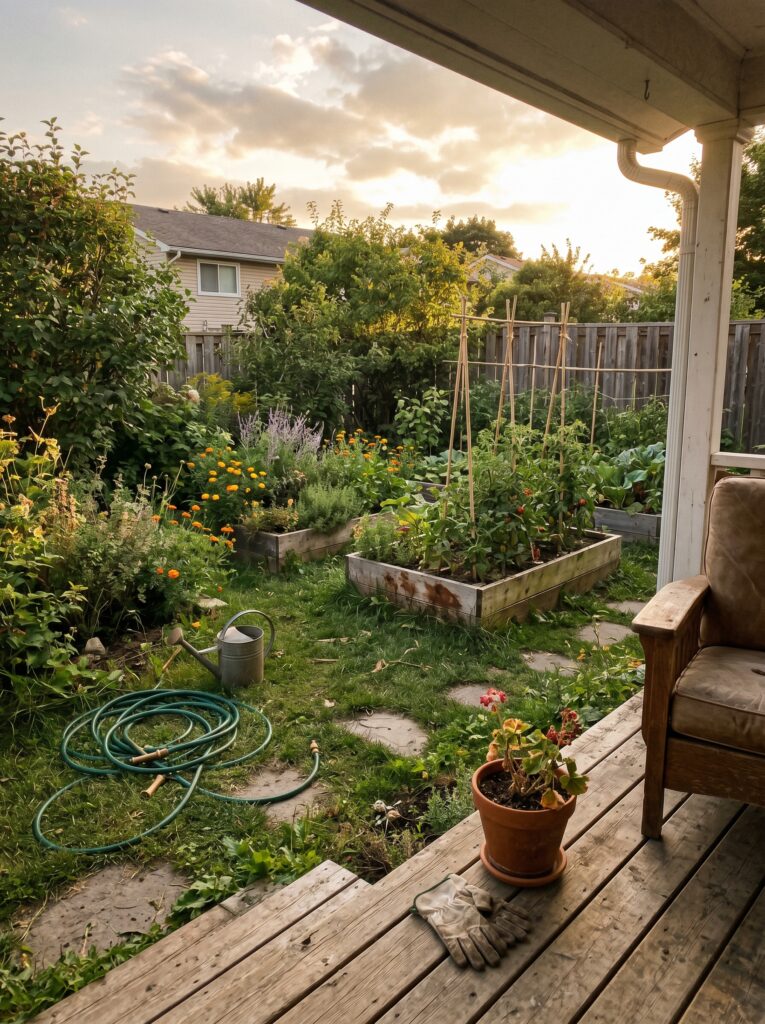
We’ve all seen those stunning photos. You know the ones—perfectly symmetrical rows of succulents or cascading herbs covering an entire side of a house. It looks like a dream, especially when you’re working with a small suburban backyard or a tiny balcony.
I fell for it hard. I bought the kits, I watched the videos, and I spent a fortune on high-quality potting mix.
But here’s the kicker: Most of those “perfect” vertical gardens are high-maintenance divas.
In a traditional garden bed, the earth acts as a massive heat sink and a moisture reservoir. When you pull plants away from the ground and stick them in small containers on a wall, you’re stripping away their primary support system. I didn’t realize that by going vertical, I was essentially putting my plants in a high-stress environment.
One thing most people ignore is how wind affects a vertical setup. On the ground, your fence or other plants provide a bit of a break. Up on a trellis or a wall, your plants are catching every breeze, which dries them out faster than you can keep up with.
The Gravity Problem Nobody Talks About
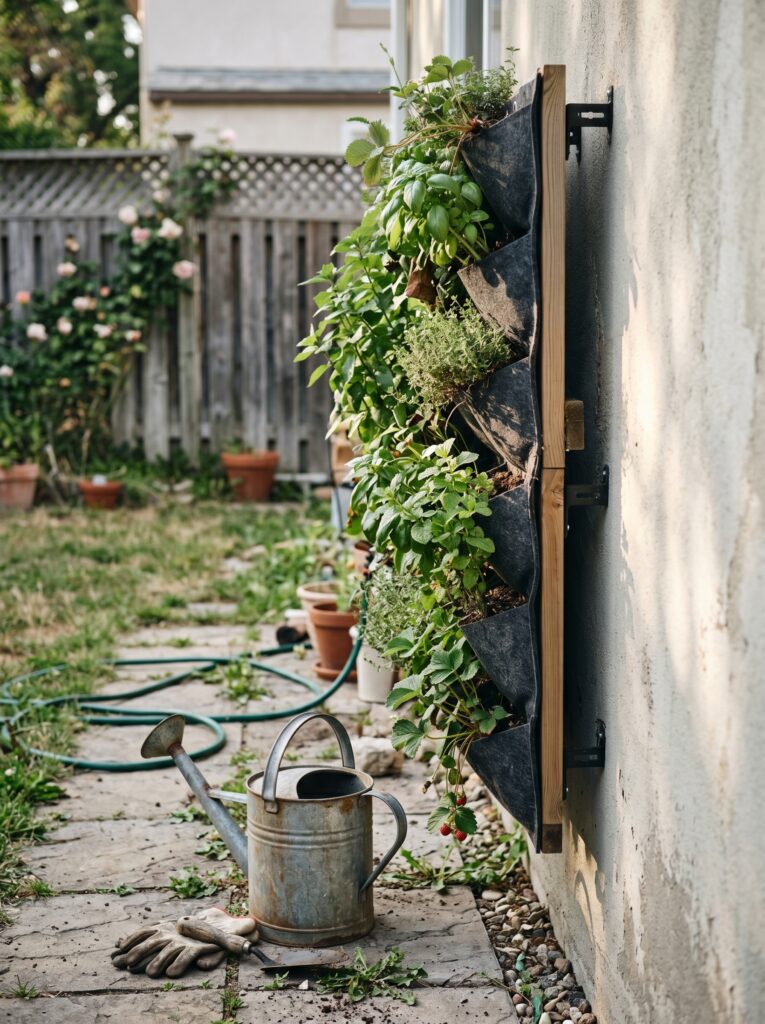
I remember the afternoon it happened. I had just finished installing a beautiful tiered felt-pocket system. It looked great for about three days. Then, I watered it.
Have you ever thought about how heavy water is?
A gallon of water weighs over 8 pounds. Multiply that by twenty pockets, and suddenly your “lightweight” wall hanging is trying to tear the siding off your house. I watched in slow motion as the top anchors started to groan and pull away from the wood.
It wasn’t just the weight, though. It was the drainage.
In a vertical system, the top plants dry out instantly because gravity pulls everything down. The bottom plants? They end up sitting in a swamp because they’re catching the runoff from every single pocket above them. I ended up with “the vertical sandwich”: crispy brown herbs at the top and root-rotted, moldy lettuce at the bottom.
I learned this the hard way: you can’t treat a vertical garden like a flat one. You have to account for the “waterfall effect.”
Soil and the Small Container Trap
Most gardening blogs never mention this, but the soil you use in a vertical planter needs to be completely different from what you use in your raised beds.
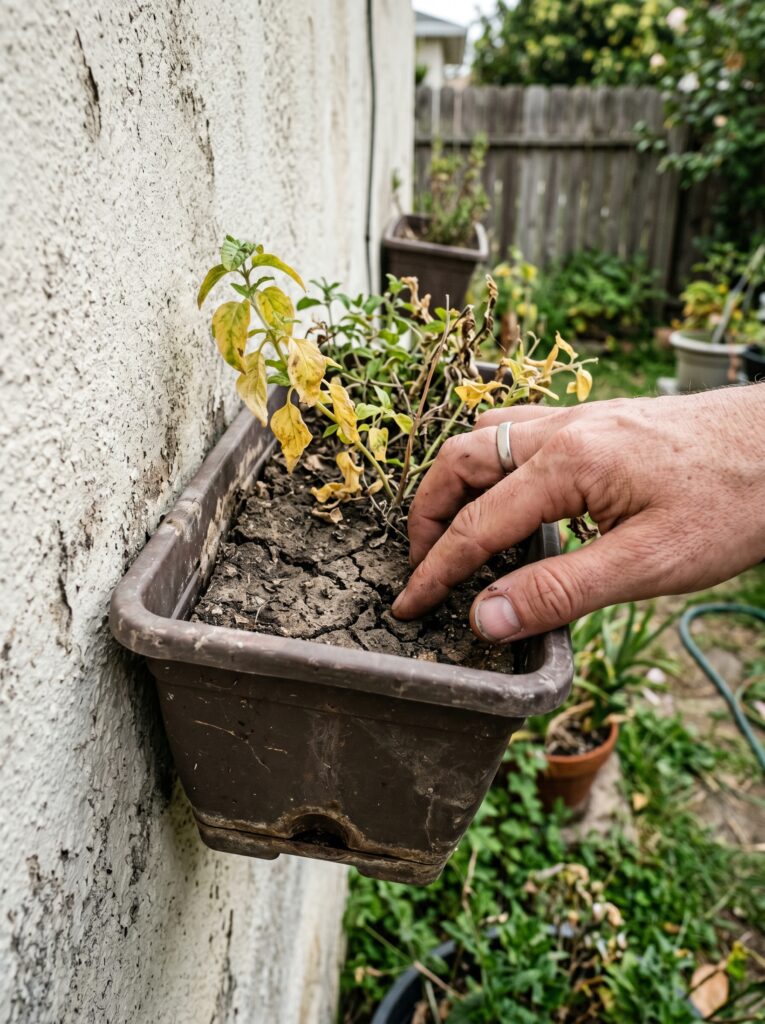
I made the mistake of using a heavy, compost-rich mix. I thought I was being a good “plant parent” by giving them the richest stuff possible. But heavy soil compacts. Within a month, the soil in my wall pockets was as hard as a brick. The roots couldn’t breathe, and the water just skated over the top and spilled onto my floor.
The best part? Fixing it was actually cheaper than the mistake.
I realized I needed more perlite and coco coir—things that keep the mix fluffy and light. When you’re working in small spaces, drainage is your best friend. If the water can’t move, the plant can’t live. It’s one of those beginner gardening mistakes that feels like a catastrophe but is actually just a physics problem.
The Micro-Climate Mess
This surprised me honestly: the temperature difference between the top of my vertical garden and the bottom was nearly 10 degrees.
My wall faces West. In the afternoon, that sun hits the top row like a laser. The plants up there were basically being baked against the heat-retaining wall. Meanwhile, the bottom rows were shaded by the plants above them and stayed cool and damp.
I was trying to grow the same variety of basil across the whole wall.
Spoiler alert: It didn’t work.
The top basil bolted and went to seed instantly because of the heat stress. The bottom basil stayed stunted because it wasn’t getting enough light. If I had been more observant, I would have put the heat-loving peppers at the top and the shade-tolerant spinach at the bottom. But I was too busy trying to make it look “aesthetic.”
Real-Life Observation: The Pest Penthouse
You’d think that getting plants off the ground would stop the pests. That’s what the “experts” told me. “No more slugs!” they said.
Well, they were right about the slugs. But they forgot about the aphids and the spider mites.
In a vertical garden, plants are often packed tightly together for that “full” look. This creates a stagnant air pocket behind the leaves. It’s basically a luxury resort for spider mites. And because the plants are stacked, if the top plant gets infested, the bugs just… fall down to the next one. It’s like a buffet line that goes from the attic to the basement.
I spent a whole weekend with a spray bottle, trying to reach the back corners of a wall-mounted planter. It was a nightmare.
Now, I leave “breathing room.” If the leaves are touching the wall or each other too much, I prune. It feels wrong to cut back a small garden, but it’s the only way to keep the air moving.
Why I Almost Quit Small Space Gardening
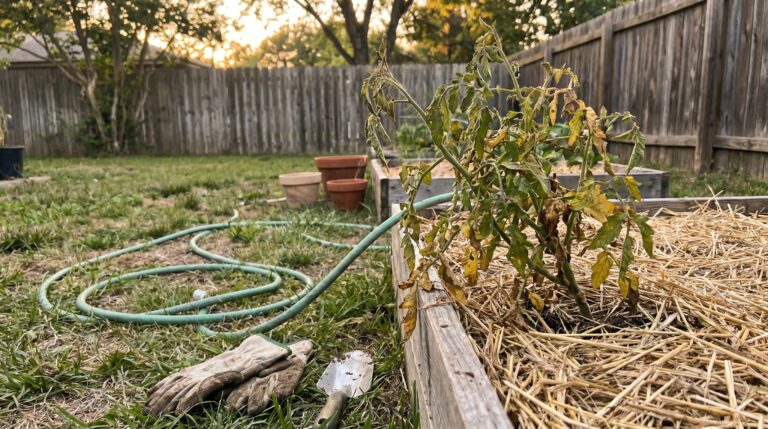
There was a Tuesday in July when I almost threw the whole thing in the trash. I had just come home from work to find my “automatic” drip line had popped off, and my strawberries were shriveled into little red raisins.
I felt like a failure. Here I was, someone who teaches people about composting at home, and I couldn’t even keep a wall of herbs alive.
But wait, there’s a catch: Failure in the garden isn’t a sign that you’re a bad gardener. It’s just data.
That failure taught me that I couldn’t rely 100% on tech. I needed to actually touch my plants every day. I started sticking my finger in the soil instead of just looking at the moisture sensor. I started noticing the subtle change in green when a plant is thirsty before it actually wilts.
Vertical gardening forces you to be more present because the margin for error is so much smaller.
Some Sections Flow Naturally Without Headings
You might be wondering if you should even bother with a vertical setup after hearing my horror stories. I actually think you should. But you have to do it for the right reasons. Don’t do it because you want a “Pinterest wall.” Do it because you want to maximize your harvest in a way that respects the plants’ needs.
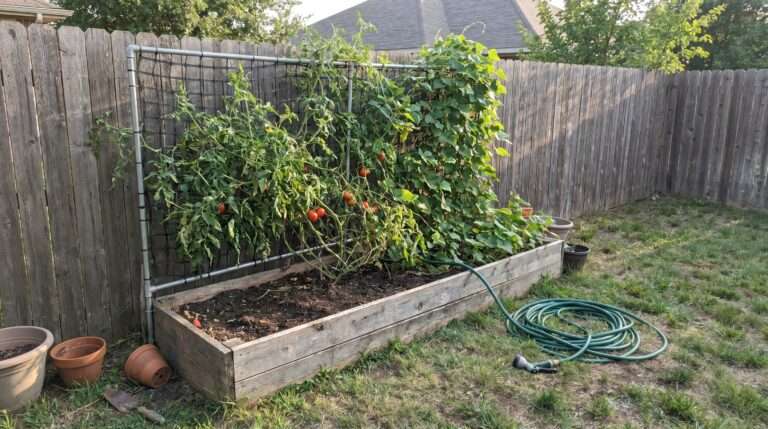
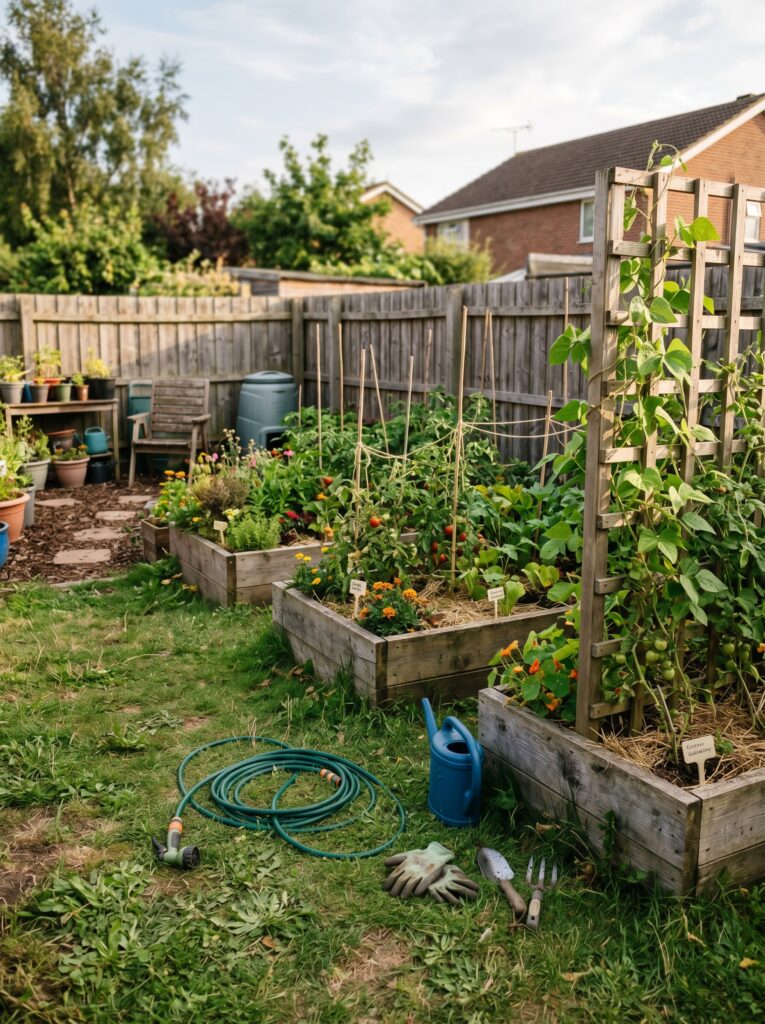
One thing I noticed is that some plants actually thrive when they’re off the ground. My cucumbers loved it. They didn’t get the belly rot they usually get when they sit on the damp soil. The key was giving them a sturdy enough structure. I stopped using those flimsy plastic nets and switched to heavy-duty cattle panels leaned against the fence. It’s not as “pretty,” but it works.
I also learned to stop fighting the seasons. In the height of summer, I move my vertical racks into the shade. If they were bolted to the wall, I’d be stuck. Portability is the “secret sauce” of small space management. If you can’t move it, you’re at the mercy of the sun.
The Honest Truth About “Self-Watering” Kits
Most of those kits you buy at the big-box stores? They’re built for looks, not for long-term plant health. The reservoirs are usually too small, and the wicking systems often clog with soil particles within a few months.
I tried three different “self-watering” systems during my vertical garden experiment. Every single one failed.
One thing most people ignore is that “self-watering” doesn’t mean “no-maintenance.” You still have to flush the system to prevent salt buildup from fertilizers. I ended up with white crusty stains all over my planters because I just kept topping off the water without ever cleaning the tanks.
The best part? A simple $10 garden hose with a wand attachment ended up being more effective than the $150 automated system. There’s no substitute for standing there and watering plants correctly. It gives you time to look for bugs, check for yellowing leaves, and actually connect with what you’re growing.
Small Mistake to Avoid: Overcrowding
I know, I know. You want that “lush” look immediately. You buy five plants for a space that only fits two. I did it too.
When plants are overcrowded in a vertical system, they compete for the tiny amount of root space available. The strongest plant wins, and the others just linger in a state of permanent sadness. It’s better to have one giant, happy Thai Basil plant than four spindly ones that never produce enough to make a single batch of pesto.
Give them room. Trust me. They’ll fill the space eventually.
What Actually Works: The “Hybrid” Vertical Setup
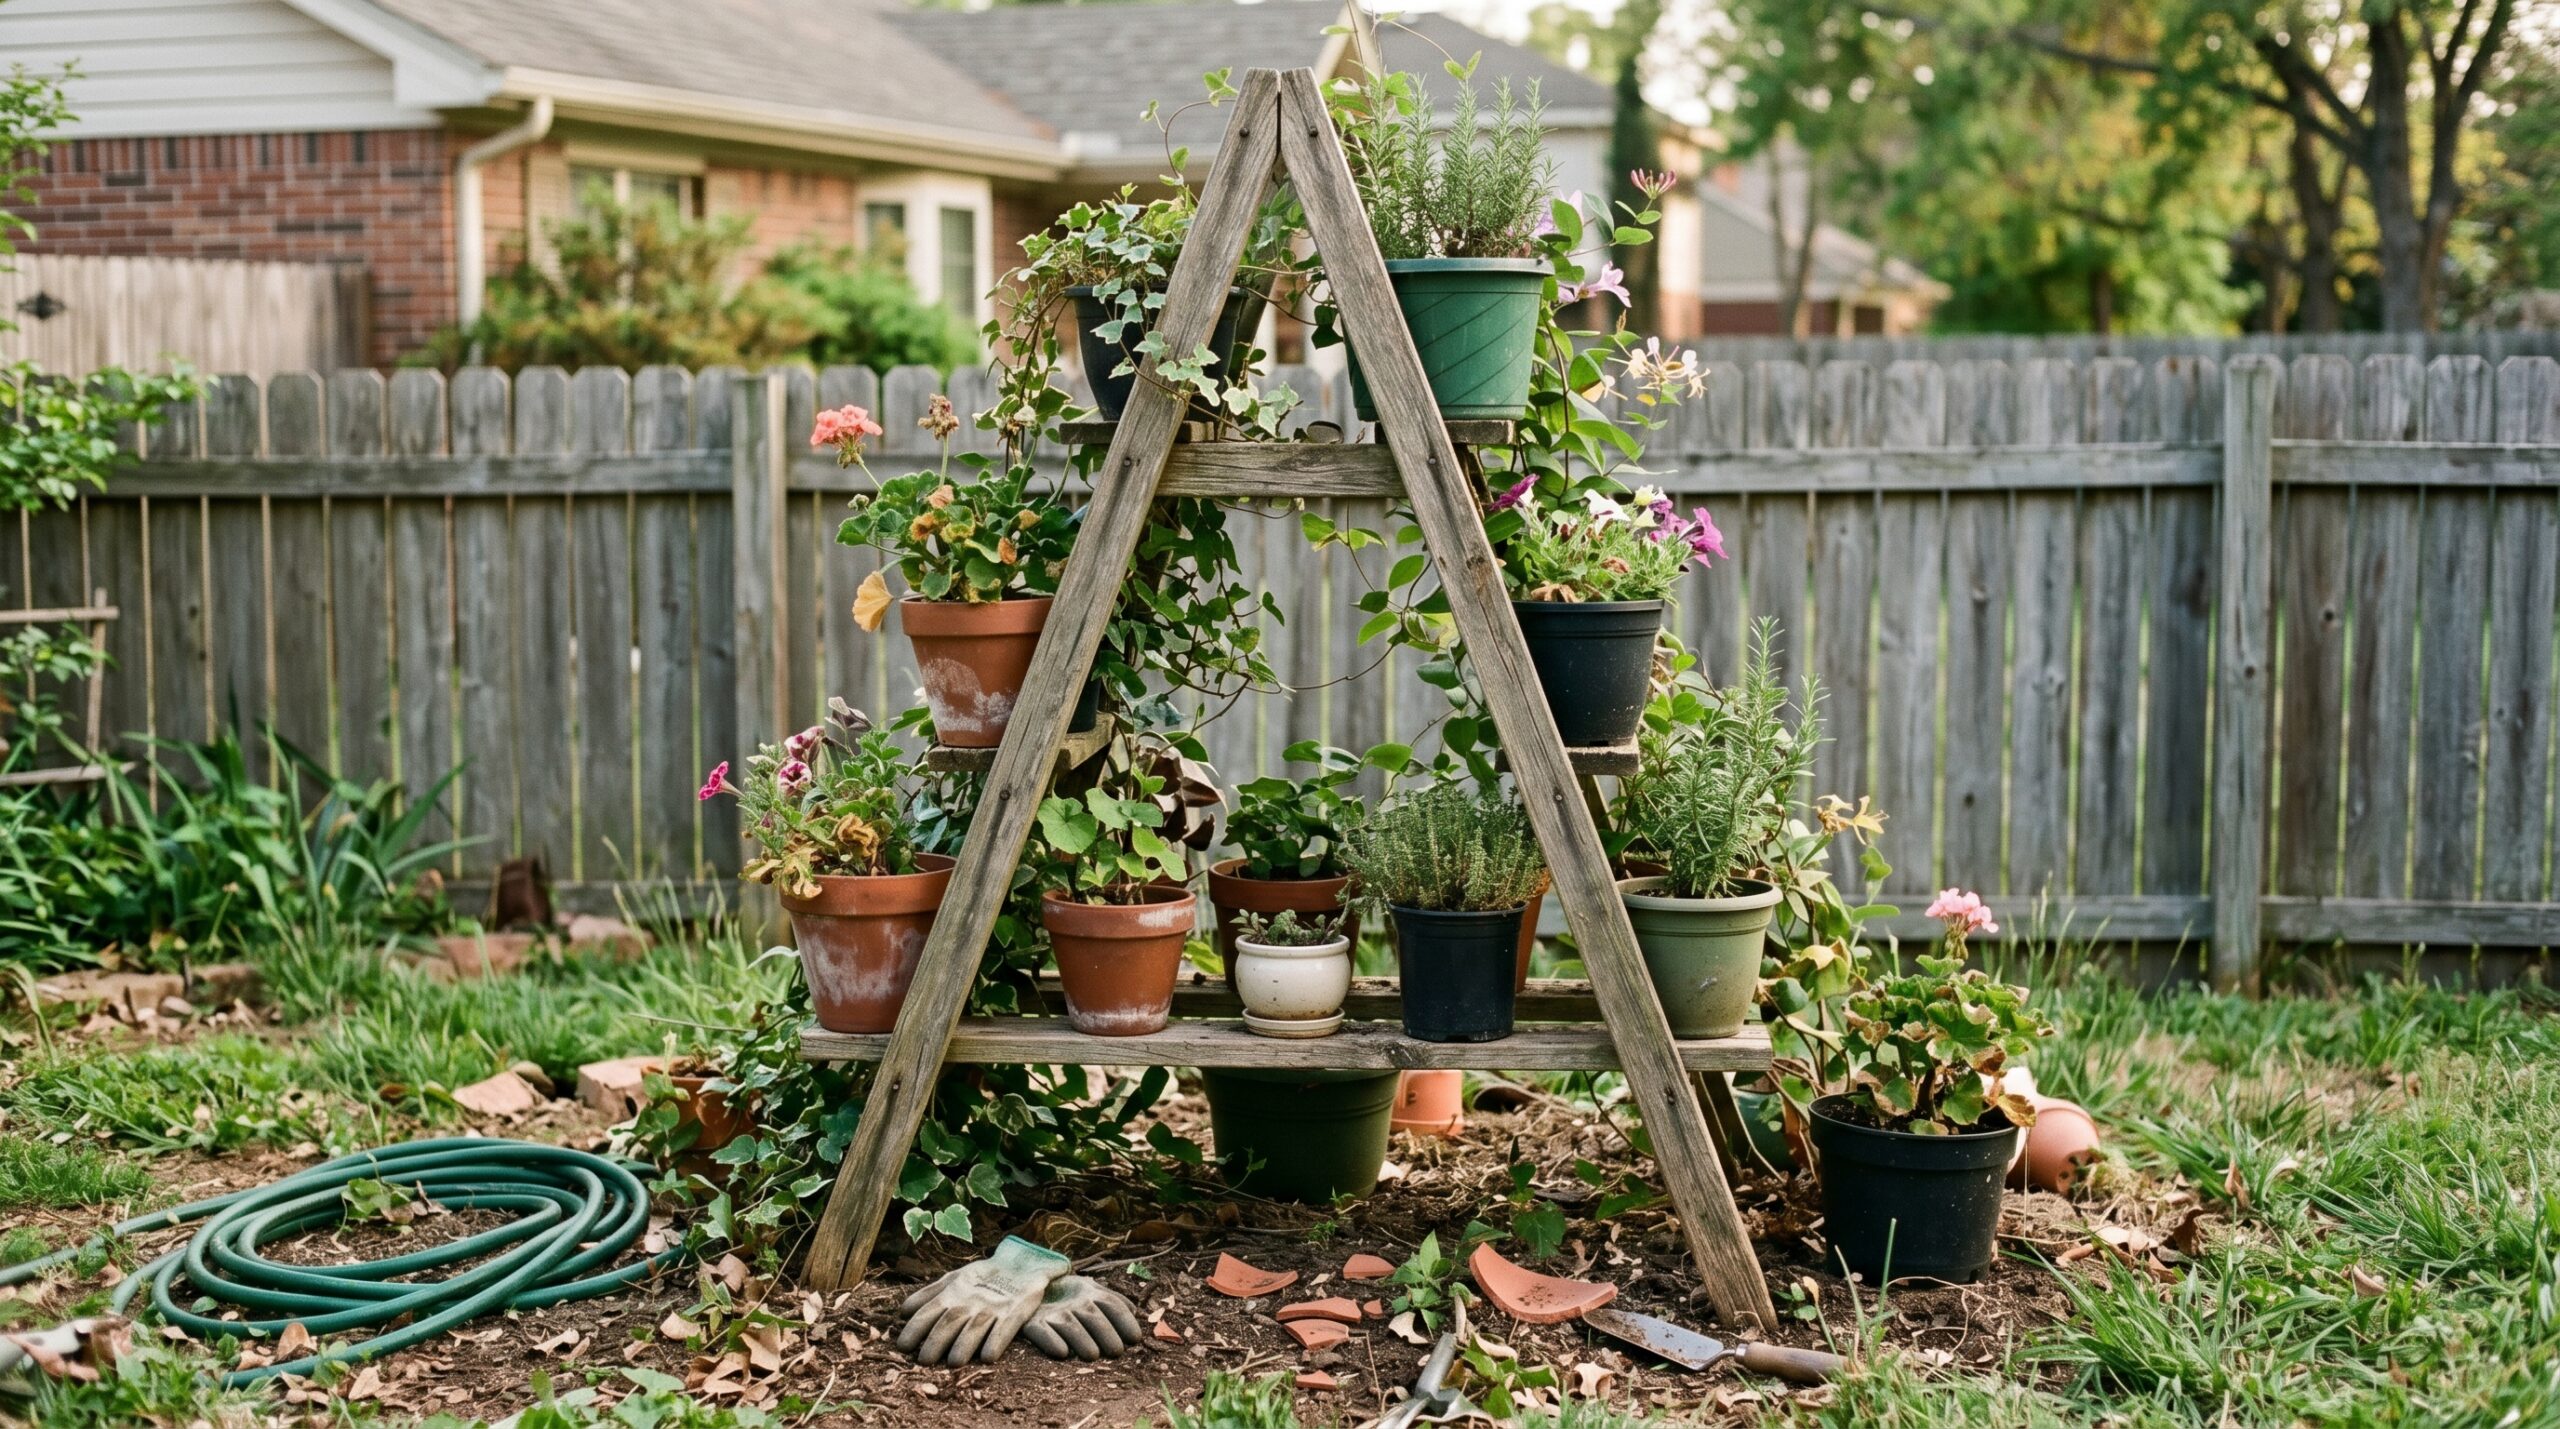
If I were starting over today (which I essentially did last spring), here is the practical, no-nonsense way I’d set up a small space vertical garden. This is the setup that actually survived the August heat and the October winds.
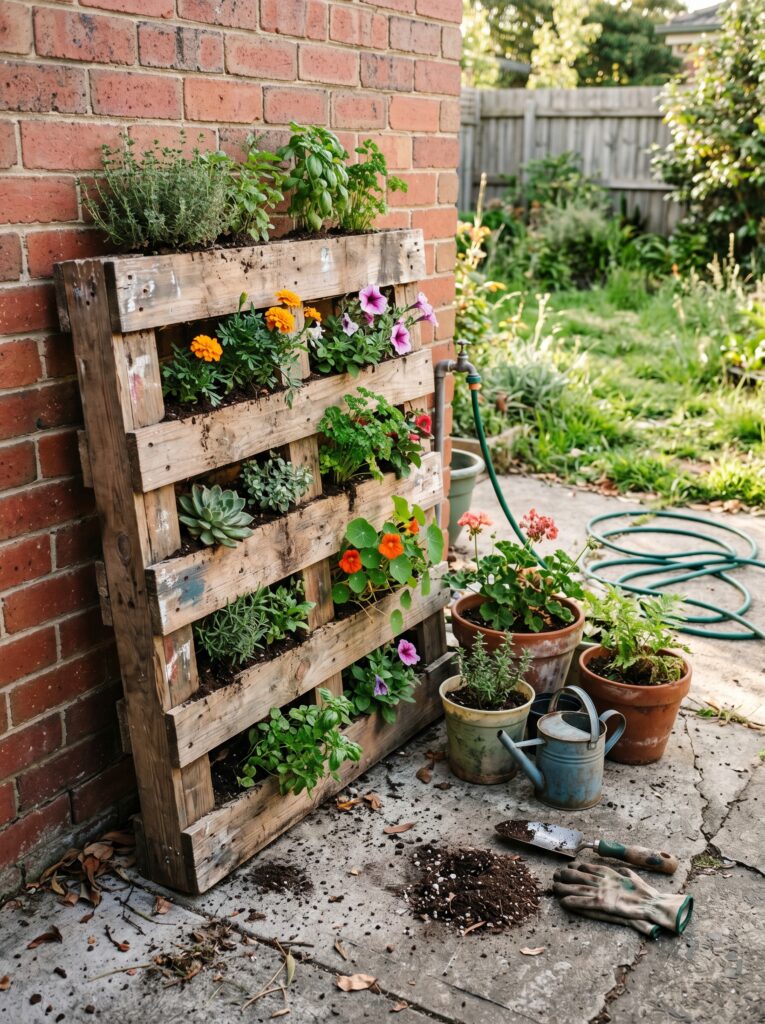
1. The Foundation: The A-Frame or Leaning Trellis Instead of mounting directly to your house wall (which can cause moisture issues and rot your siding), use a free-standing structure. A simple A-frame made of 2x4s and some wire mesh is perfect. It’s stable, it creates two sides for growing, and you can move it if you need to.
2. The Containers: Individual Pots over Pockets Skip the felt pockets. They dry out too fast. Use individual 6-inch or 8-inch plastic pots with good drainage holes. You can zip-tie these to your wire mesh. Why? Because if one plant gets sick or dies, you can just remove that one pot without disturbing the whole “wall.”
3. The Soil: The “Light and Airy” Blend Mix your potting soil 50/50 with perlite or pumice. This keeps the weight down and ensures that even when the soil is wet, there’s still air getting to the roots.
4. The Irrigation: Top-Down Manual Soaking Instead of a complex drip system, I use a simple “gravity” trick. I put an empty pot at the very top of the trellis with a single small hole drilled in the bottom. I fill that pot, and it slowly drips down into the ones below. It’s low-tech, it doesn’t clog, and it’s easy to see when it’s empty.
Things That Didn’t Work for Me
I think it’s important to be honest about the fails. Not everything is a “learning opportunity”—sometimes it’s just a mistake.
- Trusting “Full Sun” Labels: In a vertical garden against a wall, “full sun” can quickly turn into “scorched earth.” I tried growing lettuce in a south-facing vertical pocket because the tag said “sun-loving.” It turned bitter and died in three days. Now, I use shade cloth or move the rack.
- Cheap Plastic Clips: I bought those little green clips to hold my vines to the trellis. They lasted one season before the sun turned them brittle and they snapped. Now, I use old strips of t-shirt fabric. It’s uglier, but it doesn’t hurt the plants and it lasts longer.
- Ignoring the Bottom Row: I used to treat the bottom row as an afterthought. It ended up being the “drainage graveyard.” Now, I put my most water-hungry, heavy feeders (like kale) at the bottom to catch all that excess nitrogen and water.
Small Things That Make a Big Difference
- Rotate the structure: If your vertical garden is on wheels (highly recommended!), turn it 90 degrees every week. It prevents one side from becoming a “dead zone.”
- Mulch the tiny pots: Yes, even in a 6-inch wall pot, a thin layer of straw or wood chips helps keep the moisture in.
- Liquid Feed: Because you’re watering so often, you’re washing nutrients out of the soil constantly. Use a very diluted liquid seaweed fertilizer every two weeks.
The Small Space Philosophy
At the end of the day, vertical gardening isn’t about defying nature; it’s about negotiating with it. You’re asking a plant to live in a way it wasn’t designed to, so you have to provide the extra support it’s missing from the ground.
One thing I noticed is that people get really stressed about their gardens looking “perfect.” My garden looks like a work in progress because it is a work in progress. There are half-finished projects, some weeds in the corners, and a few pots that are definitely past their prime.
And that’s okay.
A garden is a living thing, not a museum exhibit. If your vertical garden fails, don’t let it discourage you. Just look at the roots, look at the soil, and ask yourself what the plant was trying to tell you. Usually, the answer is just “I’m thirsty” or “It’s too hot.”
Vertical Gardening FAQ
Yes, but don’t try it in those small wall pockets. You need a massive pot at the base and a very strong trellis. Determinant (bush) varieties are much easier to manage than indeterminate ones that want to grow 10 feet tall.
In the heat of summer, probably twice a day. Vertical containers lose moisture much faster than ground soil. If the top inch of soil feels dry, it’s time.
It can be if you buy the fancy kits. If you DIY it with pallets, cattle panels, and basic pots, it’s actually quite cheap. The main cost is the high-quality potting mix.
Start with herbs like mint (keep it contained!), chives, and parsley. Leafy greens like spinach and Swiss chard are also very forgiving as long as they don’t get scorched.
Not necessarily “special,” but you need to be consistent. Because the soil volume is small, the plants eat through the nutrients quickly. I prefer a slow-release organic granular fertilizer mixed in at the start, followed by liquid tea later.
I’m looking out at my garden right now, and I can see where the old vertical wall used to be. There’s a bit of a stain on the brick where the moisture sat too long, and a few screw holes I haven’t filled yet.
It’s a reminder that not every experiment works out the way you planned.
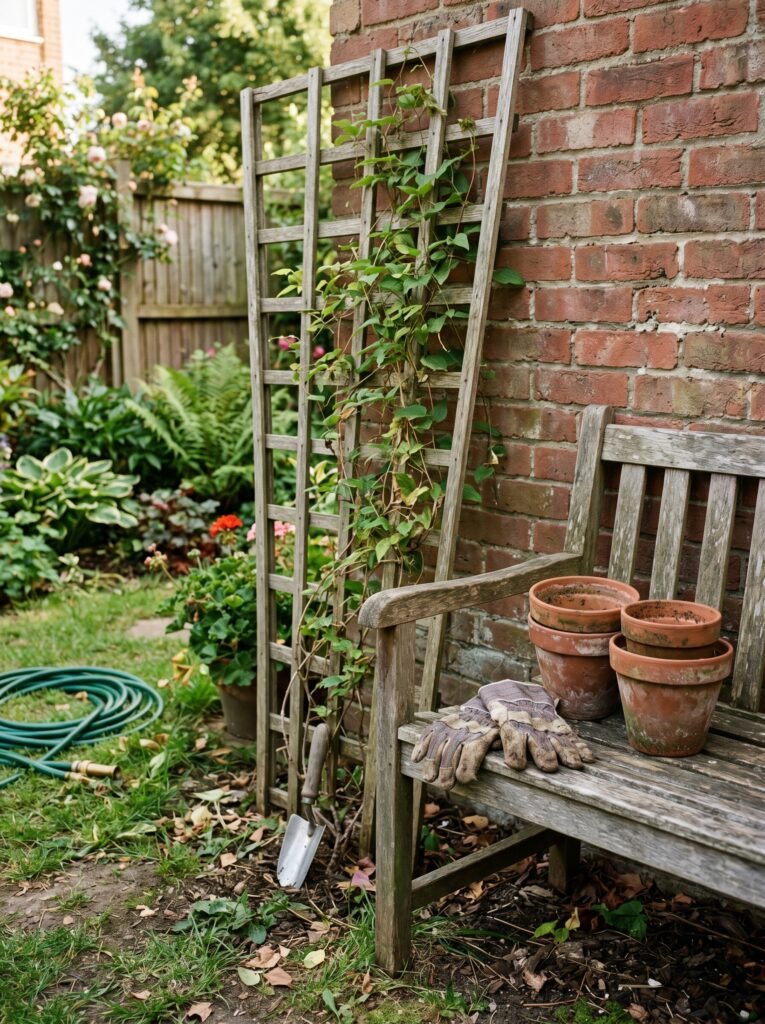
But the cucumbers on my new A-frame trellis? They’re doing great. They’re climbing high, the bees are finding the flowers, and I’ll probably have more pickles than I know what to do with by next month.
Once you understand the basics of how water and light move through a vertical space, things usually get much easier. Just don’t be afraid to make a mess along the way.
Most advice in this article comes from years of real gardening experience and trial-and-error in home gardens. Results may vary depending on climate and growing conditions.
Aagam – Founder of SpruceTouch
Hi, I’m the creator behind SpruceTouch. i am a home and garden enthusiast who shares practical ideas for backyard design, garden projects, patio decor, and small outdoor spaces. Through SpruceTouch, he focuses on simple and budget-friendly ways to improve outdoor living spaces.