Pollinator Friendly Layouts: How to Attract Bees Without Getting Stung
Every single beginner guide online tells you to plant a sea of bright flowers right next to your back door to save the bees. They make it sound like a beautiful, poetic dream.
But let’s be completely honest for a second. If you actually do that, you end up stepping out onto your patio with your morning coffee and walking straight into a buzzing wall of defensive insects.
It is terrifying. Especially if you have kids running around or you are just naturally jumpy around anything that flies and has a stinger.
You want the massive tomato harvests and the beautiful zucchini that only pollination can bring. But you do not want to feel like a prisoner in your own backyard.
I learned this the hard way about twelve years ago when I jammed a massive patch of sweet alyssum and lavender right against my main walking path. It was a complete disaster, and I spent an entire summer dodging angry bumblebees just to turn on my garden hose.
The good news is you can absolutely have a yard packed with active pollinators without turning your outdoor living space into a high-risk zone. You just need to understand how bees actually move through a yard and space things out accordingly.
In this guide, we are going to look at my actual backyard setup, how to structure your flower placements, and the exact mistakes that cause people to get stung.
The Reality of Backyard Bee Behavior
Most internet advice fails because it treats bees like aggressive little monsters looking for a fight. They are not. They are single-minded workaholics looking for sugar and pollen.
The fix is actually simpler than you think. You do not need to abandon flowers. You just need to use strategic zoning to keep the heavy insect traffic away from human traffic. If you’re building out boundaries to isolate these flight paths, you can check out my guide on [Cottage Garden Privacy: My Top 5 Shrubs for a “Living Floral Wall” (Zone 6-9)] to see how I use dense greenery to block off specific areas of the yard naturally.
If you put your favorite patio chair directly inside that flight path, you are going to have a bad time. The bee isn’t hunting you down; you just blocked its highway.
But here’s where it gets tricky: different bees have different comfort zones.
Bumblebees are clumsy, heavy, and incredibly docile unless you physically squeeze them. Honeybees are focused but can get annoyed if you swat at them. Wasps are an entirely different story, and we will talk about how to avoid attracting the wrong crowd later.
The fix is actually simpler than you think. You do not need to abandon flowers. You just need to use strategic zoning to keep the heavy insect traffic away from human traffic.

Signs Your Current Garden Layout is Inviting Trouble
This is where beginners usually panic. They see bees everywhere and assume their layout is fine, or they see no bees and wonder why their squash blossoms are dropping off off the vine.
Let’s look at a few clear signs that your current setup is poorly optimized and likely to cause a painful encounter.
- Flowers crowding the exact edges of your narrowest walking paths.
- A single, isolated patch of flowers right next to your back door or patio steps.
- Mix-and-match planting where heavy bee magnets are tangled directly inside high-maintenance vegetable beds that require daily hand-harvesting.
- Lack of distinct “landing zones” which forces bees to scout your entire yard, including your outdoor dining table, just to find food.
- Planting high-scented flower varieties directly underneath windows that you like to keep open during the spring.
- No water source for the insects, causing them to drown in your kids’ inflatable pool or hover around your outdoor drinks.
If you are dealing with any of these right now, do not worry. You do not need to dig up your whole yard this afternoon. Small adjustments can completely change how bees navigate the space.
Root Cause Breakdown: Why Layouts Fail
To fix the issue, we have to look at the environment as a whole. Bees do not see your yard the way you do. You see a nice lawn and some flowerpots; they see a thermal grid of colors, scents, and wind currents.
Airflow and Flight Paths
Bees hate high winds. If your entire yard is an open, windy plain, they will naturally congregate in the quietest, most sheltered pocket. If that sheltered pocket happens to be your covered back porch, that is exactly where all the bees will hang out.
By planting taller shrubs or installing a lattice fence on the windy side of your yard, you create a calm microclimate far away from your house. That is where you want your pollinators to gather.
The Problem With Clumped vs. Scattered Food
Most gardening blogs never explain this properly. If you scatter single flowers randomly throughout your entire yard, bees have to spend more time flying around searching. This keeps them in a constant state of scouting, which means they are constantly crossing your paths.
If you create dense, heavy blocks of the same flower—say a three-foot patch of coneflowers—bees will stay locked onto that single spot for hours. They fly in, do their work, and fly out. It keeps their movement localized and highly predictable.
Sunlight Mapping
Bees are solar-powered. They rarely forage in deep, cold shade. If your seating area is in full sun and your flower beds are tucked away in the dark shadow of your garage, the bees are naturally going to hover around your sunny patio just to stay warm while moving through the yard.
Overwatering vs. High Nectar Production
I see this confusion constantly in beginner forums. A gardener notices an absolute swarm of bees around a specific plant and assumes the plant is just highly attractive.
But sometimes, overwatering your garden actually dilutes the sugar content in the nectar of certain flowers. When this happens, bees have to spend twice as long crawling over each blossom to get the nutrients they need. This increases the total number of insects lingering in one spot.
When you manage your soil health properly and apply the principles from [Watering 101: Why Most Beginners Kill Their Plants and the “Deep Soak” Method Explained], flowers produce high-quality, concentrated nectar. The bees visit quickly, get what they need, and move on, reducing the total density of insects hovering around at any given moment.
It is a subtle balance, but proper watering keeps the insect behavior efficient and business-like rather than frantic and lingering.
My Real “Buffer Zone” Layout Strategy
I learned this strategy after a particularly frustrating summer where I couldn’t even weed my peppers without taking a bumblebee to the knuckle. I realized I needed a system that separated my yard into clear functional zones.
I call this the Three-Tier Layout. It doesn’t require a massive estate; you can do this in a standard twenty-foot suburban lot or even on a townhome patio if you use containers smartly.
+--------------------------------------------------------+
| THE REAR BUFFER ZONE |
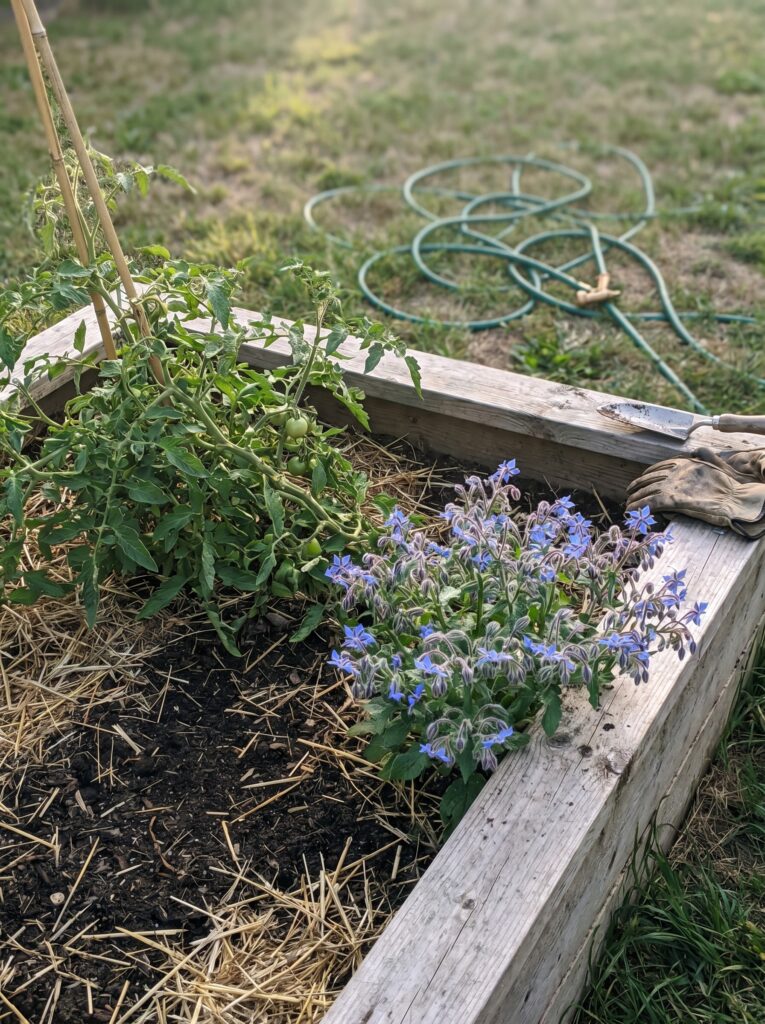
| (Heavy Bee Magnets: Sunflowers, Wildflowers, Borage) |
+--------------------------------------------------------+
^
| [Flight Path Highway]
v
+--------------------------------------------------------+
| THE MID-YARD TRANSITION |
| (Vegetables & Soft Herbs: Tomatoes, Peppers, Thyme) |
+--------------------------------------------------------+
^
| [Safe Visual Buffer]
v
+--------------------------------------------------------+
| THE HUMAN LIVING ZONE |
| (Low-Attraction / Structural: Hostas, Ferns, Patio) |
+--------------------------------------------------------+
Tier 1: The Human Living Zone
This is your deck, your patio, your outdoor grill, and the immediate paths you walk every day. In this zone, you do not plant heavy nectar producers. It functions similarly to how you would arrange a [15 Apartment Balcony Layouts: Designing a Productive Micro-Garden], focusing purely on structural plants, foliage, or low-pollinator varieties that maximize space without crowding your movement.
Instead, focus on structural plants, foliage, or low-pollinator varieties. Think ornamental grasses, hostas, ferns, or leafy greens like kale and Swiss chard if you want edibles close to the kitchen. These plants look beautiful, but they offer zero incentive for a bee to stop and hang out.
Tier 2: The Vegetable Transition Zone
This is where your tomatoes, peppers, eggplants, and squash live. These plants absolutely need bees, but their flowers are generally low-key and don’t attract massive, chaotic swarms all at once.
Place this zone at least ten to fifteen feet away from your main seating area. When you are working in this zone, you are actively gardening, so you expect a little nature around you, but it’s rarely overwhelming.
Tier 3: The Heavy Target Destination
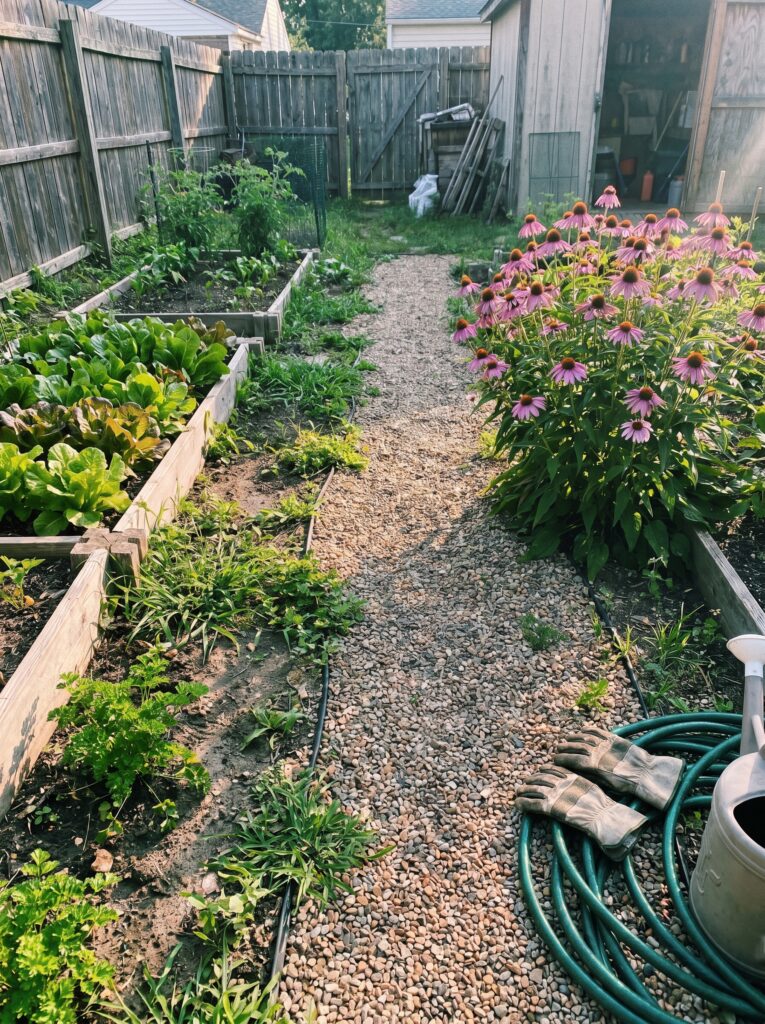
This is the secret weapon. At the farthest back corner of your property, you plant a dense, irresistible “pollinator buffet.” This is where you put your heavy hitters: coneflowers, sunflowers, bee balm, and goldenrod.
This zone needs to be highly visible from your house because it looks stunning, but it should be physically removed from your daily walking routes.
Because this zone has the highest concentration of high-quality nectar, bees will bypass your patio entirely. They will fly high over your yard, drop straight into the target zone, and stay there. You have successfully redirected the traffic.
Step-by-Step Layout Installation for Beginners
If you are starting with a blank slate or trying to fix a chaotic yard, here is exactly how to set this up without spending a fortune or losing your mind.
Step 1: Track the Sun
Before buying a single plant, spend one Saturday watching how light hits your yard. Note the areas that get blazing sun from 10 AM to 4 PM. That sun-drenched area is where your Tier 3 target destination must go. Bees will ignore a pollinator patch if it sits in the cold shade for most of the morning.
When I was adjusting my layout to make sure the primary bee border received early morning sun, I struggled with mapping out the evening shadows until I set up a few wireless lights to track the grid lines. I ended up placing the [Sunco Lighting Solar Outdoor Spotlights] along the perimeter fence, which perfectly illuminated the dark paths at night while helping me mark exactly where the shade line fell during the day.
Step 2: Establish the Human Border
Mark out your seating area and give yourself a minimum six-foot perimeter. Inside this perimeter, resolve to plant absolutely nothing that flowers heavily. If you have existing flowerbeds here that are causing problems, plan to move those plants in the autumn when they go dormant.
Step 3: Plant Your Target Buffet In Blocks
When you buy your pollinator plants, do not buy one of each variety. That creates visual confusion for both you and the bees. Buy at least three or five of the same plant and pack them tightly together. A massive block of purple salvia is much easier for a bee to spot from across the neighborhood than a single scattered stem.
If you want to quickly build out that Tier 3 heavy buffet zone without buying dozens of individual plastic pots from the nursery, starting with compressed native seed clusters is a massive budget saver. I threw down a few of these [Appalachian Wildflower Seed Mix Blocks] in my far back corner last autumn, and they filled out into a dense, clumped pollinator station that kept the traffic completely away from my backdoor.
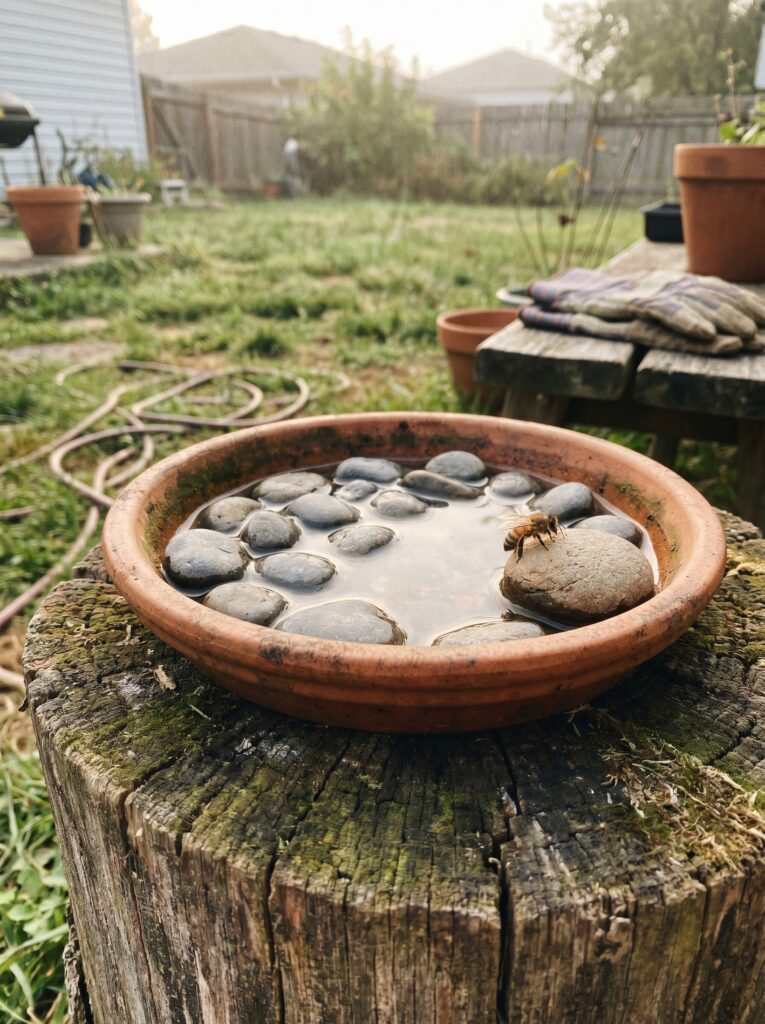
Step 4: Create a Dedicated Bee Hydration Station
Bees get thirsty, especially in the heat of July. If they don’t have a reliable water source, they will look for moisture on your damp pool towels or hover around your outdoor drinks. When setting up a proper hydration station, you need a heavy base that won’t crack under the summer sun or flip over when the neighborhood birds drop by for a splash. I used a [14-Inch Heavy Duty Terracotta Saucer] placed on an old tree stump, which gives me enough surface area to create a wide, reliable water source right in the center of the flower zone. Take a shallow terracotta saucer, fill it with clean river rocks, and pour in just enough water so the tops of the rocks stay dry…
Take a shallow terracotta saucer, fill it with clean river rocks, and pour in just enough water so the tops of the rocks stay dry. Place this right next to your Tier 3 flower buffet. The bees can land safely on the dry rocks and drink without drowning, and it keeps them completely away from your patio area. To keep the insects from drowning in the shallow water, you absolutely must provide stable landing pads that sit just above the water level. I poured a bag of [Natural Polished River Pebbles (10 lbs)] directly into the saucer, which gives the bees a smooth, completely safe grip to sit and drink without ever slipping under.
Container Gardens vs. Raised Beds vs. Large Yards
The way you apply this layout depends entirely on the size of your space. The core principles never change, but the execution does.
The Container Patio Approach
If you only have a small concrete patio, you cannot space things out by twenty feet. You have to use vertical height instead. Put your seating on the ground level, and place your heavy pollinator containers on high plant stands or hanging hooks at the outer corners of your balcony. This forces the bees to fly up and over your head rather than straight across your face while you are sitting down. If your yard is tight on space and you can’t plant a massive field of tall flowers, you can achieve the exact same traffic redirection by using vertical nesting habitats. I mounted a [Handcrafted Wooden Mason Bee House] high up on my far back fence post, and it instantly drew the solitary, non-aggressive pollinators straight to the property line and completely away from my patio dining table.
Put your seating on the ground level, and place your heavy pollinator containers on high plant stands or hanging hooks at the outer corners of your balcony. This forces the bees to fly up and over your head rather than straight across your face while you are sitting down.
The Raised Bed System
In a standard backyard with raised beds, avoid putting your flower borders at the ends of the beds where you need to stand to tend your vegetables. Always place your pollinator-attracting flowers on the back-facing sides of the structures. This ensures that when you are leaning over to prune your tomatoes, your face isn’t inches away from a busy bee workspace.
Seasonal Movement Patterns in the United States
Bee behavior changes dramatically depending on the month, and understanding this cycle prevents a lot of unnecessary panic.
In the early spring, around April and May, bees are hungry and desperate. Queen bumblebees are emerging from underground holes, and they are single-minded. They will visit almost anything. This is when your early blooming fruit trees or spring bulbs get heavy traffic.
By mid-summer, around July and August, the colony sizes are at their absolute peak. This is also when summer heat can dry out wild nectar sources, making your well-watered backyard look like an oasis. If you haven’t established your Tier 3 target zone by now, this is when bees will start exploring your patio looking for alternative food sources.
In the late autumn, especially across the Midwest and Northeast US, bees can get a bit sluggish and cranky. The weather is cooling down, food is scarce, and they are trying to finish their winter preparations. Give them extra space during September and October; they are just trying to survive the coming frost.
Real Layout Mistakes I Made So You Don’t Have To
I have made every single design mistake imaginable over the last two decades. Here are the top three blunders that cost me a few painful stings and a lot of wasted time.
The Lavender Path Disaster
I once planted an entire border of English lavender along my main walkway because I thought it would look like a charming cottage garden design. It looked stunning, but within two years, the plants matured into massive bushes that spilled over the gravel path.
Every time I walked to my garden shed, my legs would brush against the branches. The bees didn’t want to sting me, but when a giant human leg suddenly traps an insect inside a flower cluster, it’s going to defend itself. Keep your walking paths completely clear of overhanging blooms. Whenever my lavender or salvia starts spilling over onto the gravel path, I use my [Fiskars Professional Bypass Pruning Shears] to make quick, clean cuts that keep the walkways wide, open, and completely safe to walk down. In fact, this exact issue is why I completely changed my mind on walkway design; you can read about why in DIY Garden Paths: Why I stopped using mulch and switched to repurposed stones.
The “Wildflower Mix” Trap
When I was a beginner, I bought one of those cheap shaker cans of “Mixed Wildflower Seeds” and tossed it randomly across my entire vegetable patch.
I ended up with a chaotic, tangled mess of weeds, invasive species, and flowers growing directly underneath my tomato cages. I couldn’t harvest a single tomato without reaching my hand into a mystery cloud of buzzing insects. It taught me to always plant my flowers in dedicated, controlled zones. I talk more about how uncontrolled spacing completely ruins a layout in my breakdown of [Why My Vertical Garden Failed: Real Lessons on Small Space Management].
Ignoring the Morning Shade
I once built a gorgeous pollinator border directly behind a mature oak tree. The area stayed in deep shade until 1 PM.
Because the flowers were cold and dark all morning, the bees completely ignored them and instead spent their mornings hovering around the sunny, warm steps of my back porch where my wife kept a few simple geraniums. Always make sure your primary bee attractors get the earliest possible morning sun.
Simple Setup Costs & Real Budget Estimates
Building a safe layout does not mean you need a massive landscaping budget. You can start small and expand your zones over a few seasons. Here is a realistic breakdown of what you actually need to spend in the US market.
| Tool / Material | Purpose | Realistic Price Range (USD) |
| Starter Perennial Flowers | 3-4 Pots of Salvia, Coneflower, or Sedum | $25 – $40 total |
| Terracotta Saucer & Pebbles | Creating a dedicated bee watering station | $8 – $15 total |
| Simple Wooden Stakes / Twine | Keeping tall flowers from flopping into paths | $5 – $10 total |
| Quality Hardwood Mulch | Suppressing weeds in your dedicated target zones | $5 – $7 per bag |
You do not need fancy electronic gadgets or expensive specialty setups. A few well-placed perennial plants that come back year after year will do 90% of the work for you. Spend your money on good, established plants rather than cheap seed packets that might not germinate properly for a beginner.
FAQ
Not necessarily. Bees eat nectar and pollen. Wasps are predators that look for meat, protein, and rotting fruit. While a few wasps might visit flowers occasionally, they are far more attracted to your open garbage cans, outdoor barbecue grills, or fallen apples rotting on the ground. Keep your trash sealed and your orchard clean, and you won’t have a wasp problem.
If you want greenery near your patio table without attracting insects, stick to non-flowering items or plants with low-attraction blooms. Hostas, caladiums, ferns, coleus, and ornamental sweet potato vines provide incredible color and texture without inviting a single bee to your table.
You can, but you lose out on the massive benefits of natural pollination. If you want your backyard vegetable garden to actually produce food, you need real insects. A yard with zero pollinators means your squash blossoms will shrivel up and drop off without ever producing a single vegetable.
The absolute worst thing you can do is panic, scream, and start swatting your arms wildly. To a bee, a waving arm looks like a predator trying to smash it, which triggers its defensive stinging instinct. Just freeze, close your mouth, and walk away slowly in a straight line. Once you step out of its immediate zone, it will completely lose interest in you.
Yes. Bees see ultraviolet light, and they are naturally drawn to bright blues, purples, and yellows. If you wear a bright neon yellow shirt out into the garden, don’t be surprised if a curious honeybee lands on your shoulder to check if you are a giant flower. Stick to neutral colors like khaki, white, or grey when you are working extensively in the garden beds.
Bringing Balance Back to Your Space
At the end of the day, a healthy garden is a living ecosystem. You cannot sterilize nature, and you shouldn’t want to.
Once you stop treating your yard like a textbook project and start looking at how elements like sunlight, airflow, and plant density actually dictate insect behavior, the fear completely disappears. You can have a thriving, high-yielding garden and a peaceful patio space at the exact same time.
Set up your borders clearly, keep your walking lanes wide and open, and give the insects a dedicated place of their own at the far edge of the property. You will get better harvests, beautiful flowers, and total peace of mind every time you step outside.
Most advice in this article comes from years of hands-on gardening experience, trial-and-error, and plenty of personal mistakes in real home gardens. Results can vary depending on your specific local climate, regional bee species, and unique backyard growing conditions. Always prioritize personal safety if you have a known severe allergy to insect stings.
Aagam – Founder of SpruceTouch
Hi, I’m the creator behind SpruceTouch. i am a home and garden enthusiast who shares practical ideas for backyard design, garden projects, patio decor, and small outdoor spaces. Through SpruceTouch, he focuses on simple and budget-friendly ways to improve outdoor living spaces.