17 Stunning DIY Garden Path Ideas on a Budget (That Look Expensive!)
Last summer, my backyard looked like a mess after every rain. The grass turned into a muddy trap, and walking from one corner to another felt like a chore instead of something relaxing. I remember thinking, “Do I really need to spend thousands just to make a simple path?”
That’s when I started experimenting with DIY garden paths using whatever I could find locally—leftover bricks, gravel, even broken tiles. Some ideas worked beautifully, while others… well, let’s just say I learned a few lessons the hard way.
But here’s the secret: you don’t need a big budget to create a stunning garden path—just the right approach and a bit of creativity.
In this guide, I’m sharing the exact ideas that actually worked for me (and what to avoid), so you can build a path that looks premium… without the premium price.
Quick Selection Table
| Path Idea | Best For | Budget Level | Difficulty | My Verdict |
|---|---|---|---|---|
| Gravel Path | Beginners | Very Low | Easy | Fast & forgiving |
| Brick Path | Classic gardens | Low | Medium | Durable & timeless |
| Stepping Stones | Small yards | Low | Easy | Minimal effort |
| Wood Slice Path | Rustic look | Very Low | Medium | Unique but needs care |
| Mulch Path | Temporary fixes | Very Low | Easy | Great starter option |
1. Gravel Garden Path (The Beginner’s Shortcut)
Gravel was honestly my first experiment because it felt the least risky. I bought a few bags from a local supplier (much cheaper than garden centers, by the way) and just spread them over a cleared path. The transformation was instant—it went from muddy chaos to something that actually looked intentional.
The trick I learned later is to always lay a weed barrier underneath. I skipped this step initially, and within a month, weeds started poking through. Fixing that later took more effort than doing it right the first time.
You can edge the path with cheap bricks or even recycled plastic borders to keep the gravel in place. Without edging, the stones slowly spread out, and your path disappears over time.
If you want to elevate the look, mix two gravel colors. It adds depth without adding much cost.

2. Brick Path Using Reclaimed Materials
I found my bricks from a demolition site nearby—sometimes you can get them almost free if you’re willing to clean them. That alone saved me hundreds.
Laying them isn’t as complicated as it looks. Start with a sand base, level it carefully, and then place the bricks tightly together. I made the mistake of rushing the leveling process once, and the path ended up uneven—trust me, you feel every bump when walking barefoot.
The beauty of brick is its flexibility. You can create patterns like herringbone or keep it simple with straight lines. Even a basic layout looks elegant.
Seal the bricks if you want them to last longer, especially in rainy areas. Otherwise, moss and stains will build up quickly.

3. Stepping Stone Path with Grass In-Between
This is one of those designs that looks expensive but isn’t. I spaced out concrete stepping stones and let grass grow in between. It instantly gave my yard a modern, airy feel.
Spacing is everything here. Too far apart, and it feels awkward to walk. Too close, and it loses that visual charm. I usually test the spacing by walking naturally and placing stones where my feet land.
A common mistake is not securing the stones properly. If they wobble, it ruins the experience. Dig slightly into the soil so they sit flush with the ground.
You can also swap grass for gravel or moss depending on your climate.

4. Wood Slice Path (Rustic Charm on a Budget)
I tried this with leftover tree logs after trimming. Cutting them into slices created these beautiful natural stepping pieces.
The biggest lesson here: seal the wood. I didn’t do it initially, and within months, the slices started rotting. A simple wood preservative extends their life dramatically.
Lay them over sand or gravel for drainage. Direct soil contact speeds up decay.
This path works best in low-traffic areas, like side gardens or decorative spaces.

5. Mulch Path (Quick & Cheap Solution)
Mulch is what I recommend if you just want a quick fix. It’s incredibly cheap and easy to spread.
However, it’s not permanent. Over time, it decomposes and needs replenishing. I usually refresh mine every few months.
To make it look more structured, add simple borders using stones or wood planks. Without borders, it looks messy quickly.
Mulch paths are great for testing layouts before committing to permanent materials.

PRO TIP
If you’re unsure which path to choose, start temporary. Try mulch or gravel first, live with it for a few weeks, and then upgrade. I’ve saved money by testing layouts before committing to permanent materials.
6. Concrete Slab Path (Modern Look on a Budget)
Concrete slabs completely changed how my backyard felt. I picked up a few leftover slabs from a local supplier at a discounted price—honestly, many stores sell slightly chipped ones for cheap, and once they’re laid, you barely notice imperfections.
The key here is spacing and alignment. I initially tried eyeballing it, and the result looked messy. What worked better was using a string line to keep everything straight. Even if you want a slightly “floating” look, consistency matters more than perfection.
You don’t need a thick base, but you do need stability. I laid mine on a mix of sand and fine gravel, which made leveling easier. If you skip this step, the slabs will sink unevenly over time—especially after rain.
A mistake I learned the hard way: avoid placing slabs directly on wet soil. They shift, and fixing them later is frustrating.
If you want to elevate the design, leave gaps and fill them with gravel or grass. It softens the look and makes the path feel intentional instead of rigid.

7. Pebble Mosaic Path (Artistic & Eye-Catching)
This is one of those projects that looks intimidating—but once you start, it’s actually quite relaxing. I tried a simple swirl pattern using black and white pebbles, and it instantly became the highlight of my garden.
Start small. That’s the biggest lesson here. I made the mistake of planning a large section first and got overwhelmed halfway through. Breaking it into smaller panels made it manageable and much more enjoyable.
Use a cement or mortar base to lock the pebbles in place. Without it, they shift, and your pattern disappears over time. Also, press each pebble firmly so it sits evenly—uneven surfaces can make walking uncomfortable.
If you’re on a budget, mix premium pebbles with cheaper filler stones. No one notices the difference once everything is laid out.
This path works beautifully near seating areas or as a decorative feature rather than a high-traffic walkway.

8. Pallet Wood Walkway (Recycled & Rustic)
I love this idea because it’s almost free if you can find pallets locally. Many warehouses or shops give them away—you just need to ask.
Breaking pallets into usable planks takes effort, but it’s worth it. Once cleaned and sanded, they look surprisingly good. I skipped sanding on a few pieces once and regretted it immediately—splinters are no joke.
Lay the planks over a gravel base for better drainage. Wood and moisture don’t mix well, so keeping them slightly elevated extends their life. I also recommend sealing the wood—it adds durability and gives a richer finish.
Spacing between planks is important. Too tight, and water gets trapped. Too wide, and it becomes uncomfortable to walk.
This type of path fits perfectly in rustic or cottage-style gardens. It may not last forever, but it adds character like nothing else.

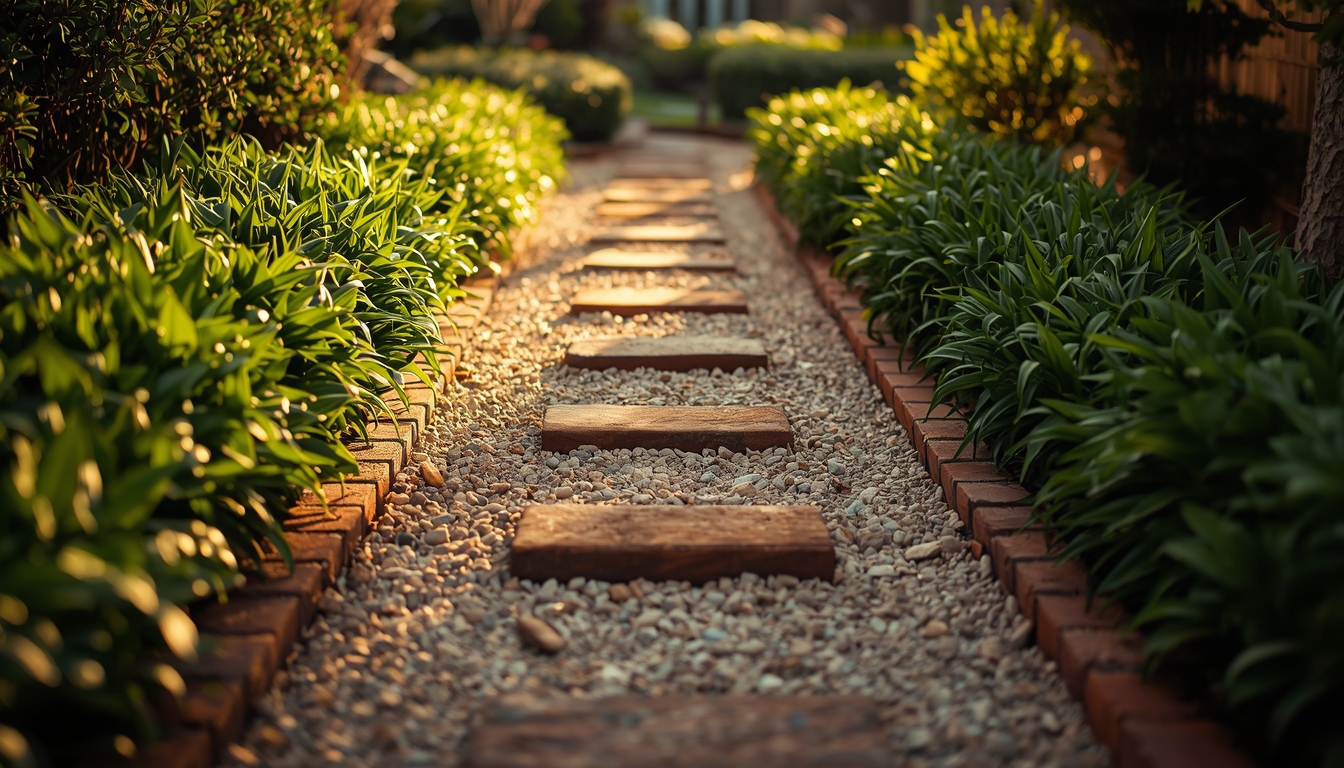
9. Stone + Gravel Combo Path (Designer Look for Less)
This is the idea that made my garden look the most “professionally designed.” Large stepping stones paired with gravel instantly create contrast and structure.
The trick is choosing stones that are similar in size and thickness. I once mixed random stones, and the uneven height made it awkward to walk. Consistency matters more than perfection here.
Gravel acts as both filler and stabilizer. It locks the stones in place while also improving drainage. I like using lighter gravel with darker stones—it creates a subtle visual contrast that looks high-end.
Don’t forget edging. Without it, gravel spreads into the garden beds, and the clean look disappears quickly.
If you’re planning a full backyard makeover, this style pairs beautifully with ideas like smart outdoor layouts from small garden pond designs, helping you create zones that feel intentional and connected.

10. Tile Scrap Path (Creative & Budget Genius)
This idea came from leftover tiles after a renovation—and it turned out way better than expected. Instead of throwing them away, I broke them into smaller pieces and created a mosaic-style path.
The biggest challenge is handling sharp edges. I recommend lightly sanding or placing them deep enough in mortar so they don’t stick out. Safety first—especially if you walk barefoot.
Plan a loose pattern before placing anything permanently. I didn’t do this at first, and the result looked random instead of artistic. Even a simple color grouping can make a huge difference.
Use cement or mortar to fix the pieces securely. Without it, tiles shift and crack under pressure.
This path works best as a decorative walkway or accent feature rather than a main high-traffic path.

PRO TIP
Mix materials for a premium look without the cost. One of my best decisions was combining leftover materials—like concrete + gravel or stone + mulch. It creates depth and saves money while making your garden feel professionally designed.
11. Brick + Grass Path (Soft & Classic Look)
This idea balances structure and softness beautifully. I laid bricks with small gaps and let grass grow between them—it instantly made the path feel less rigid and more “alive.”
Spacing is key here. Too tight, and grass won’t grow properly. Too wide, and it looks patchy. I found that leaving about an inch gap works well for most lawns.
You’ll need to maintain the grass regularly. I ignored mine for a while, and weeds started taking over. A little trimming keeps it neat and intentional.
Make sure the bricks are level with the ground. If they sit higher, mowing becomes difficult and annoying.
This style is perfect if you want something that blends seamlessly with your garden instead of standing out too much.
If you’re also working on the overall vibe, combining this with soft backyard lighting ideas for pathways can completely transform how it looks at night.

12. Flagstone Path (Natural & Timeless Appeal)
Flagstone paths always gave me that “magazine garden” feel—but I assumed they were expensive. Turns out, if you source locally or buy irregular pieces, they can be surprisingly affordable. I picked up a mix of leftover slabs, and the uneven shapes actually made the path look more natural.
Instead of forcing symmetry, lean into the organic layout. I tried aligning everything perfectly at first, and it looked artificial. Once I relaxed the placement, the path started to feel like it truly belonged in the garden.
Lay the stones on a sand or gravel base to keep them stable. Without that, they tend to shift over time—especially after heavy rain. Also, leave small gaps between stones and fill them with soil or moss for a softer finish.
One mistake to avoid: don’t choose stones that are too thin. They crack easily under weight and won’t last long.
This path works beautifully in gardens where you want a calm, natural vibe rather than something structured.

13. Sandstone Path (Warm & Inviting Look)
Sandstone has this soft, earthy tone that instantly warms up a garden. I used it in a shaded area, and it made the whole space feel more inviting.
It’s relatively easy to work with, but you need a solid base. I learned this after noticing a few stones sinking unevenly—adding compacted sand underneath fixed the issue.
The texture can be slightly rough, which is actually a good thing—it prevents slipping during rainy days. Still, make sure the surface is level enough for comfortable walking.
If you’re trying to save money, mix sandstone with gravel or cheaper stones. It creates a layered look without blowing your budget.
This type of path pairs beautifully with greenery and works well in both modern and rustic gardens.

14. Concrete Mold Path (Custom Shapes on a Budget)
This was one of my favorite experiments. Instead of buying expensive stones, I used a reusable concrete mold to create my own “stone” path.
It takes a bit of patience, but the results are worth it. You pour concrete into the mold, let it set slightly, then remove it and repeat. It’s almost like building a puzzle piece by piece.
The biggest mistake I made was rushing the drying process. If you remove the mold too soon, the shape collapses. Give it time—it makes all the difference.
You can even tint the concrete slightly to mimic natural stone. It adds a premium touch without much extra cost.
This method is perfect if you want a custom look without paying for custom materials.

15. Grass Pathway (Soft & Minimalist)
Sometimes, the best path is the simplest one. A grass pathway works beautifully if you already have a lawn and want a subtle walking route.
I created one just by mowing a slightly defined line through my yard. It sounds basic, but it actually made movement through the garden feel more intentional.
The downside? Wear and tear. Over time, heavy foot traffic can damage the grass. I solved this by reinforcing certain areas with hidden stepping stones underneath.
Watering and maintenance are important here. If the grass dries out or becomes patchy, the path loses its charm quickly.
This is a great option if you want something low-cost and low-effort that still looks polished.

GROWING SECRET
Think about how you use your garden, not just how it looks. The most beautiful path will fail if it doesn’t match your daily movement—observe your natural walking routes first, then design around them.
16. Log Beam Path (Bold & Natural Texture)
This idea came from leftover timber beams, and it turned into a surprisingly striking path. Instead of cutting logs into slices, I used longer sections laid side by side.
It creates a strong visual impact, especially in rustic or woodland-style gardens. But there’s a catch—wood needs protection. Without sealing, it absorbs moisture and starts deteriorating quickly.
I also learned to slightly elevate the logs using gravel underneath. Direct soil contact speeds up decay and attracts insects.
Spacing matters here too. Keep the logs tight enough for comfortable walking but allow slight gaps for drainage.
This path works best in low-traffic areas where you want a bold, natural statement.

17. Mixed Material Patchwork Path (Creative & Budget-Friendly)
This is where everything comes together. If you have leftover bricks, stones, tiles, or wood—use them all. I created a patchwork-style path using whatever materials I had, and it became the most unique part of my garden.
The key is controlled randomness. At first, I just placed things wherever, and it looked chaotic. Then I started grouping similar materials together—and suddenly, it looked intentional.
Use a consistent base layer (like sand or gravel) to keep everything level. Different materials have different thicknesses, so adjust as you go.
One mistake to avoid: don’t mix too many colors. Stick to a simple palette so the design feels cohesive.
This is the best option if you’re on a tight budget and want maximum creativity. No two paths will ever look the same.

FAQ
1. What is the cheapest garden path material?
Gravel and mulch are the cheapest and easiest to install.
2. How do I stop weeds in my path?
Use a weed barrier fabric underneath and top it with your material.
3. Can I build a path without digging?
Yes, but it won’t last long. Even shallow digging improves durability.
4. How wide should a garden path be?
At least 2 feet for comfortable walking.
5. Which path lasts the longest?
Brick and stone paths are the most durable options.
Simple Step-by-Step Guide
- Mark your path using rope or chalk
- Remove topsoil (2–3 inches)
- Add base layer (sand/gravel)
- Level the surface carefully
- Place your chosen material
- Add edging for structure
- Water lightly to settle everything
Common Mistakes to Avoid
- Skipping weed barrier
- Ignoring drainage
- Poor leveling
- No edging (leads to spreading)
- Choosing style over practicality
Final Thoughts
If there’s one thing I’ve learned, it’s this: your garden path doesn’t need to be perfect—it just needs to feel right.
Some of my best results came from experimenting, mixing materials, and even fixing mistakes along the way. Start simple, don’t overthink it, and upgrade as you go.
Because at the end of the day, a garden path isn’t just about walking—it’s about enjoying the journey.
Aagam – Founder of SpruceTouch
Hi, I’m the creator behind SpruceTouch. i am a home and garden enthusiast who shares practical ideas for backyard design, garden projects, patio decor, and small outdoor spaces. Through SpruceTouch, he focuses on simple and budget-friendly ways to improve outdoor living spaces.