
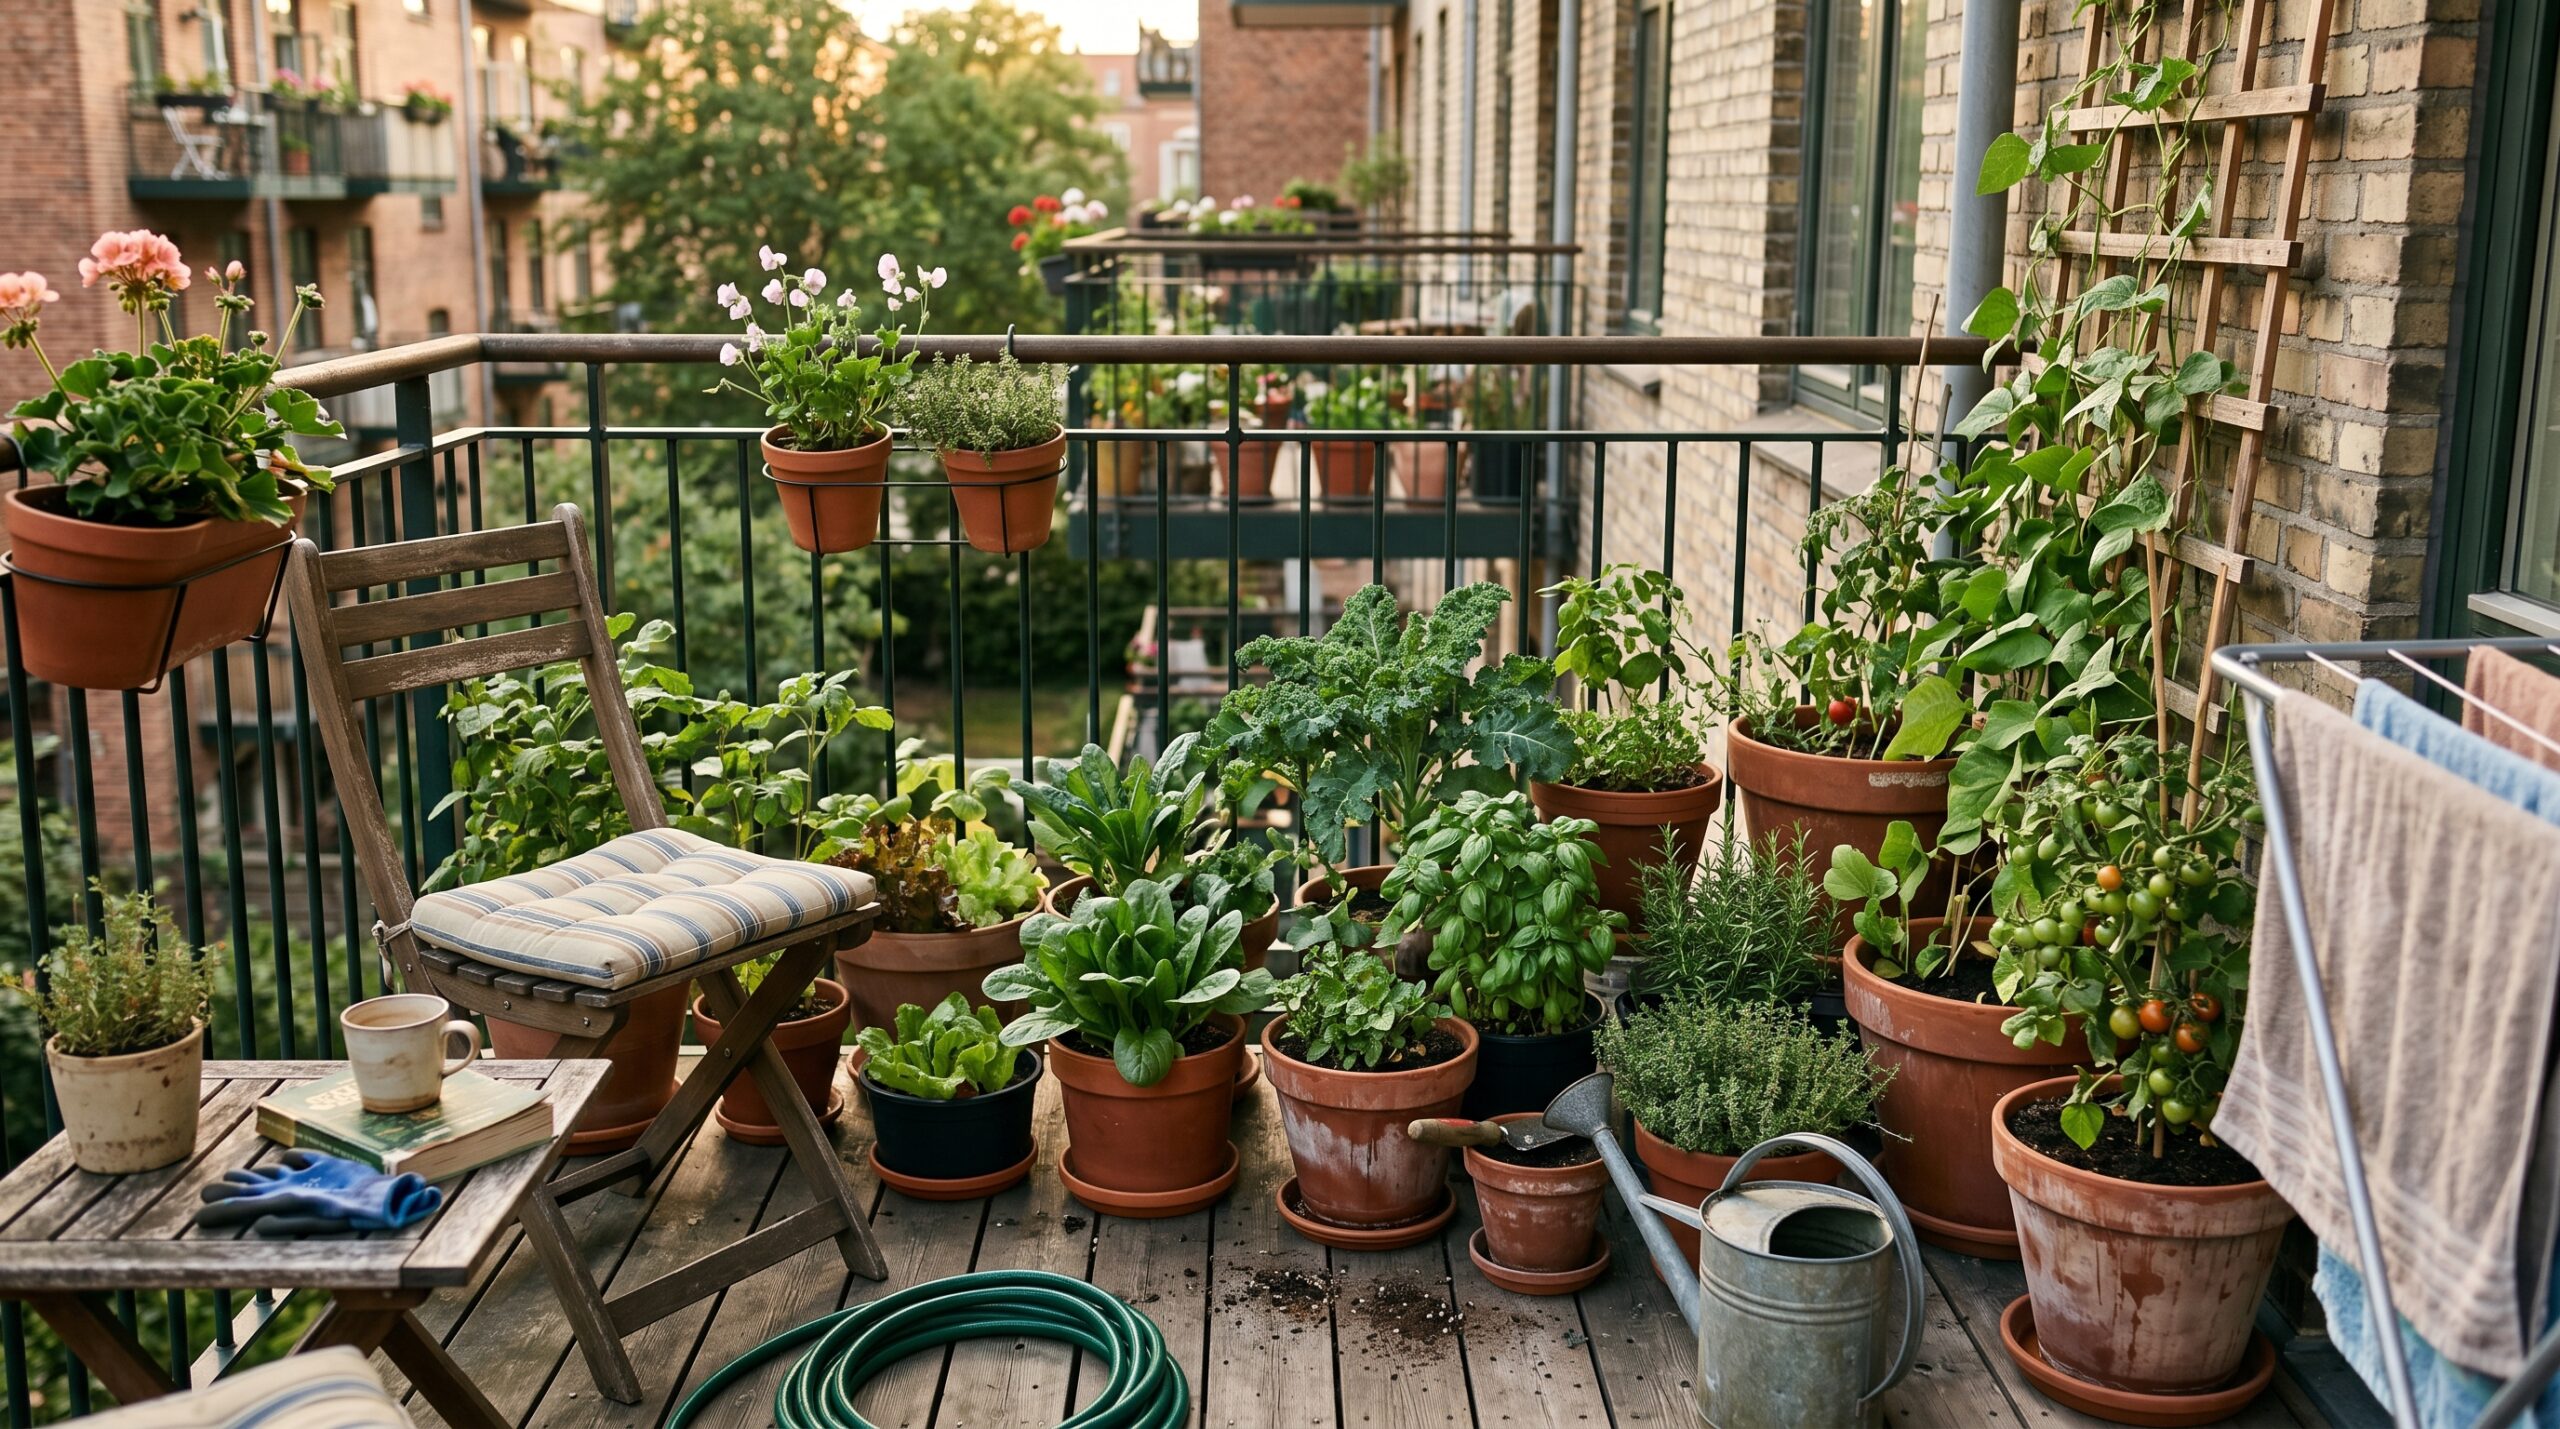
I’ve spent about 18 years pushing the limits of what you can actually grow in small spaces. I’ve lived in places with sprawling backyards and places where my “garden” was a 4×10 concrete slab five stories up. If there is one thing I’ve learned, it’s that most people treat their balconies like a storage closet with a chair, rather than a living ecosystem.
Early on, I wasted a lot of money on those flimsy plastic greenhouses that blow over in a light breeze and “self-watering” pots that just turned my tomato roots into mush. I used to think I needed a massive patio to grow anything meaningful, but honestly, some of my best harvests came from a cramped third-floor balcony where I had to shimmy past a bike just to reach my kale.
The struggle is real—wind tunnels, scorching concrete, and that awkward moment when you realize you’ve blocked your only exit with a giant zucchini plant. But once you figure out the layout, everything changes. You stop seeing a cramped outdoor space and start seeing a grocery store right outside your glass door.
A few of these layouts honestly worked much better than I expected, especially when I stopped trying to copy those “minimalist” catalogs and started focusing on how plants actually grow.
Quick Picks (Top 5)
- The Vertical Ladder: Best for those who have zero floor space but plenty of wall.
- The Railing Runner: Highest impact for pollinators and herbs without blocking your view.
- The Rolling Crate System: Perfect if your balcony only gets “good light” for three hours a day in one specific corner.
- The “L-Shaped” Lounge & Leaf: Low-budget way to keep a seating area while surrounding yourself with greens.
- The Hanging Jungle: Best visual win; keeps the floor clear for your morning coffee.
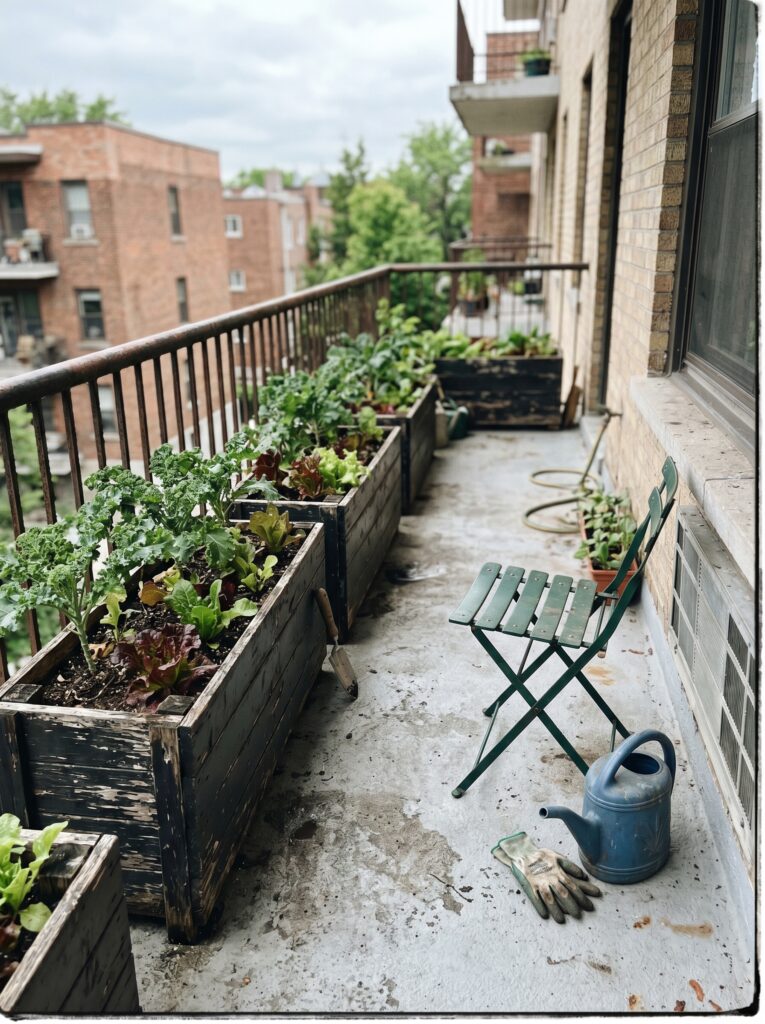
1. The Perimeter Pocket Layout
When I first started balcony gardening, I made the mistake of putting a big table in the middle. I spent the whole summer tripping over pots. Now, I suggest lining the entire perimeter with slim, rectangular troughs. This leaves the center open for movement.
It creates a “border” feel that makes the balcony feel like a true room. I found that 24-inch window boxes sitting on the floor work better than deep pots because they distribute the weight more evenly along the edge.
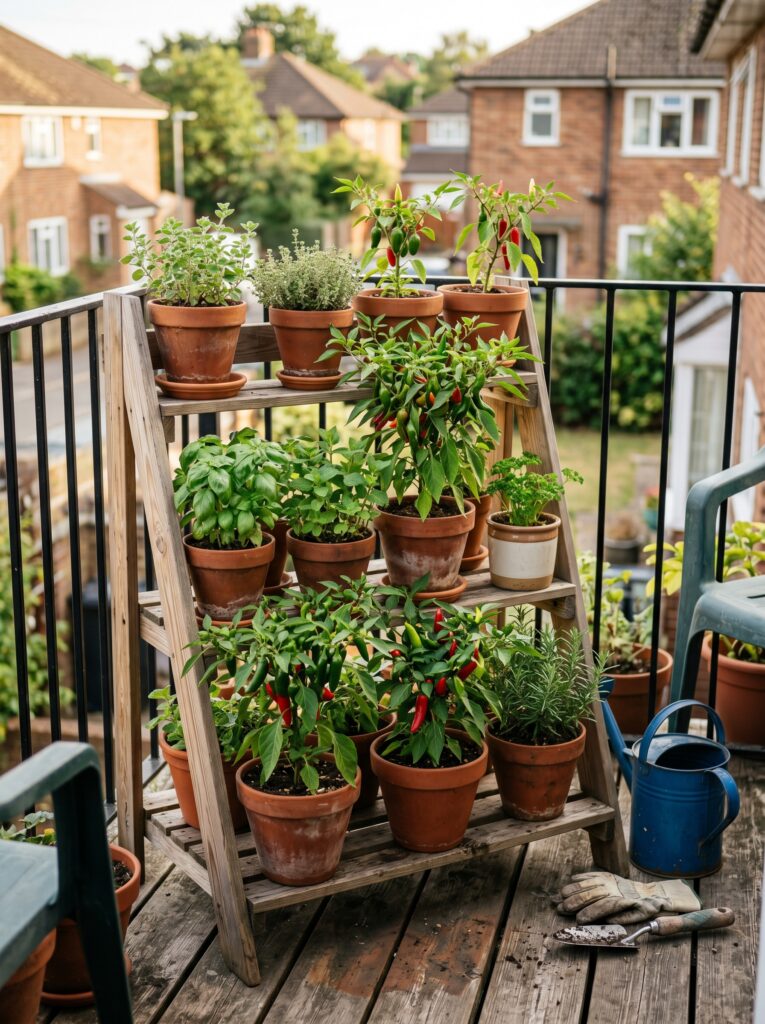
2. The Tiered “Stadium” Steps
I learned the hard way that if all your pots are the same height, the ones in the back get leggy and sad because they’re “reaching” for the sun. Using a simple wooden tiered stand—basically a mini set of bleachers—allows every plant to get its fair share of Vitamin D.
I usually put the heavy feeders like peppers on the top step and the shade-loving herbs like cilantro or parsley tucked underneath the “overhang” of the steps.
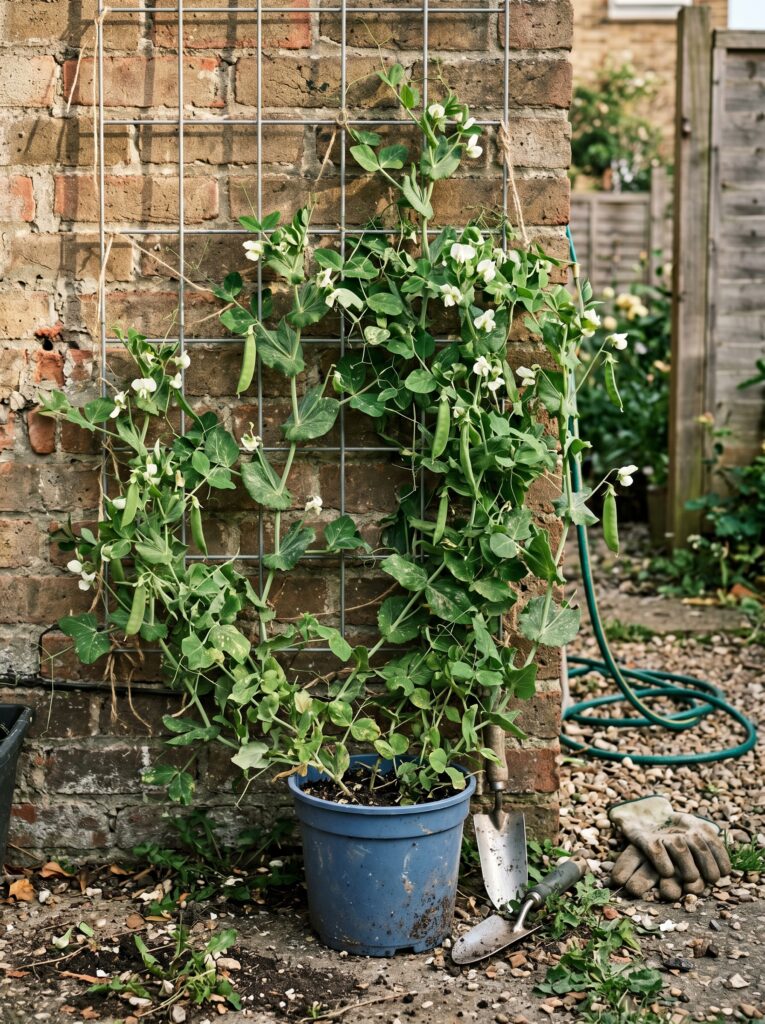
3. The “Sky-High” Trellis Wall
If you have a side wall that is just blank siding or brick, you’re sitting on a gold mine. I once mounted a simple cattle panel (you can get them at hardware stores for cheap) against the wall. I grew sugar snap peas and small cucumbers upward.
It acts as a privacy screen from the neighbors while producing food. Just a heads up: make sure your trellis is anchored well. A wind gust on the 4th floor can turn a cucumber vine into a sail.
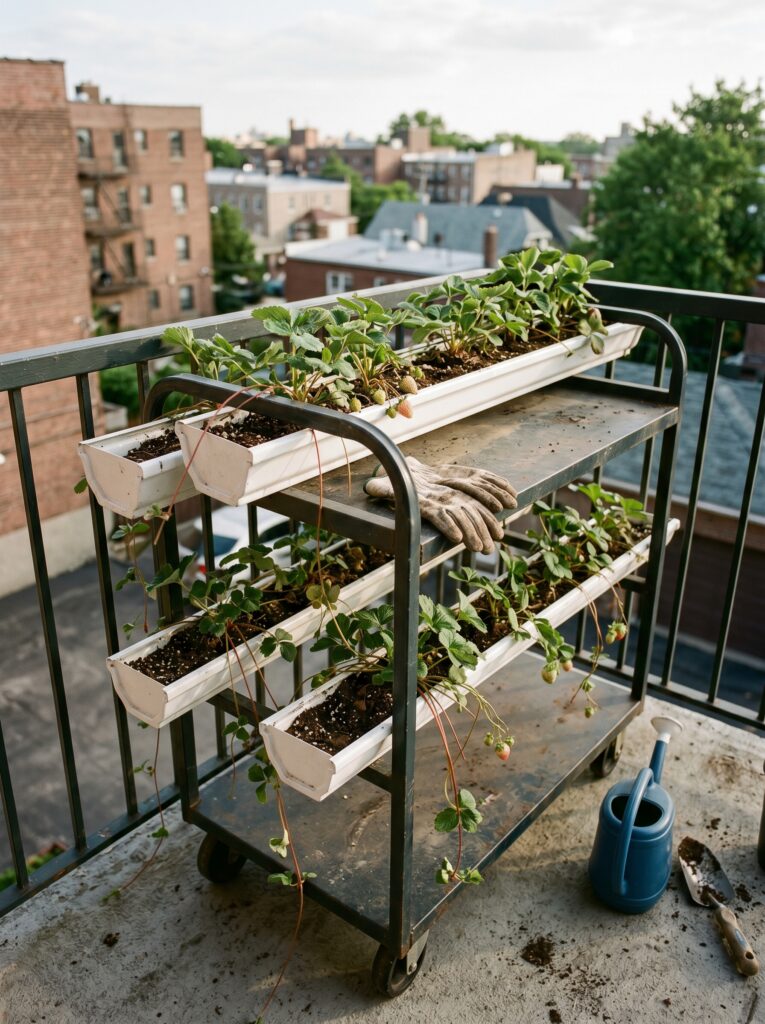
4. The Rolling Gutter Garden
This is one of those “what surprised me” projects. I took a few sections of vinyl rain gutter, capped the ends, and mounted them to a rolling garment rack. Why? Because the sun on my balcony moved six feet throughout the day. Being able to wheel my entire strawberry patch into the sunny spot while I was working from home was a game changer.
💡 Small Pro Tip: Always drill more drainage holes than you think you need in gutters. They clog easily with fine soil.
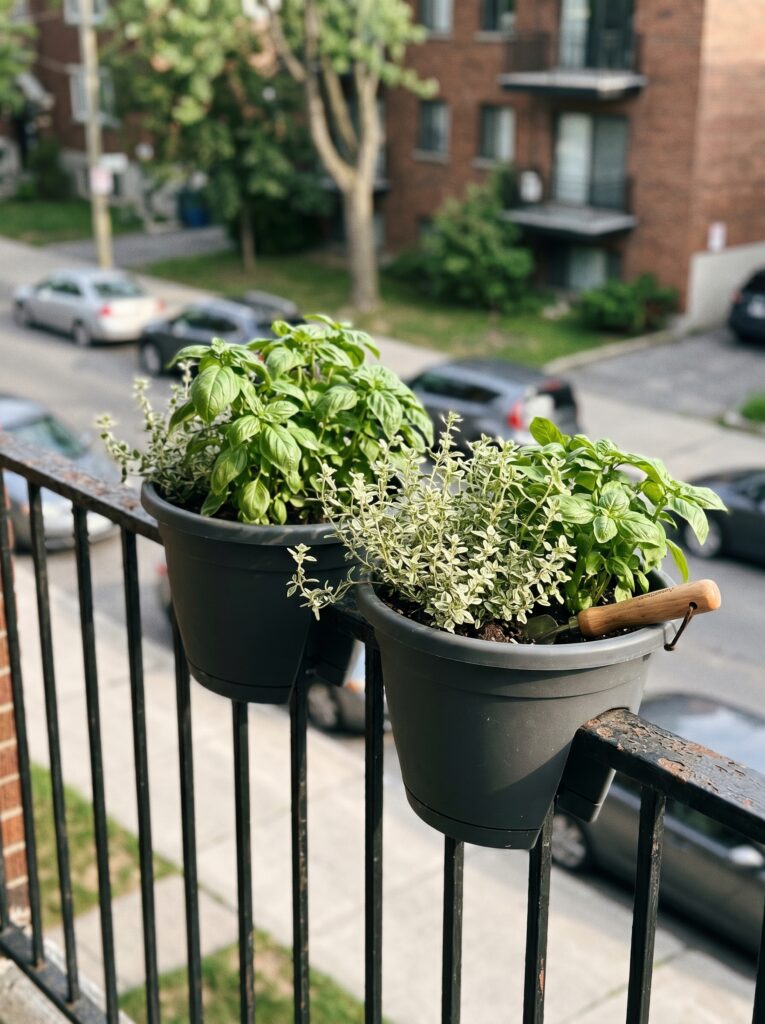
5. The Railing Herb Bar
I’m a big fan of the over-the-railing planters, but only if they are the “saddle” style that sits securely. I use these exclusively for my “kitchen staples”—basil, oregano, thyme, and mint. It keeps them at waist height so you can just pop outside with scissors while you’re cooking.
One mistake to avoid: don’t put mint in a shared planter. It’s a garden bully and will kill your basil in three weeks.
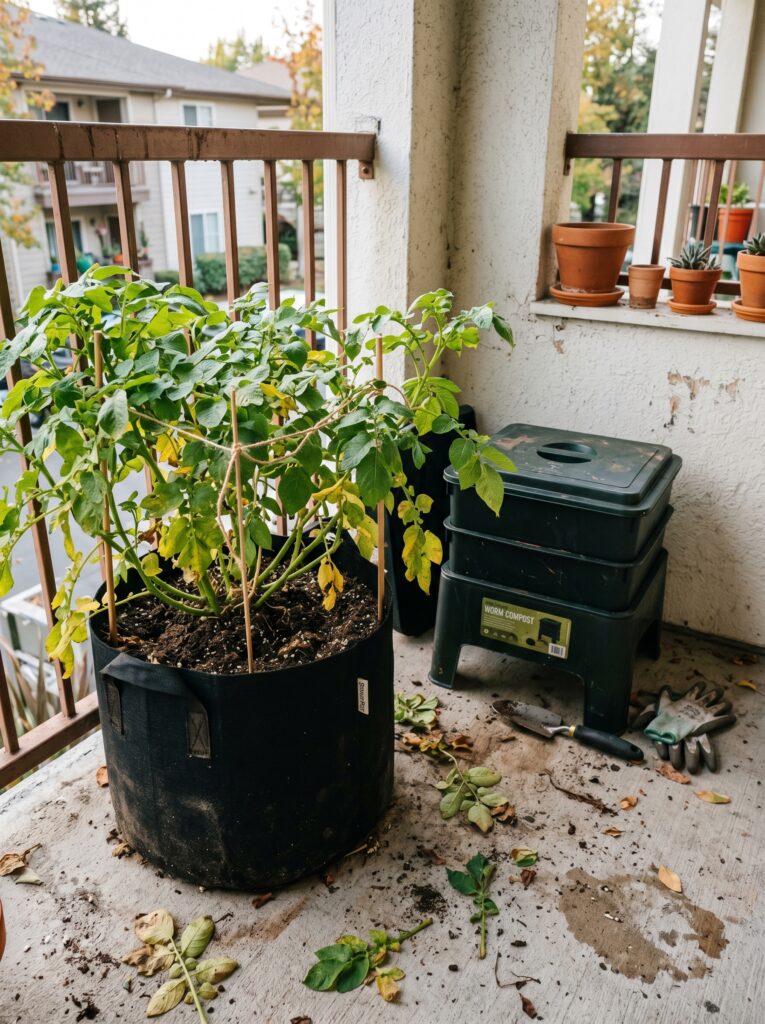
6. The Corner Compost & Crop Station
Most people hide their supplies, but on a small balcony, you don’t have that luxury. I like to dedicate one corner to a “functional stack.” A small worm composter on the bottom (they don’t smell if you do it right, I promise), and a large 10-gallon grow bag of potatoes sitting right on top or next to it.
It keeps the “messy” stuff in one zone. I’ve found that soil health guides are actually more important in pots than in the ground because the nutrients wash out so fast.
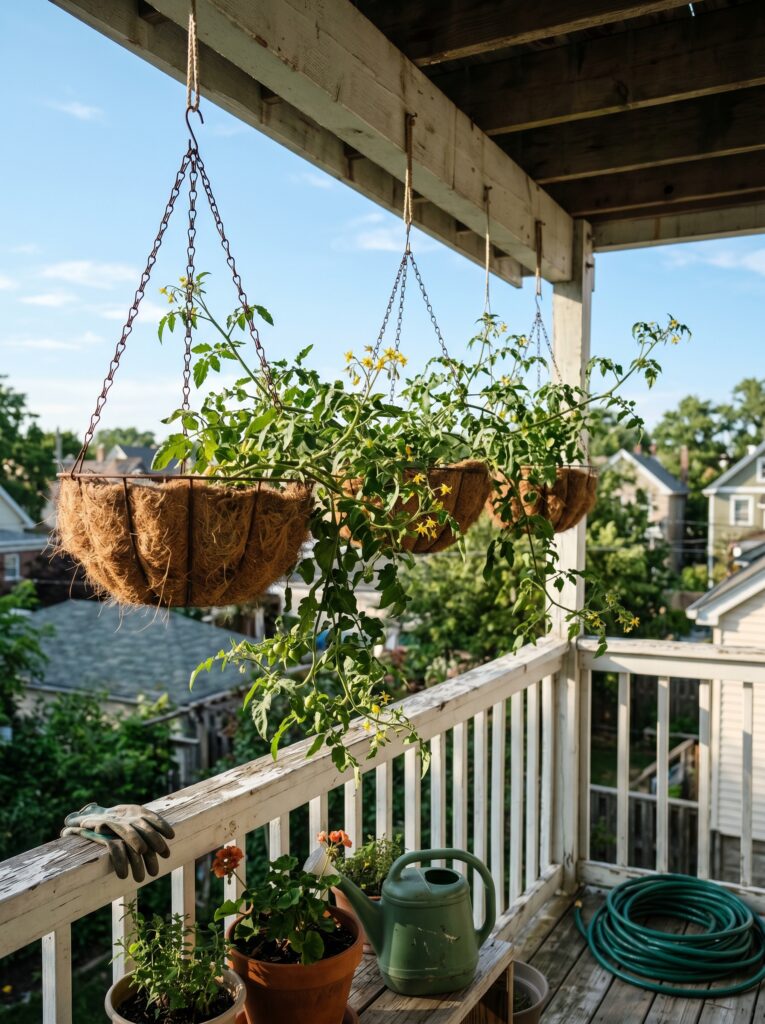
7. The Hanging Basket “Curtain”
When you have literally zero floor space, look up. I used heavy-duty ceiling hooks to hang a row of trailing cherry tomatoes (like the ‘Tumbler’ variety). They hang down like a curtain. It’s beautiful, but here’s the kicker: they dry out incredibly fast. You’ll be watering plants correctly twice a day in July, or they will crisp up before the fruit even turns red.
8. The Pallet Privacy Planter
I’m usually wary of “pallet projects” because they can look like junk, but a heat-treated pallet (look for the ‘HT’ stamp) stood upright makes an incredible vertical planter. I stapled landscape fabric behind the slats to create pockets. I used this to grow a “salad wall.” It’s a low-maintenance garden idea once it’s set up, as long as you use a good moisture-retentive potting mix.

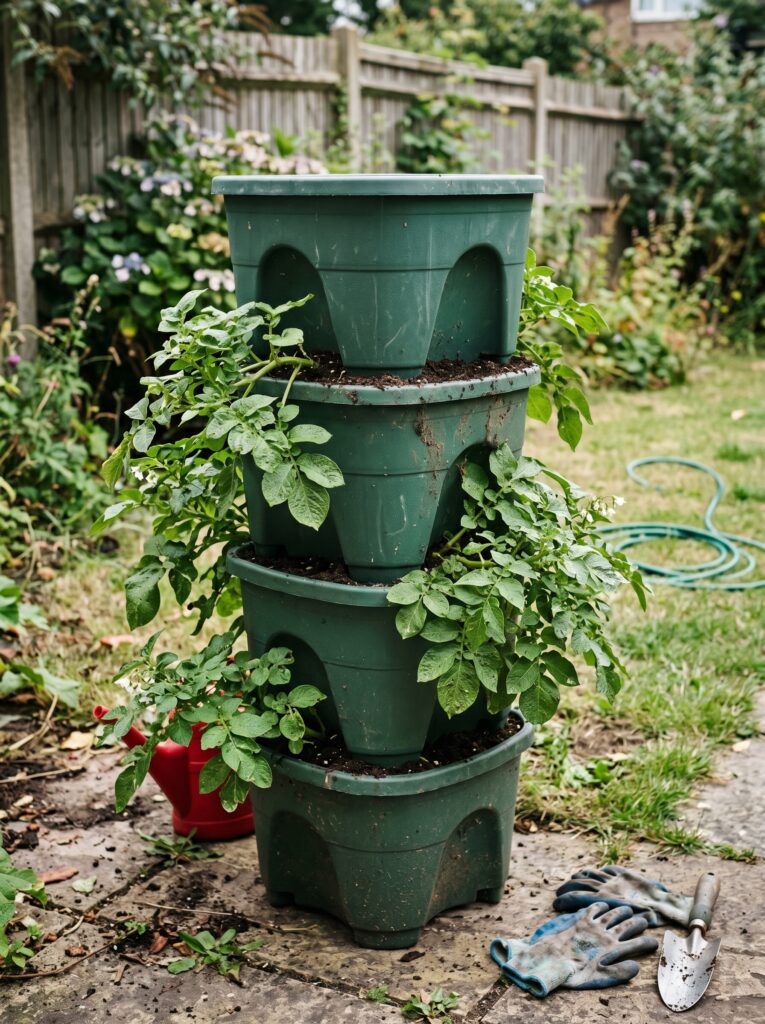
9. The “Deep Root” Potato Tower
You’d be shocked how much food you can get out of two square feet. I use stackable planters specifically for root veggies. You start with one level and add more as the plant grows. I learned this the hard way: don’t use regular garden soil in these. It’s too heavy and will compact until it’s like a brick. Use a high-quality potting mix to keep it fluffy.
10. The Beverage & Bloom Bistro
If you actually want to sit on your balcony, you need a layout that respects the “human zone.” I use a small bistro set but replace the table with a large, flat-topped wooden crate. Inside the crate? My gardening tools. On top? My coffee. Surrounding the chairs? Tall, thin “Emerald Green” arborvitae in pots to act as a natural sound barrier from the street.
⚠ Common Mistake: Thinking you can use “dirt” from the ground. Please, don’t do it. Ground soil has clay that doesn’t drain in pots, and it’s full of weed seeds and bugs you don’t want in your house. Buy the bagged potting mix; your back and your plants will thank you.
11. The “Shadow Zone” Layout
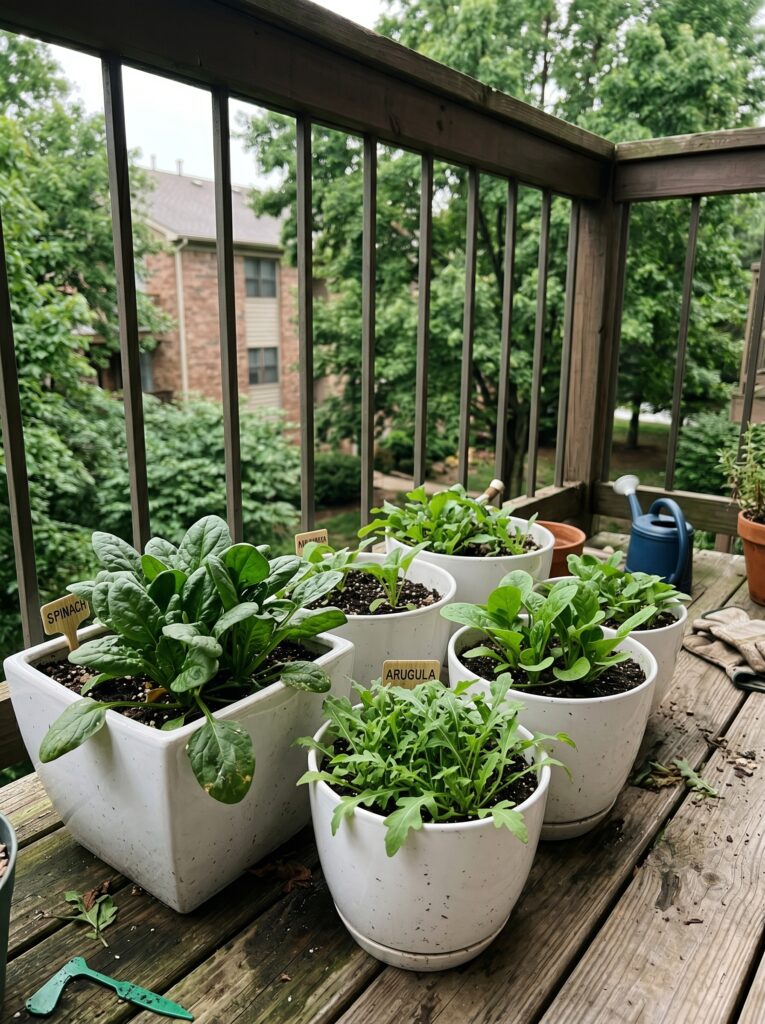
Not every balcony gets 8 hours of sun. My old apartment was North-facing and felt like a cave. I had to pivot to “The Shadow Zone” layout. This involves using white or light-colored pots to reflect what little light there is, and sticking strictly to leafy greens and brassicas. I grew some of the best spinach of my life in that “cave” because it didn’t bolt in the heat.
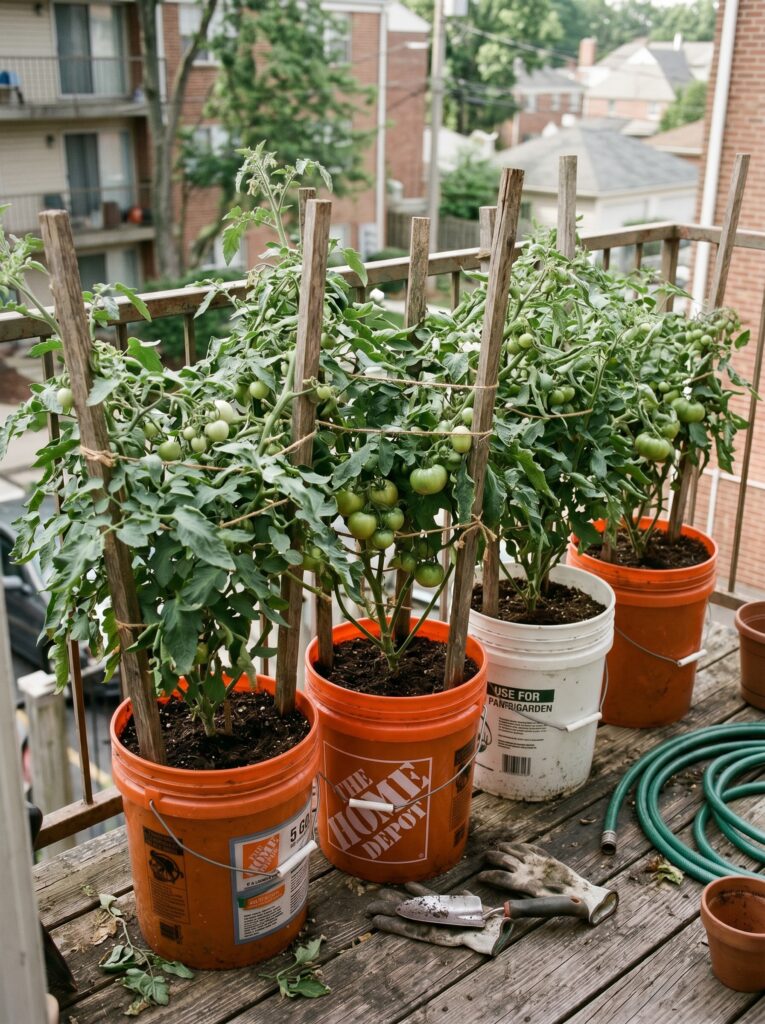
12. The “Self-Wicking” Five-Gallon Array
This is the “industrial” look, but it works. I use five-gallon buckets (recycled from bakeries) and turn them into self-wicking tubs with a water reservoir at the bottom. I line them up along the sunniest wall. It’s not the prettiest, but if you’re a beginner gardening tips seeker, this is the most foolproof way to grow big beefsteak tomatoes without them wilting every time you go to work.
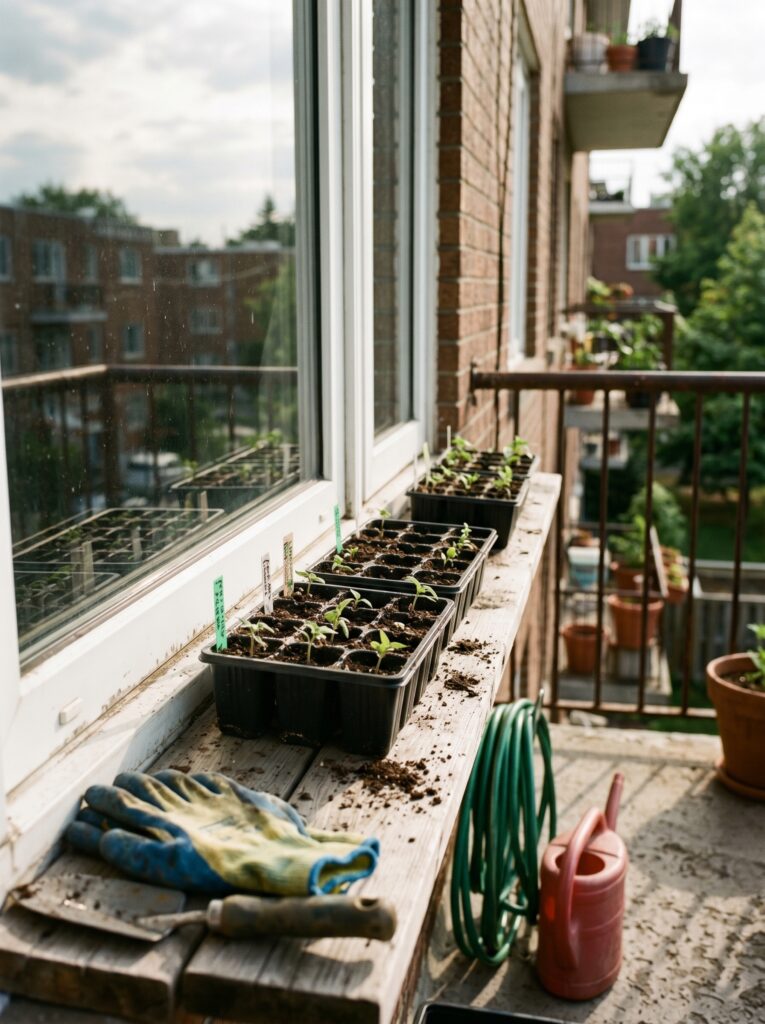
13. The Window Sill “Micro-Extension”
If your balcony is truly tiny, use the window sill that looks out onto it. I bought some tension-mounted shelves that fit into the window frame on the outside. It’s perfect for seed starts or microgreens. One thing most people ignore: check the weight limit on your window sills before loading them with heavy damp soil.
14. The “Zig-Zag” Airflow Layout
One thing I learned the hard way: if you pack pots too tightly against a wall, you get powdery mildew. It’s a fungus that looks like white flour on your leaves. Now, I stagger my pots in a “zig-zag” pattern. This allows the wind to move between the plants. It looks a bit more artistic and keeps the plants much healthier.
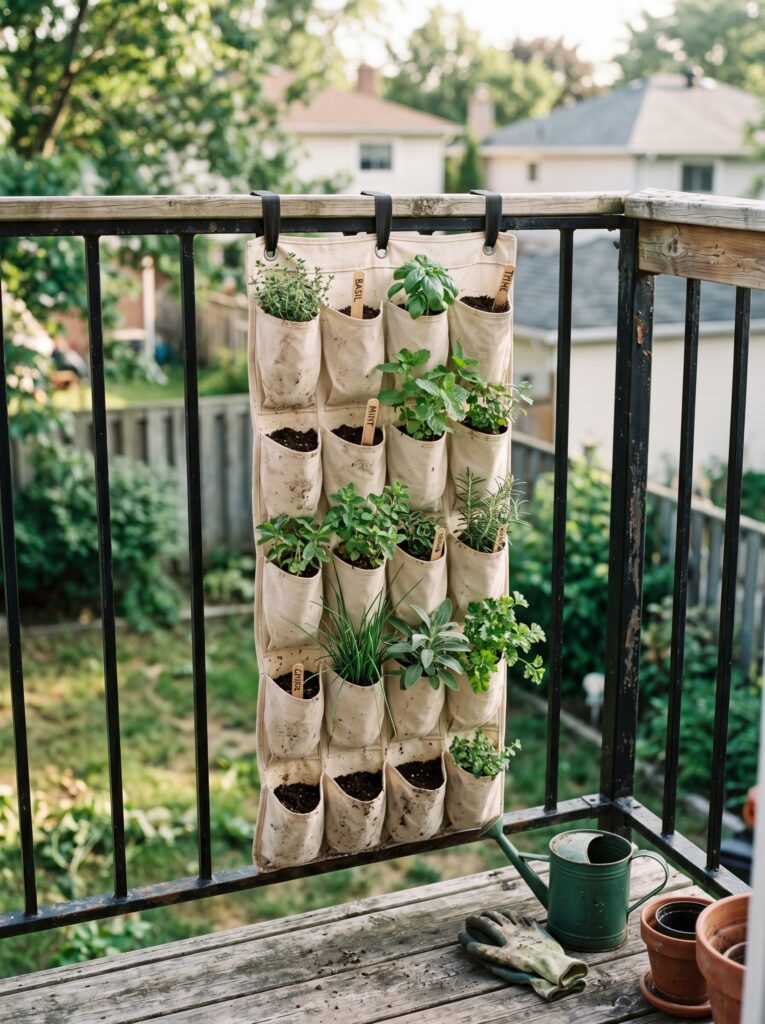
15. The “Over-the-Door” Herb Organizer
This is the ultimate space-saver. I took a fabric over-the-door shoe organizer and hung it on the inside of the balcony railing (using zip ties). Each shoe pocket gets a small herb. This worked better than expected for things like chives and mint. But wait, there’s a catch: the fabric pockets dry out incredibly fast. I ended up lining mine with a bit of plastic to hold the moisture in.
How to Start (Simple Plan)
- Measure Twice: Don’t guess. Measure your floor space and the height of your railing.
- Track the Sun: Spend one Saturday checking your balcony every hour. Does the sun hit the floor? The wall? Only the railing?
- The “Big Three” Setup: Buy three 10-gallon grow bags, one bag of high-quality potting mix, and three starts (Tomato, Pepper, Basil).
- Watering Kit: Get a 1-gallon watering can. Anything bigger is too heavy; anything smaller is a chore.
- Start Small: Pick one layout from the list above. Don’t try to do the “Jungle” on day one.
Things That Didn’t Work for Me
- Cheap Plastic Greenhouses: On a balcony, these are basically kites. I’ve chased mine down the street twice. Never again.
- Overcrowding: I used to think 3 plants in one pot meant 3x the food. It actually means 3 dead plants because they fight for nutrients. One plant per pot is the golden rule.
- Neglecting Drainage: I once used “cute” ceramic pots without holes. The plants literally drowned after one heavy rainstorm. If it doesn’t have a hole, it’s a bowl, not a planter.
FAQ
You can’t grow tomatoes or peppers, but you can grow “leaves and roots.” Think spinach, lettuce, beets, and radishes. They actually prefer a bit of cool shade.
Usually, no. Most modern balconies can handle the weight of pots. However, avoid heavy concrete planters. Stick to fabric grow bags, plastic, or resin to be safe.
In the heat of summer, probably every morning. Pots lose moisture much faster than the ground does.
It can. If you’re on a high floor, use heavier pots or secure them to the railing with zip ties. Creating a “windbreak” with a trellis helps too.
Lettuce or herbs like mint and basil. They are very forgiving and grow fast.
Start with a couple of ideas first and adjust as you go. You’ll figure out what your specific balcony “personality” is pretty quickly once you get your hands in the soil.
Most ideas in this article come from years of real gardening experience and testing different setups at home. Results may vary depending on climate, space, and maintenance. Always check your building’s rules regarding balcony weight and drainage.
Aagam – Founder of SpruceTouch
Hi, I’m the creator behind SpruceTouch. i am a home and garden enthusiast who shares practical ideas for backyard design, garden projects, patio decor, and small outdoor spaces. Through SpruceTouch, he focuses on simple and budget-friendly ways to improve outdoor living spaces.