

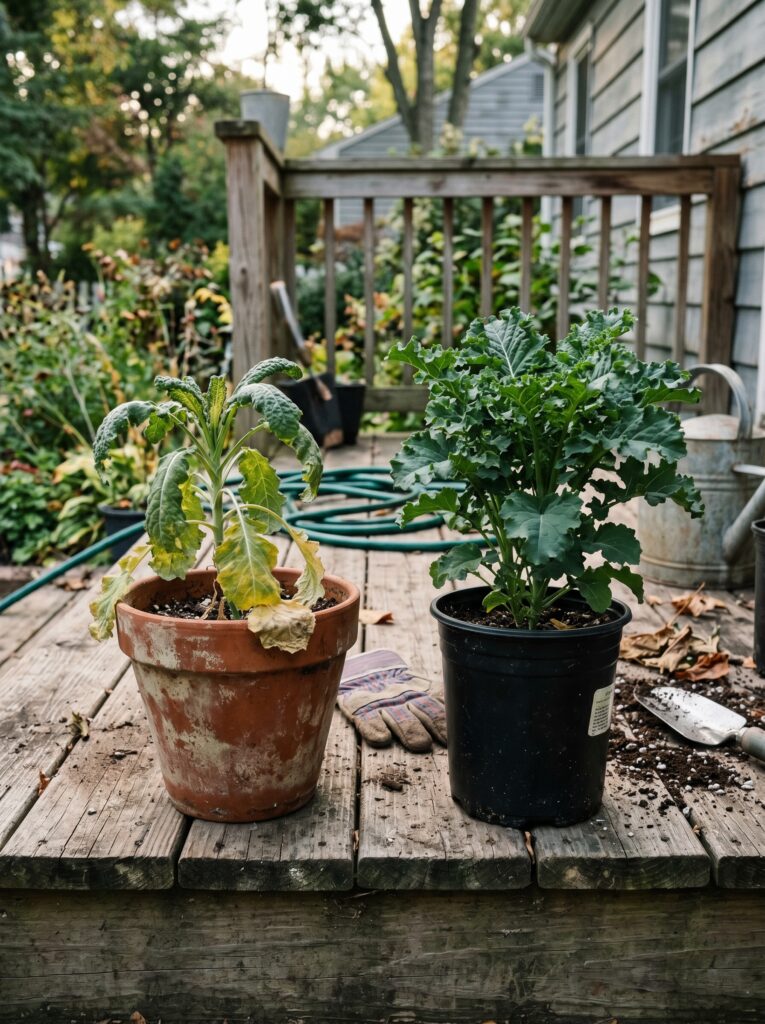
Most beginners think yellow leaves mean the plant needs more water. I see it every single weekend in my neighborhood—someone out there with a garden hose, drowning a plant that’s already gasping for air. Half the time, that extra water actually makes the problem worse.
The truth is, your plants are usually trying to tell you something much deeper, literally. They’re screaming about what’s happening in the soil, but since they can’t talk, they use colors, spots, and stunted growth to get your attention.
In this guide, I’m going to show you how to actually “hear” them. We’re going to skip the over-complicated lab reports for a minute and look at the dirt under your fingernails. You’ll learn how to test your soil at home without spending a fortune, why most of the stuff you read on social media about “miracle fixes” is junk, and how I personally saved my prize tomatoes after nearly killing them with too much store-bought “enriched” soil.
I once spent forty bucks on a fancy electronic probe that promised to tell me everything. It told me my soil was “perfect” while my hydrangeas were turning a sickly shade of lime green and dropping dead. I learned the hard way: expensive gadgets don’t replace basic observation.
But here’s where it gets tricky: soil isn’t just “dirt.” It’s a living, breathing thing.
Signs You’re Doing It Wrong
Before we dig in, let’s look at the red flags. If you’re seeing these, stop what you’re doing and put the fertilizer down.
- The “Yellowing Top” Trap: If the new leaves are yellow but the old ones are green, you’ve likely got a pH issue or a micronutrient lockout. Adding more “all-purpose” food won’t help.
- Water Standing Still: If you water your garden and the puddles are still there ten minutes later, your soil texture is a mess. No amount of plant food fixes “wet feet.”
- Stunted But Green: Your plants look healthy, but they haven’t grown an inch in a month. This is usually a sign that the roots are hitting a “wall” or the nitrogen is trapped.
- Crispy Edges: You think it’s heat, but if the soil is damp and the edges are brown, you might have salt buildup from cheap fertilizers.
- Purple Veins: Especially in tomatoes or peppers. That’s a classic “I can’t find any Phosphorus” scream.
Why Is This Happening? (The Root Cause)
Most people treat their soil like a trash can. They throw in some bagged dirt, maybe a handful of those blue crystals, and expect magic. But your soil is the stomach of the plant. If the stomach is sick, it doesn’t matter how much “food” you give it; it can’t digest it.
Texture is the first big hurdle. If you have heavy clay, it’s like trying to grow a plant in a brick. If you have sand, it’s like trying to grow a plant in a sieve—everything just washes right out.
Then there’s the pH. This is the one that trips up everyone. Think of pH like the “gatekeeper.” If your soil is too acidic or too alkaline, it literally locks the nutrients in the soil. The food is there, but the plant can’t grab it. It’s like being at a buffet with your hands tied behind your back.
Airflow matters too. Roots need oxygen. If your soil is compacted—maybe because you walked over it too much while it was wet—the roots suffocate.
The Great “Fertilizer vs. Soil” Confusion
I get this question at least once a week: “What fertilizer should I buy to fix my soil?”
The answer is usually: None.
Fertilizer is a vitamin, not a meal. If your soil is dead—meaning it has no organic matter or microbes—fertilizer is just a temporary chemical spike. It’s like living on energy drinks instead of eating dinner. Eventually, the crash comes.
Most internet advice tells you to buy a “3-in-1” soil tester or a specific brand of liquid feed. They oversimplify it because they want to sell you a bottle. In reality, I’ve found that a bag of simple, unfinished compost often does more for a struggling garden than a $50 bottle of “Growth Serum.”
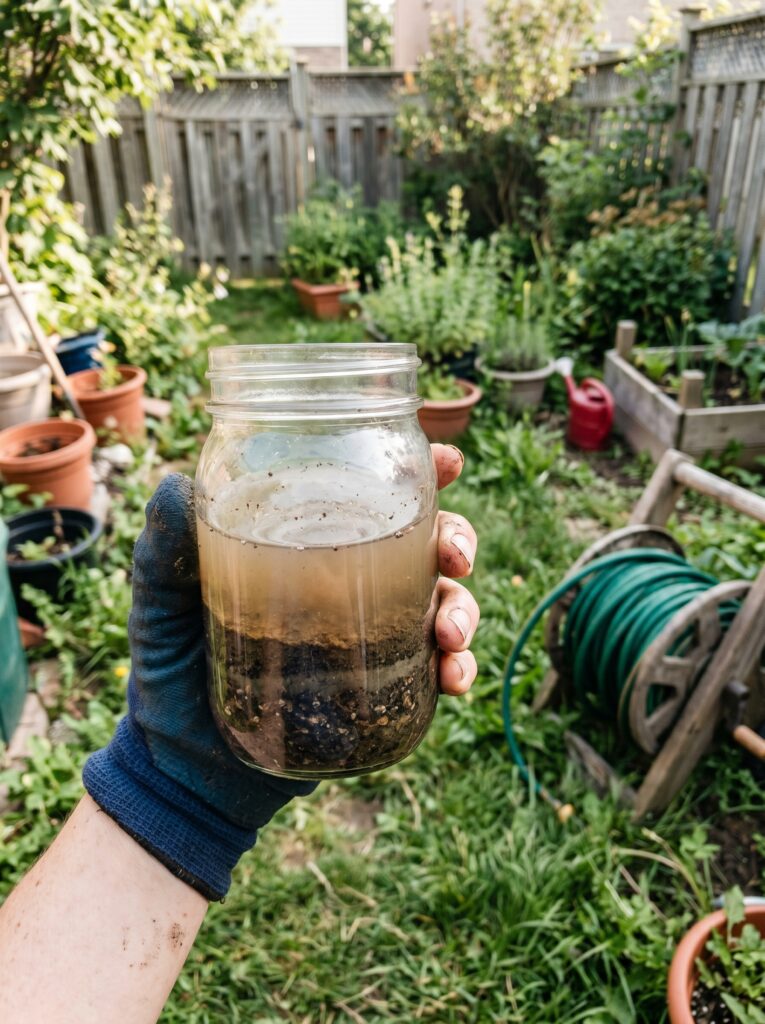
DIY Soil Testing: The “Kitchen Science” Method
You don’t need a lab. You need a jar, some vinegar, and some baking soda. This is how I check my beds every spring before I even think about buying seeds.
The Jar Test (Texture)
Find a glass jar (old pasta sauce jars are perfect). Fill it halfway with your garden soil. Fill the rest with water, leave a little air at the top, and shake it like your life depends on it.
Now, set it on a shelf and leave it for 24 hours.
- The Bottom Layer: That’s your sand. It falls first.
- The Middle Layer: That’s your silt.
- The Top Layer: That’s the clay.
- The Floaters: That’s the organic matter (the good stuff).
If you see 80% sand and no floaters, your plants are thirsty and hungry. If it’s all clay, they’re drowning. The goal is a nice mix of all three.
The Fizz Test (Quick pH)
Take two bowls. Put a scoop of soil in each.
- In bowl one, add some vinegar. If it fizzes, your soil is alkaline.
- In bowl two, add a little water to make mud, then sprinkle baking soda on it. If it fizzes, your soil is acidic.
If neither fizzes? You’re probably in that “sweet spot” where most vegetables thrive. This isn’t precise down to the decimal point, but it’s enough to know if you’re heading for a disaster.
What Your Plants Are Actually Screaming
One thing most people miss is that a plant will tell you exactly what it’s missing if you know the code.
I had a row of peppers last year that looked “fine,” but the leaves were a weird, dark, almost bluish-green. I ignored it. Then they started dropping flowers. I realized my soil was way too cold and the phosphorus was locked out.
Nitrogen (The “Grow” Juice): Leaves turn pale green or yellow starting from the bottom up. The plant looks “tired.” Phosphorus (The “Flower” Power): Purplish tints on the underside of leaves or on the stems. Potassium (The “Immunity” Booster): The edges of the leaves look burnt or “scorched,” even though you’ve been watering.
The fix is actually simpler than you think: stop adding stuff and start balancing.
How to Fix It (The Real Solution)
Most gardening blogs give you a 10-step plan that costs $200. I don’t do that. Here is what actually works in a real, suburban backyard.
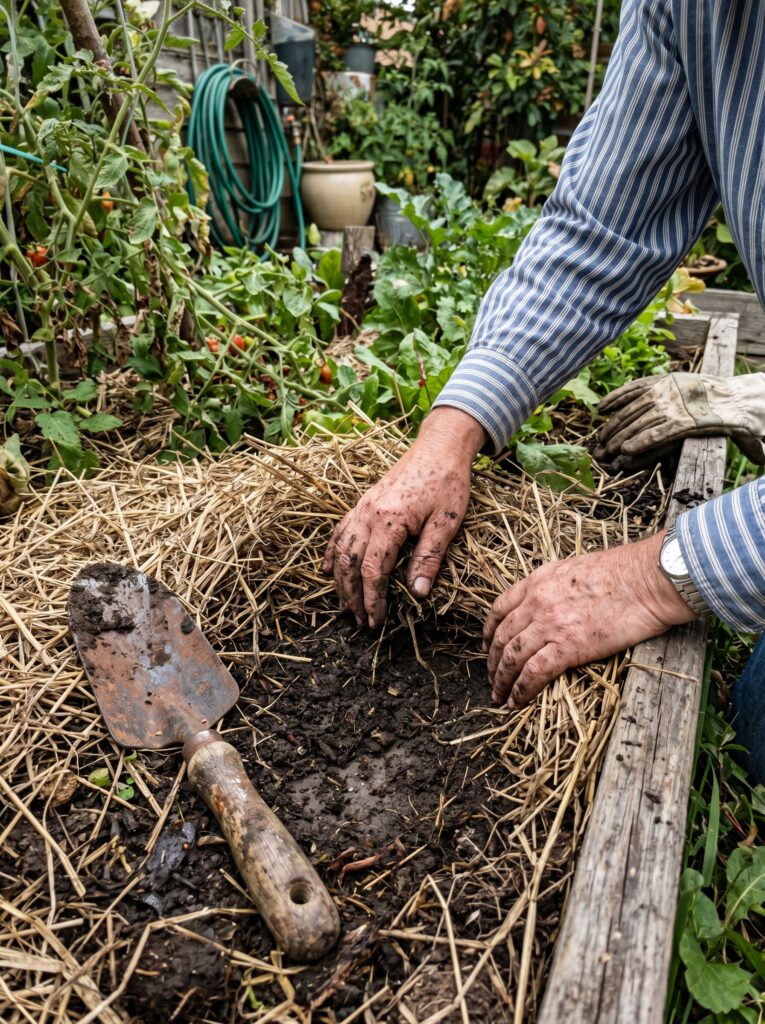
1. The “Compost Cure”
If your soil is too sandy, add compost. If it’s too clay-heavy, add compost. It sounds like a joke, but compost is the universal buffer. It holds water in sand and creates air pockets in clay.
I don’t buy the “designer” compost. I go to the local nursery and buy the basic stuff, or better yet, I use the pile in the corner of my yard where I throw my grass clippings and kitchen scraps.
2. Mulch Like You Mean It
Bare soil is dying soil. When the sun beats down on “naked” dirt, it bakes the life out of it. It turns the surface into a hard crust that water can’t penetrate. I use shredded leaves or wood chips. Not only does it keep the moisture in, but as it rots, it feeds the worms. Worms are better soil testers than I’ll ever be. If you have worms, your soil is healthy.
3. Stop Tilling
This is a hard one for people to accept. We grew up seeing big tractors tilling fields. But in a small home garden? Every time you flip that soil with a heavy machine, you’re destroying the fungal networks (mycelium) that help plants drink. You’re also waking up thousands of weed seeds. Just layer your amendments on top. Let the rain wash them down.
4. The “Slow Soak”
I learned this after years of thinking I was a “good” waterer. I used to spray the garden for 5 minutes and think I was done. Then I dug down two inches and realized the soil was bone dry.
Use a soaker hose or just leave the hose on a tiny trickle at the base of the plant for 20 minutes. You want the water to get below the roots so the roots grow down to find it. Shallow watering makes for weak plants.
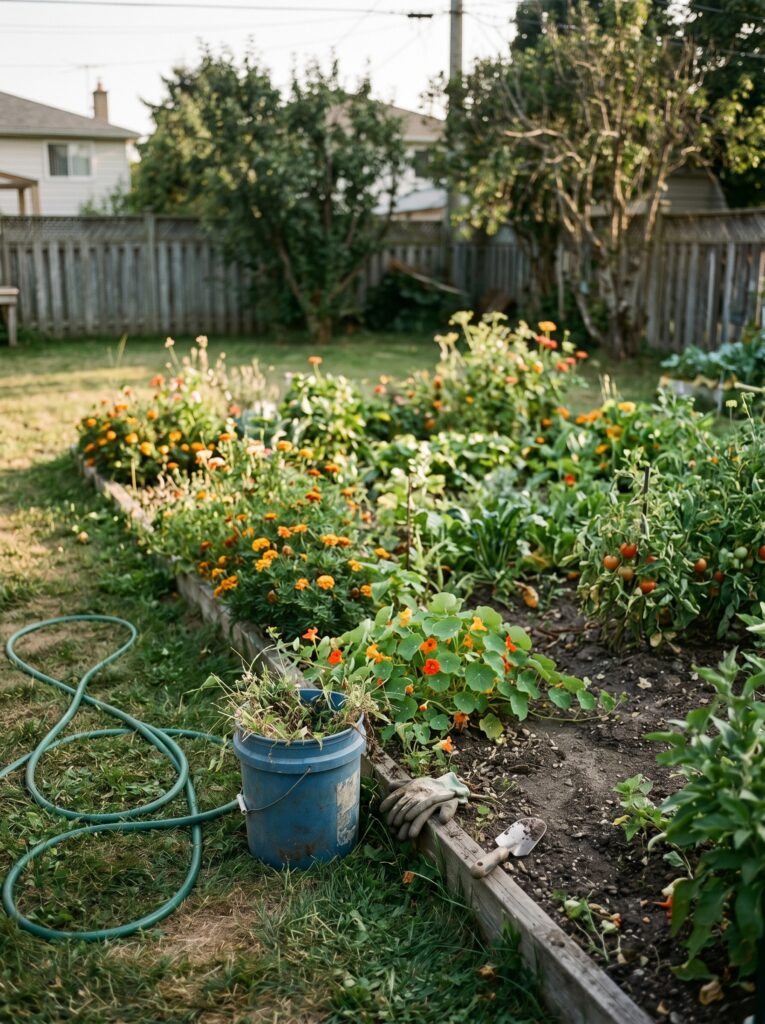
Different Cases: It’s Not One-Size-Fits-All
A raised bed is a completely different beast than the “native” soil in your backyard.
Indoor Plants
Indoor potting mix isn’t actually soil. It’s usually peat moss and perlite. It has zero nutrients after about two months. If your indoor pothos is looking sad, it’s probably because the “soil” has become hydrophobic—it’s so dry it’s actually repelling water. You have to soak the whole pot in a sink to “reset” it.
Raised Beds
These dry out fast. Because they are above ground, they bake. I’ve seen people fill raised beds with 100% bagged “garden soil” and wonder why their plants die. You need a mix. I like 50% topsoil, 40% compost, and 10% something for drainage like coarse sand or perlite.
Containers
In a pot, the plant is a prisoner. It can only eat what you give it. You have to be much more diligent with liquid feeding (I like fish emulsion—it smells like a pier, but plants love it) because every time you water, nutrients leach out the bottom.
Seasonal Factors: Don’t Panic in July
This is where beginners usually panic. In the middle of a US summer—especially if you’re in a place like Georgia or Texas—your plants are going to look like they’re dying at 3:00 PM.
They might be wilting, but that doesn’t always mean the soil is dry. Sometimes the plant is just shutting down to protect itself from the heat. If you water it while it’s in “shutdown mode,” you might actually rot the roots. Wait until the sun goes down. If it’s still wilting at 8:00 PM, then you have a soil moisture problem.
In the spring, the problem is usually “cold feet.” The air is warm, so you plant your tomatoes. But the soil is still 50 degrees. The plant sits there, turns purple, and refuses to grow. You have to wait for the soil to wake up.
Real Mistakes I Made (So You Don’t Have To)
- The Wood Chip Disaster: I once tilled fresh, “green” wood chips directly into my vegetable bed. I thought I was being “organic.” Instead, the wood chips sucked every bit of nitrogen out of the soil to try and decompose, and my corn crop turned white and died. Lesson: Only use wood chips on top of the soil.
- The “More is Better” Mentality: I over-limed a patch of lawn once because I heard it killed moss. I turned the soil so alkaline that nothing grew there for three years. Not even weeds. It was a dead zone.
- Trusting the Bag: I bought a “premium” potting mix that was actually full of fungus gnats. Now, I always leave a new bag of soil out in the sun (sealed) for a few days to let the heat kill any hitchhikers before I bring it into my greenhouse.
- The Panic Prune: I saw yellow leaves on a rose bush and assumed it was a disease. I hacked the whole thing back. It turned out it was just a simple Iron deficiency because the soil was too wet. I could have fixed it with a handful of amendments instead of a chainsaw.
Simple Setup & Budget
You don’t need a massive budget to get your soil right. Here is what I actually keep in my shed:
| Item | Purpose | Est. Price (USD) |
| Simple pH Test Kit | The liquid kind (more accurate than cheap probes) | $12 – $15 |
| Bag of High-Quality Compost | To top-dress struggling plants | $7 – $10 |
| Hand Trowel | For digging “test holes” | $10 – $20 |
| Mulch (Straw or Wood) | To protect the “soil skin” | $5 – $20 per bale/bag |
| Fish Emulsion | Emergency “green-up” food | $15 – $20 |
Total Starter Kit: Under $75.
You can spend hundreds on “smart” irrigation and lab tests, but honestly? These five things will solve 90% of your problems.
FAQ: Stuff People Always Ask Me
Yes and no. Don’t dump them directly on small plants; they can get moldy and crust over. Throw them in your compost pile first. They’re great for nitrogen, but they aren’t a “magic fix” for pH like people say
Please don’t. You’ll break your back and the soil’s structure. Put down 4 inches of compost and 2 inches of mulch. Let the worms do the digging for you. It takes a season, but it works better.
“Organic” on a bag just means it’s made of carbon-based stuff. Look for the “OMRI” seal if you want the real deal. But “organic” doesn’t always mean “good.” I’ve seen organic soil that looks like ground-up trash.
Once a year in the spring is plenty. If the garden is doing great, honestly, I don’t test it at all. If it ain’t broke, don’t fix it.
Celebrate! Mushrooms mean your soil is breaking down organic matter. It’s a sign of a healthy “living” soil. Just don’t eat them unless you’re an expert.
It’s the only test I trust. Stick your finger in the dirt up to the second knuckle. If it feels cool and damp, leave it alone. If it’s dry, water it. Simple.
Putting it All Together
If you want to stop the “screaming,” you have to stop looking at the leaves and start looking at the ground.
Start with a jar test this weekend. Figure out if you’re dealing with a “brick” (clay) or a “sieve” (sand). Once you know what you’re standing on, everything else—the watering, the feeding, the pruning—starts to make a lot more sense.
Gardening isn’t about being perfect. It’s about trial and error. I’ve killed more plants than I can count, and that’s exactly how I learned what they needed.
Once you understand what’s actually causing the problem, fixing it gets much easier. You’ll stop panicking at every yellow leaf and start feeling like you actually know what you’re doing. And trust me, your plants will thank you for it.
Most advice in this article comes from years of hands-on gardening experience and trial-and-error in real home gardens. Results can vary depending on your specific US climate zone and local growing conditions. Always observe your plants closely—they are your best teachers.
For more help, check out our soil health guide or learn about composting at home to start fixing your dirt for free. If you’re just starting out, my beginner gardening tips and plant care basics will get you on the right track. And remember, watering plants correctly is half the battle!
Aagam – Founder of SpruceTouch
Hi, I’m the creator behind SpruceTouch. i am a home and garden enthusiast who shares practical ideas for backyard design, garden projects, patio decor, and small outdoor spaces. Through SpruceTouch, he focuses on simple and budget-friendly ways to improve outdoor living spaces.