
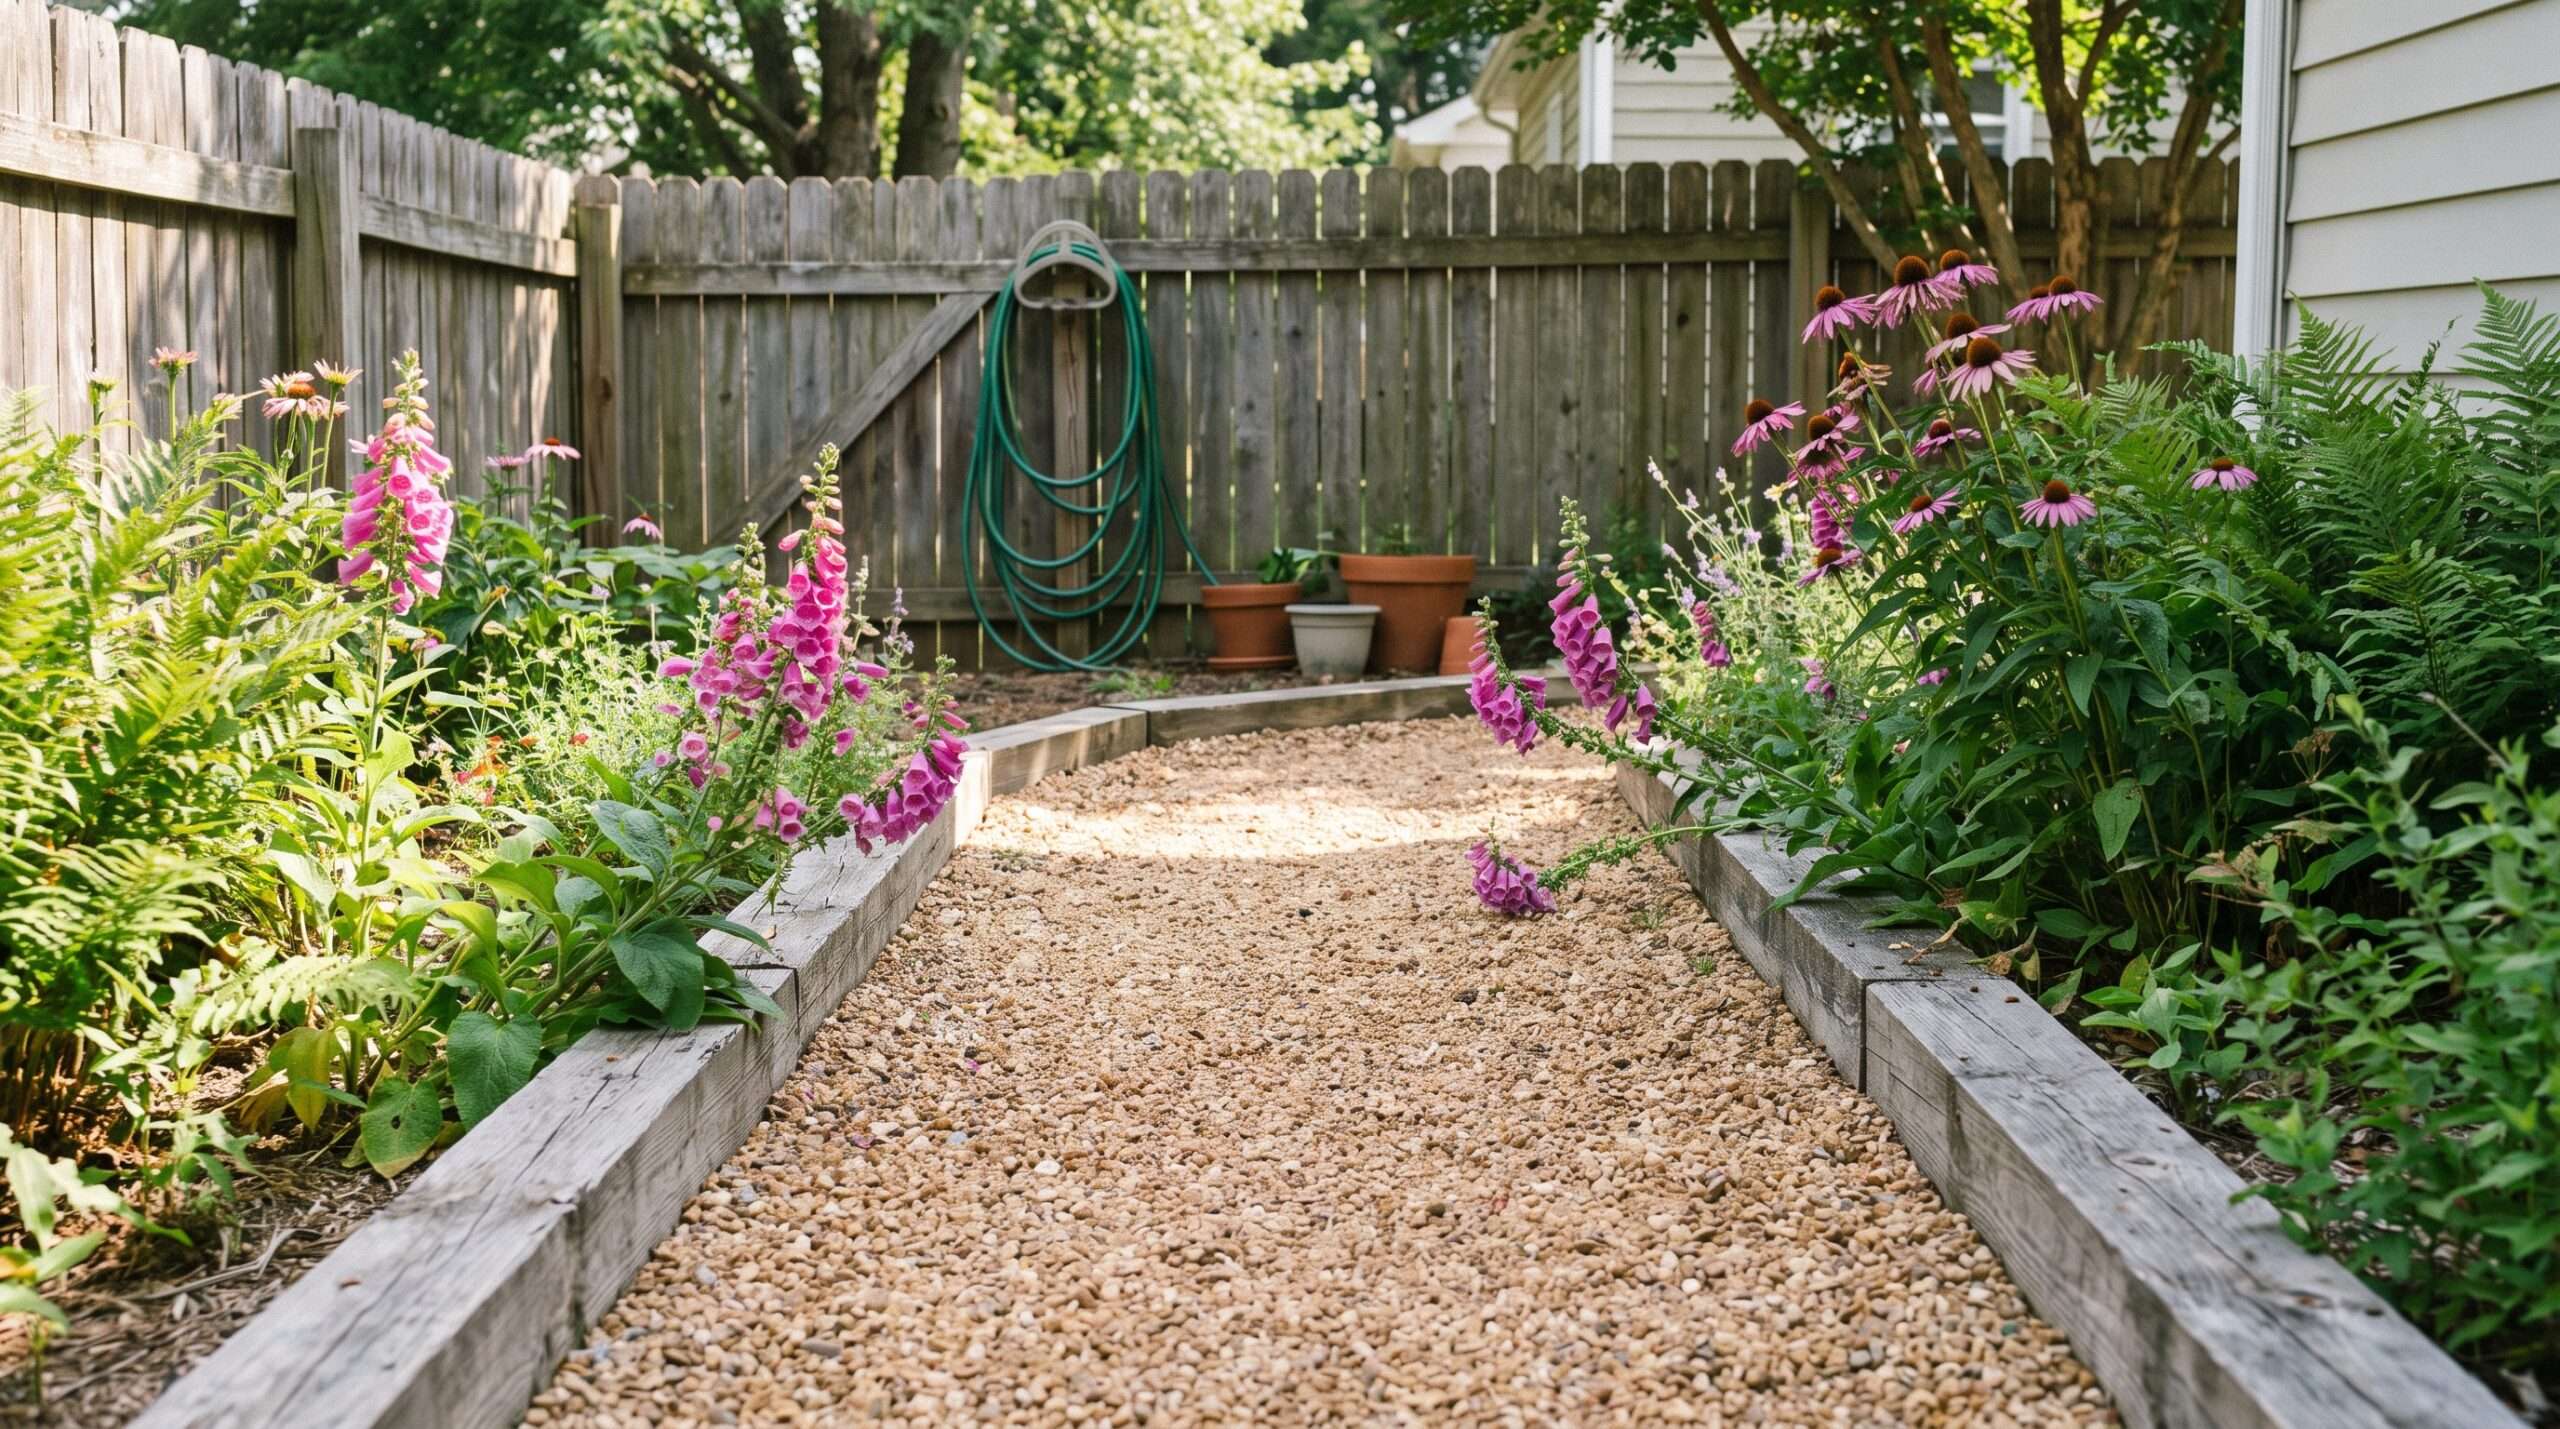
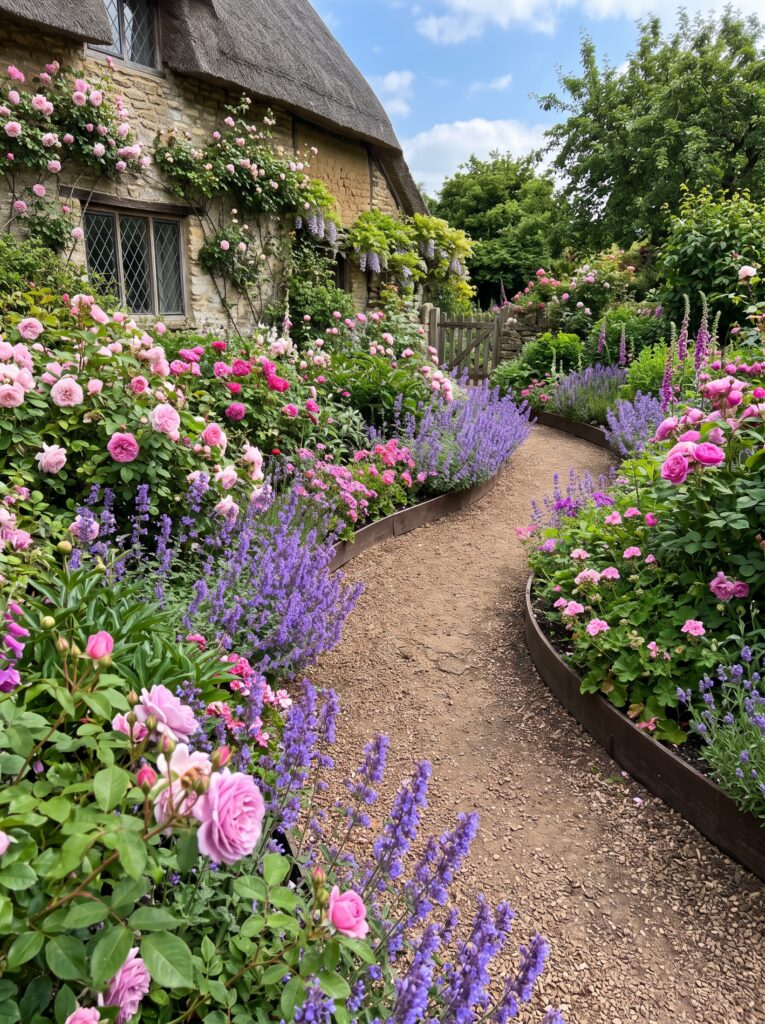
There is something deeply satisfying about a crunching gravel path winding through a sea of messy, colorful cottage flowers. For years, I tried keeping my garden paths neat using those cheap plastic edging strips from the big box stores, but they constantly popped out of the ground every winter and looked incredibly fake.
After about fifteen years of tweaking layouts, digging up sod, and testing out different borders in my own backyard, I finally realized that framing gravel with real wood is the secret. It gives the garden a structure that holds back the soil while letting the plants spill over the edges completely naturally.
My first attempt at this was a total disaster, mostly because I used thin landscape stakes that rotted out within two summers and left my pea gravel spilling into the lawn. I spent way too much money fixing mistakes before I figured out how to actually pin wood borders down so they stay put for a decade.
A few of these ideas honestly worked much better than I expected, and they completely changed how my backyard feels when you walk through it.
Essential Planning Checklist (Before You Start)
| Recommended Product | Why You Need It | Estimated Price | Action |
| [Heavy-Duty Woven Landscape Fabric] | It prevents aggressive weeds and grass from growing up through your gravel. | $20 – $45 | [Check Price on Amazon ↗] |
| [High-Visibility Landscaping String Line & Stakes] | Essential for mapping out straight lines or smooth curves before digging your trenches. | $12 – $25 | [Check Price on Amazon ↗] |
Disclaimer: As an Amazon Associate, we earn a small commission from qualifying purchases at no extra cost to you.
Quick Picks (Top 5)
- Best for Beginners: The flush-laid treated 2×4 frame. It sits low, lets your lawnmower ride right over the edge, and takes an afternoon to install.
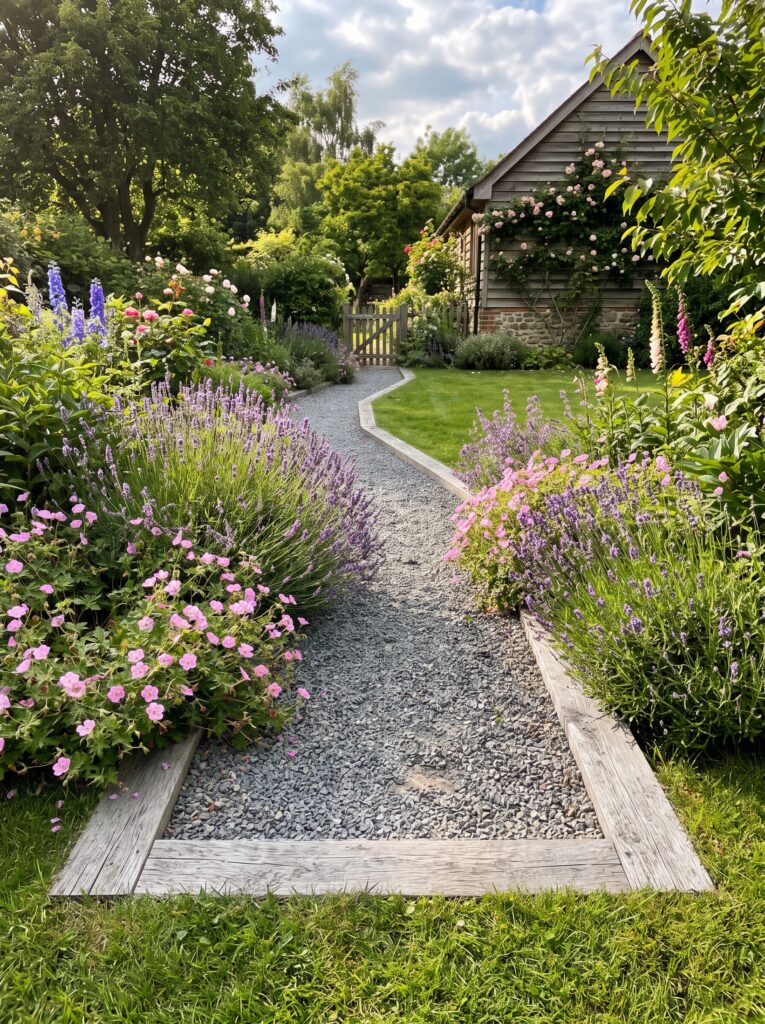
- High-Impact Winner: Rough-sawn cedar beams. They weather to a gorgeous silvery-gray that makes purple salvia and pink roses pop instantly.
- Budget-Friendly Favorite: Reclaimed construction timber scraps. If you can find 4×4 offcuts, they make a heavy, rustic border that costs next to nothing.
- Fastest Visual Win: The sunken railway sleeper path. It gives an immediate sense of age and permanent structure to a brand-new, empty yard.
- Most Creative: Woven branches over a hidden wood spine. It looks entirely hand-forged and rustic, keeping the gravel tightly contained.
1. The Flush-Mount Treated 2×4 Boundary
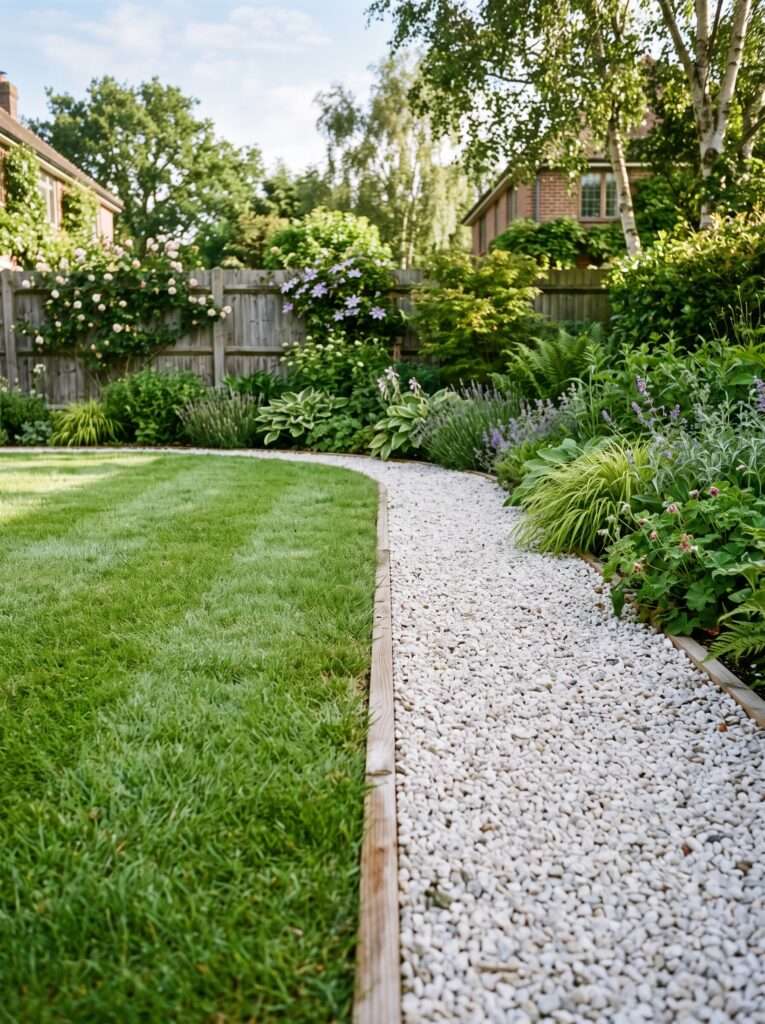
When I first started laying down gravel paths, I wanted something that wouldn’t catch the edge of my lawnmower every single week. This flush-mount approach uses pressure-treated 2x4s set flat into the ground, so the top of the wood sits exactly level with the dirt and grass. It creates a crisp, clean line that separates your walking space from your planting beds without creating a tripping hazard.
To make this hold up over time, you need to dig a shallow trench precisely the depth of the lumber. I learned this the hard way: if you don’t pack the soil tightly against the outside of the wood, the gravel will eventually push the timber out of alignment. Once it’s set, you drive long wooden stakes along the inside every four feet and screw the border directly into them.
The beauty of this setup is how it lets low-growing cottage favorites like creeping thyme or sweet alyssum spill right over the edge. The plants partially blur the wooden line, making the path feel like it’s been there for thirty years, while the gravel stays exactly where it belongs instead of migrating into your lawn.
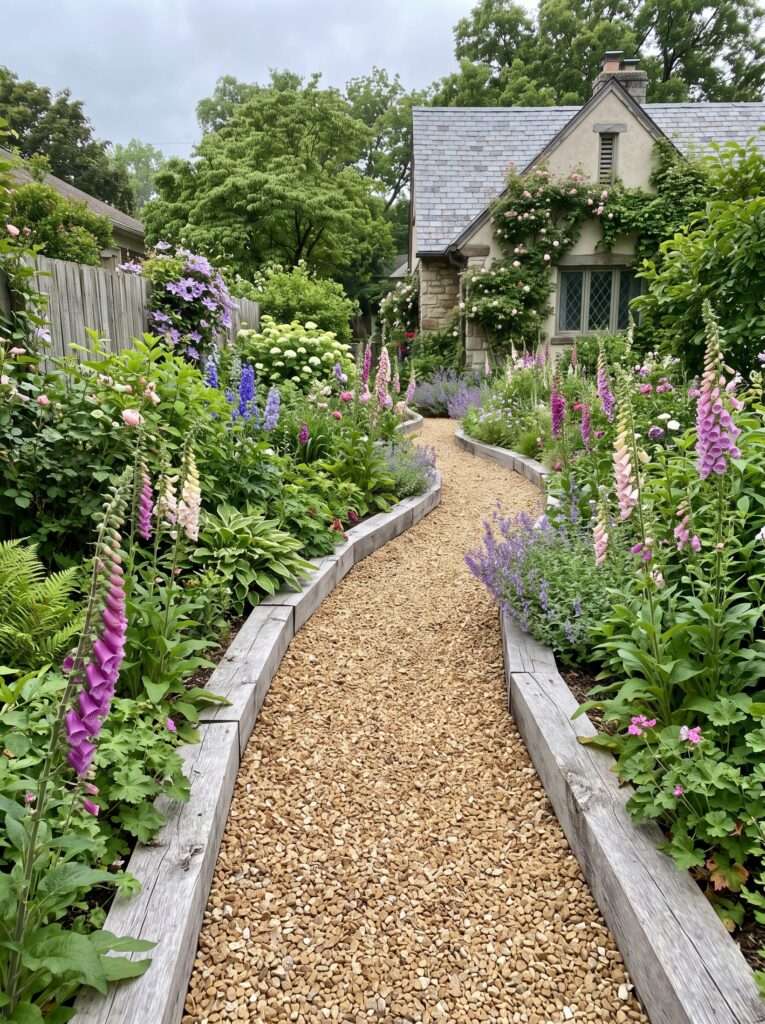
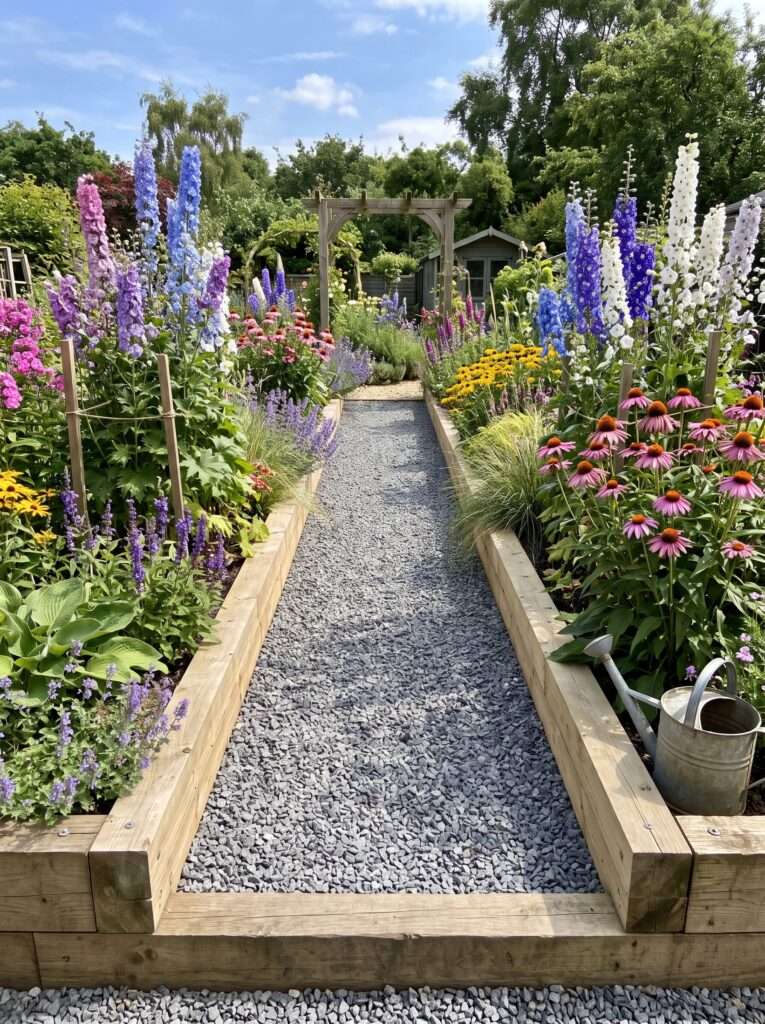
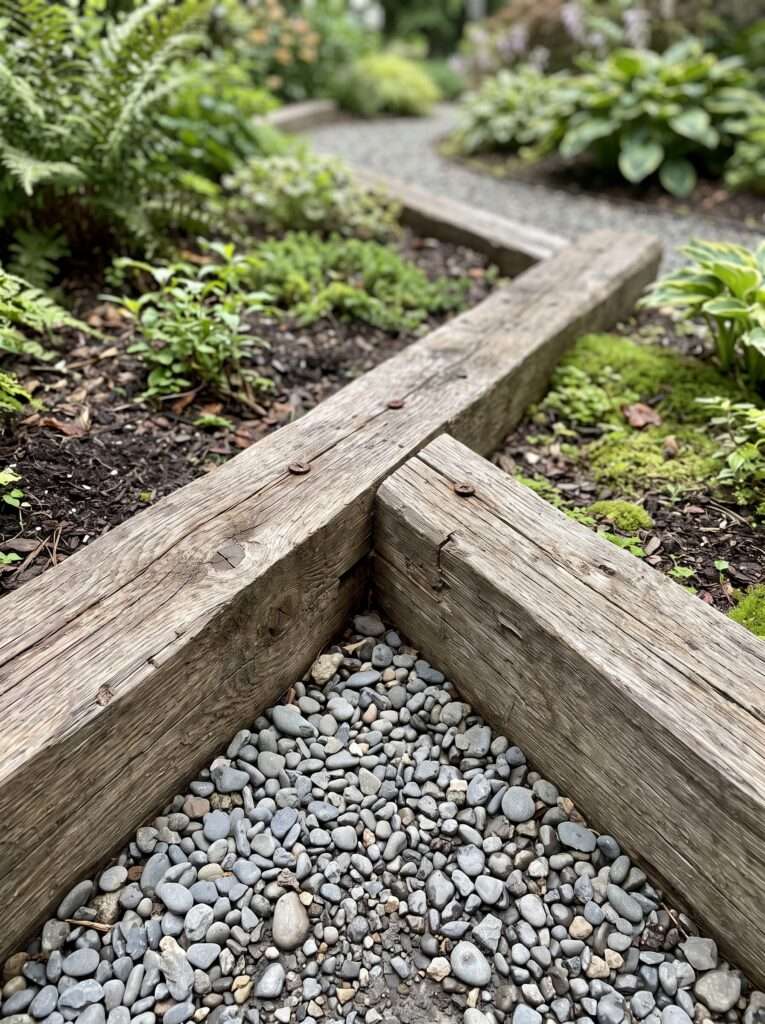
2. Chunky 4×4 Rough-Sawn Cedar Borders
If you want a path that feels substantial and framing that won’t rot out anytime soon, rough-sawn cedar 4x4s are incredible. They have a fuzzy, textured surface that looks vastly superior to the shiny, chemically treated wood you usually see at the lumber yard. Cedar naturally resists bugs and decay, and over a few seasons, it turns a stunning weathered gray that matches almost any cottage flower color scheme.
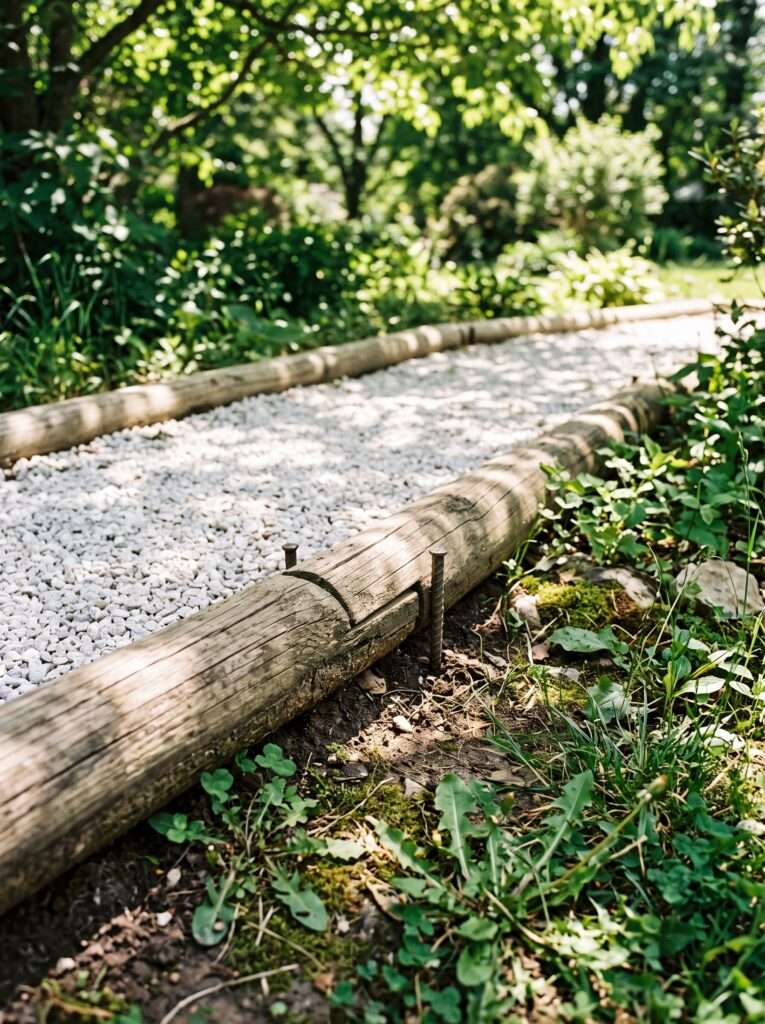
Because these timbers are heavy, they don’t shift easily once you lay them down. I like to anchor them by drilling vertical holes through the timber every few feet and driving long pieces of rebar straight into the ground. It takes some muscle, but that border isn’t going anywhere, even if you accidentally step right on the edge.
One thing most people ignore is the transition where your path meets a patio or a deck doorway. If you’re building a walkway like this near your house, you can easily tie the look together by checking out these diy attached pergola plans doorway shade to create a beautifully structured entrance that leads right onto your new gravel path.
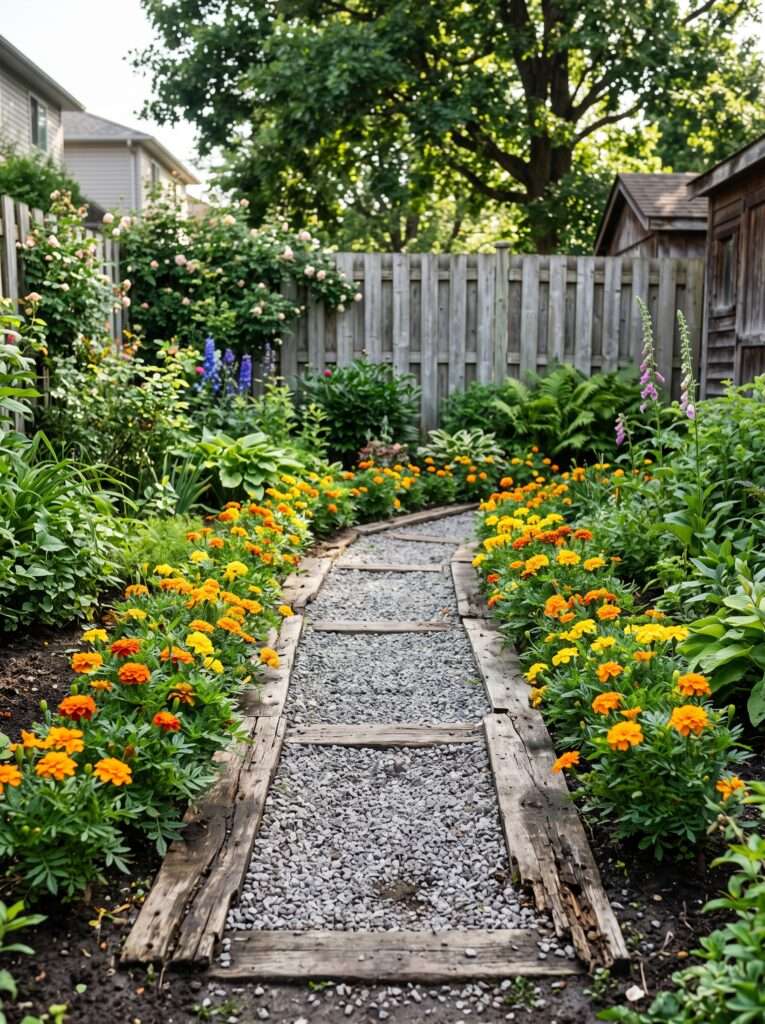
3. Low-Profile Overlapping Landscape Timbers
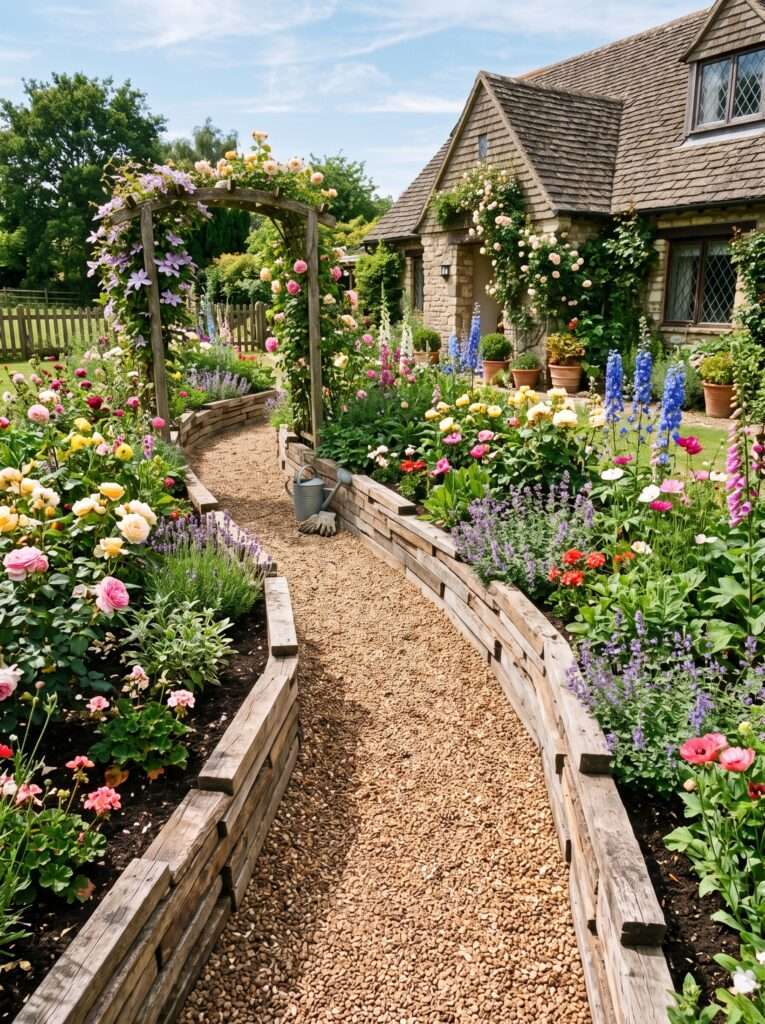
Landscape timbers—the ones with the two flat sides and rounded edges—are incredibly cheap, which makes them perfect if you have a long path to build on a tight budget. Instead of butt-jointing them end-to-end, which always looks a bit sloppy if your ground isn’t perfectly flat, try overlapping the ends slightly by cutting them at angles. This gives the path a subtle, hand-built rhythm that feels right at home in a casual cottage setting.
But here’s the kicker: because these timbers are often made from fast-growth pine, they need extra protection where they touch the wet soil. I always line the backside of the timber with a strip of heavy-duty landscape fabric before backfilling with gravel. This simple step keeps the wet dirt from sitting directly against the wood, adding years to its lifespan.
I used this exact method to frame a path that leads around the side of my garage to a small hidden seating area. The rounded edges of the wood feel softer underfoot if you happen to stray off the gravel, and they frame low-growing mosses beautifully.
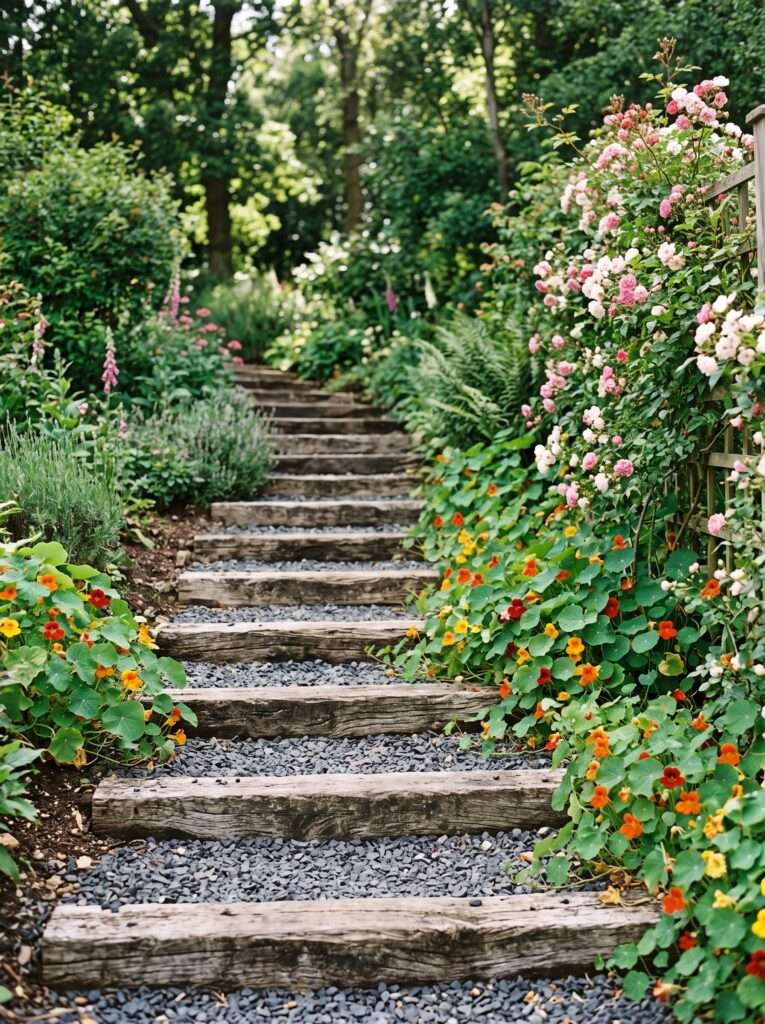
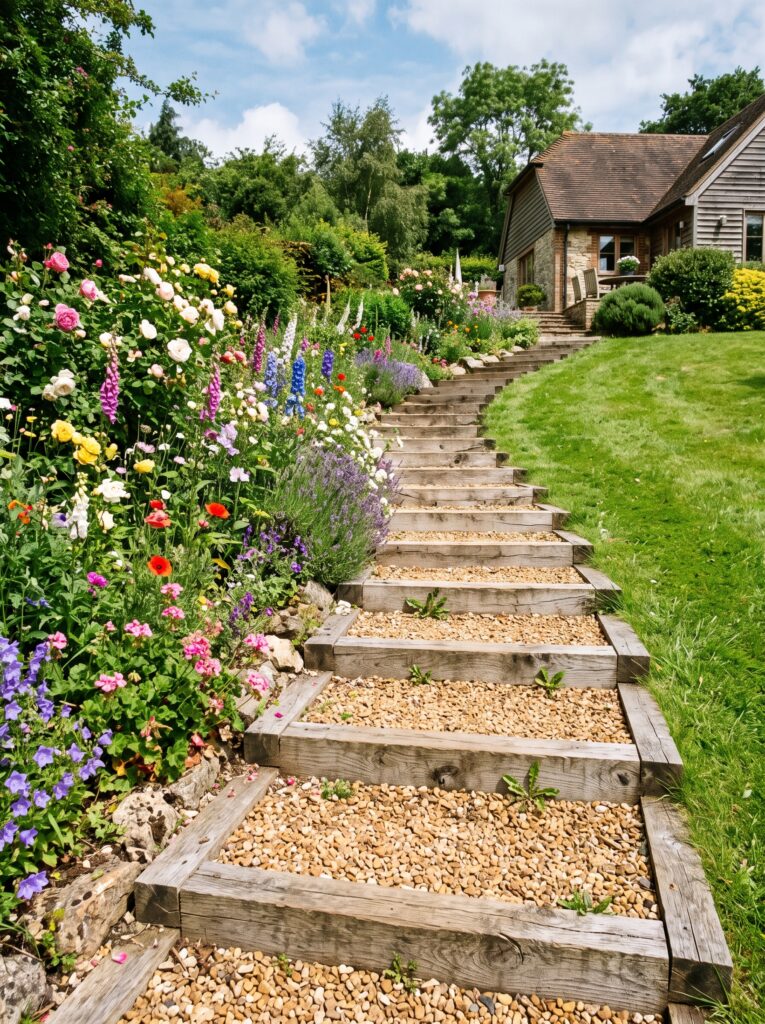
4. Sunken Railroad Sleeper Stepping Frames
If you love the look of old, historic gardens, using chunky, weathered railroad sleepers (or thick crossing timbers) is the way to go. Instead of running them continuously along the edge, you can use short, two-foot sections of the sleepers placed horizontally across the path like ladder rungs, with the gravel filled into the pockets between them. It creates a gorgeous timber-and-gravel stair-step effect that works beautifully on slight slopes.
This looked great online when I first saw it, but I learned this the hard way: old railroad ties can sometimes bleed sticky black creosote when the summer sun beats down on them. If you have kids or pets running around barefoot, look for untreated hardwood sleepers or thick oak beams instead of authentic reclaimed railway ties.
The weight of these beams means you don’t need many stakes to keep them down. You just excavate a shallow bed for each timber, level it up, pack gravel around it, and let gravity do the work. It provides a rock-solid walking surface that handles heavy wheelbarrow traffic without shifting an inch.
5. Layered Scrap Wood Border with Shifting Heights
You don’t always need to buy brand-new lumber to frame a cottage path. In fact, using different lengths and heights of scrap wood can create an incredibly charming, patchwork look that fits the whimsical vibe of a cottage garden perfectly. I once collected 2×6, 4×4, and 2×4 scraps from a neighbor’s remodeling project and used them to create a stepped border that changed heights every few feet.
The key to making this look intentional rather than messy is to keep the gravel level consistent while letting the wood tops jump up and down. Some sections might rise six inches above the path to hold back a tall mound of bleeding hearts, while the next section drops down flat to let creeping sedum crawl into the walkway.
If you have a lot of odd wood pieces left over after building a path like this, don’t let them rot in the garage. You can use those smaller bits for other water-wise projects; for example, look at these diy scrap wood multi level water cascade ideas to add a relaxing sound element right next to your new walkway.
6. Double-Stacked 2×6 Raised Path Frame
Sometimes your garden soil is incredibly heavy clay, or your yard floods slightly during heavy spring rains. When that’s the case, you don’t want a sunken path—you want a raised gravel walkway. By stacking two rows of pressure-treated 2×6 boards on edge, you create a sturdy, three-inch-deep wooden trough that sits slightly above the surrounding garden beds.
This keeps your feet completely dry and out of the mud, even during a downpour. To make sure the stacked boards don’t bow outward under the immense weight of the gravel, you need to drive heavy wooden 2×4 stakes into the ground every three feet on the inside of the frame, screwing both levels of the 2×6 boards securely into the stakes.
One mistake to avoid: Do not skip the compaction step here. Because the path is raised, if you don’t pack the gravel down with a heavy hand tamper before you start walking on it, your feet will sink straight into it like loose beach sand.
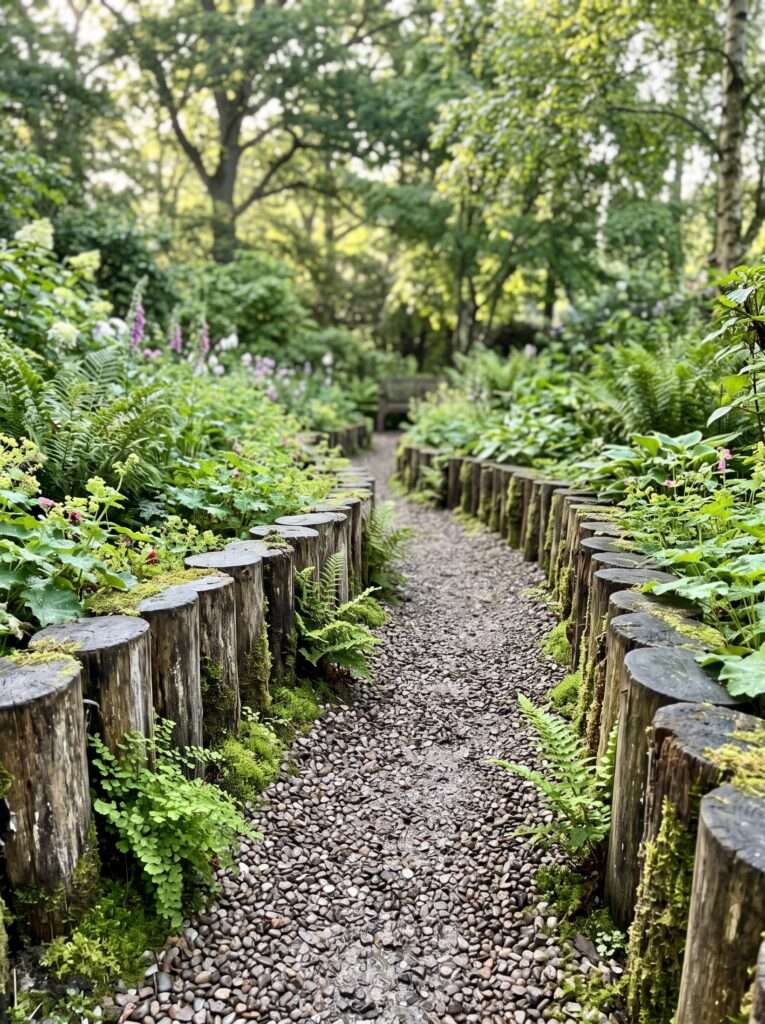
7. The Inset Log-Slice Edging
If you have access to fallen tree branches or logs from a recent pruning session, you can create a beautiful, organic border by cutting the logs into short, six-inch rounds. You bury these rounds vertically into the ground side-by-side like a mini retaining wall, leaving about two or three inches poking out above the dirt to contain your gravel path.
This creates a lovely, scalloped wooden border that looks completely integrated into a woodland cottage setting. It looks incredibly cozy when tucked under large hostas, ferns, and bleeding hearts. The varying diameters of the log slices add a wonderful texture that sharp, milled lumber simply can’t replicate.
The best part? It’s completely free if you use your own yard waste. However, keep in mind that untreated logs will naturally break down after four or five years, hosting beneficial garden bugs and fungi as they age, which is honestly part of the charm in an organic cottage garden.
8. Stepped Timber Frames for Sloped Yards
Rarely is a backyard completely flat, and trying to run a continuous gravel path down a hill without framing it properly results in all your expensive stone washing down to the bottom during the first heavy rainstorm. Building a series of shallow timber boxes that step down the slope creates a gorgeous, functional terraced walkway.
You use thick 4×4 or 6×6 timbers to create a series of wide, shallow boxes. Each box acts as a flat landing pad filled with gravel, stepping down gently to the next level. This slows down rainwater and provides a secure, level surface for walking.
If you have a slope that drops off into a concrete patio area at the bottom of the hill, you can make the whole space feel more cohesive by extending the woodwork. You might want to explore these diy low profile wooden deck over concrete patio designs to transition your rustic timber steps cleanly onto a beautiful, low-profile wooden deck area.
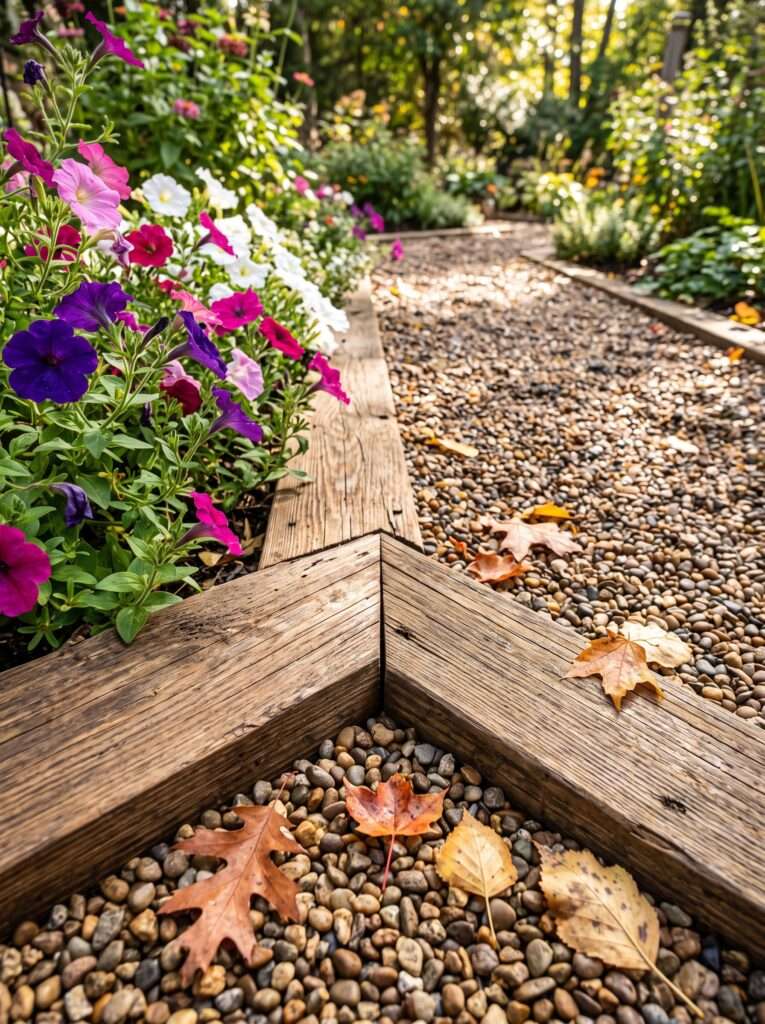
9. The Crisp Mitered Corner Border
For a cottage garden that leans a bit more structured or traditional, sharp lines can provide a wonderful contrast to the wild, floppy nature of the plants. Using crisp 2×4 or 2×6 cedar boards with perfectly mitered 45-degree corners allows you to create sharp geometric bends, zig-zags, or formal turns in your gravel paths.
This look works wonderfully if your path wraps around a formal elements like a birdbath, a sundial, or a small square garden bed. The clean lines of the wood frames make the wild eruption of nearby poppy and daisy blossoms look completely intentional.
To keep those mitered corners from opening up over time due to ground frost shifting the soil, use heavy metal corner brackets screwed into the inside faces of the wood frames where they meet. This keeps the joints tight and professional-looking for years.
10. Weathered Pallet Wood Stakes and Planks
If you love upcycling and want a project that costs virtually zero dollars, dismantling old shipping pallets is a fantastic option. The rugged, mismatched oak and pine planks from a pallet can be cut down into uniform lengths and screwed to sturdy internal wooden stakes to create a wonderfully rustic, low-profile gravel channel.
Because pallet wood varies in thickness and color, the resulting path border has tons of built-in character. Some boards will look weathered gray, while others retain a warm tan wood tone. This lack of uniformity is exactly what makes it look so charming when surrounded by heirloom cottage plants like hollyhocks and sweet peas.
Before you spend hours dismantling pallets, make sure they have an “HT” stamp on the side, which means they were heat-treated rather than chemically treated. This ensures you aren’t leaching harsh industrial chemicals into your pristine garden soil where you might want to grow herbs or edible flowers later.
Required Tools & Materials for Installation
| Recommended Product | Why You Need It | Estimated Price | Action |
| [Heavy-Duty Cast Iron Hand Tamper] | Compacts the soil subgrade so your wooden frames and gravel won’t sink or shift later. | $35 – $60 | [Check Price on Amazon ↗] |
| [Premium Coated Outdoor Wood Screws] | Structural, rust-resistant screws needed to securely lock your wood frames to the grounding stakes. | $15 – $35 | [Check Price on Amazon ↗] |
Disclaimer: As an Amazon Associate, we earn a small commission from qualifying purchases at no extra cost to you.
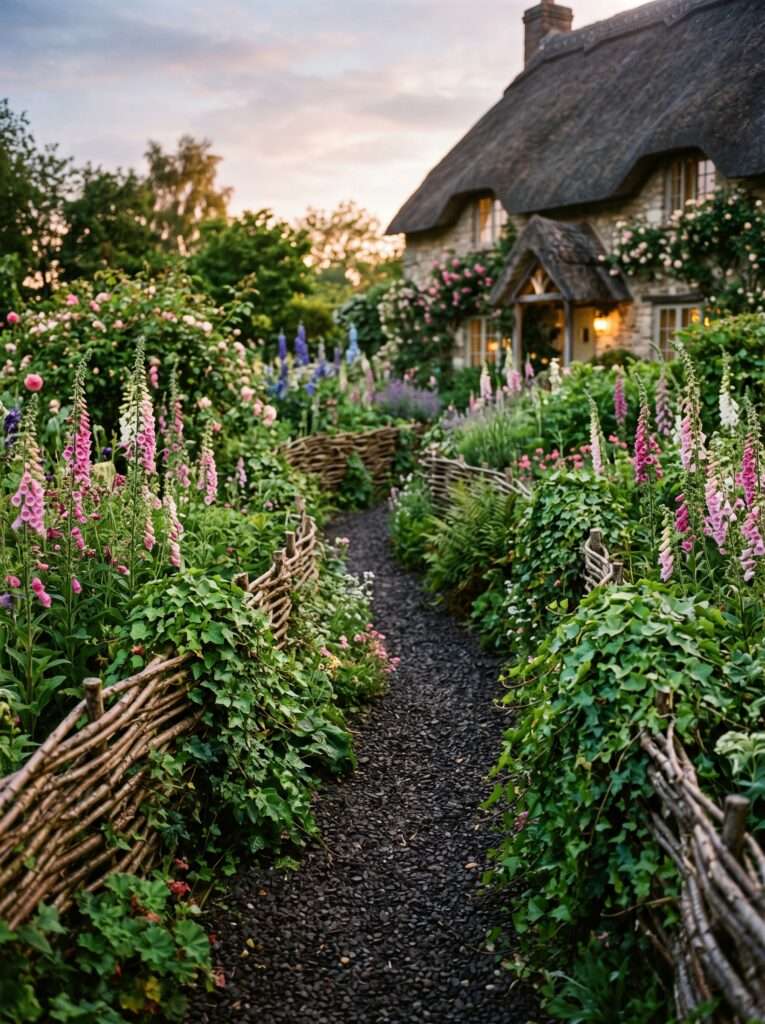
11. Hidden Spine Woven Branch Border
If you want a border that looks like it was plucked out of a fairy tale, you can combine a sturdy, hidden wood frame with woven branches on top. You start by installing a basic, low-profile 1×4 pressure-treated wood frame to do the heavy lifting of holding back the gravel. Then, you drive slender willow, hazel, or birch branches into the dirt right outside the wood and weave them horizontally over the top of the frame.
This gives you the absolute best of both worlds: the structural integrity and longevity of a solid piece of lumber, hidden beneath the gorgeous, handmade texture of traditional English wattle fencing. The gravel stays tightly locked inside the path, while the exterior looks completely soft, natural, and artisanal.
This setup looks particularly stunning when paired with a water feature. If you want a peaceful weekend project to build right alongside a path like this, check out how to make a diy solar fountain pond wooden box to bring life, movement, and soft sounds to your garden walk.
12. Thick Timber and Rebar Industrial-Rustic Frame
If you have a high-traffic area—perhaps the main walkway leading from your driveway to your back gate—you need a framing system that can handle kicking feet, rolling trash cans, and wandering lawnmowers without ever budging an inch. Using heavy 4×6 construction timbers laid flat provides a wide, solid wooden edge that feels as permanent as stone.
Instead of hiding the fasteners, you can embrace an industrial-cottage look by drilling holes through the timbers and driving heavy, thick black rebar stakes straight down through the wood into the earth, leaving the textured iron caps flush with the surface of the timber.
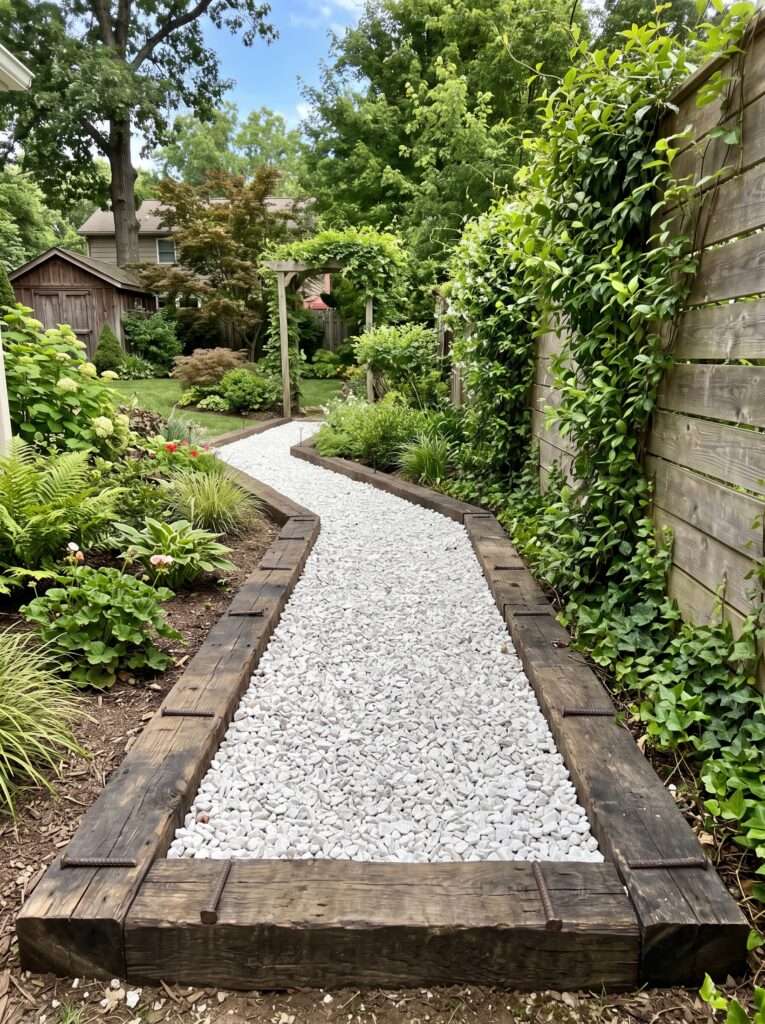
This setup creates a wonderful, grounded frame for lighter, airy gravel varieties like bright white chip stone or fine pink granite grit. The dark, heavy wood contrasts beautifully with light-colored stones, making the path a clear visual guide through your yard.
13. The Curved Plywood Form Border
Most people assume that wood framing means your gravel paths have to be perfectly straight lines, but that’s a myth. By using thin strips of exterior-grade plywood or flexible bender board wood, you can create smooth, sweeping curves that snake gracefully around your circular flower beds and old shade trees.
You cut the flexible wood strips into long four-inch-wide bands, layer two of them together for strength, bend them into your desired curve inside a dug trench, and secure them to thick wooden stakes every two feet. Once the gravel is poured inside, the weight holds the curve permanently in place.
This is the ultimate secret for achieving that classic, romantic cottage garden flow. A curved path keeps you from seeing the entire garden at once, encouraging guests to slow down and wander around the bend to see what’s blooming next.
14. Raised Timber Bench-Edge Walkway
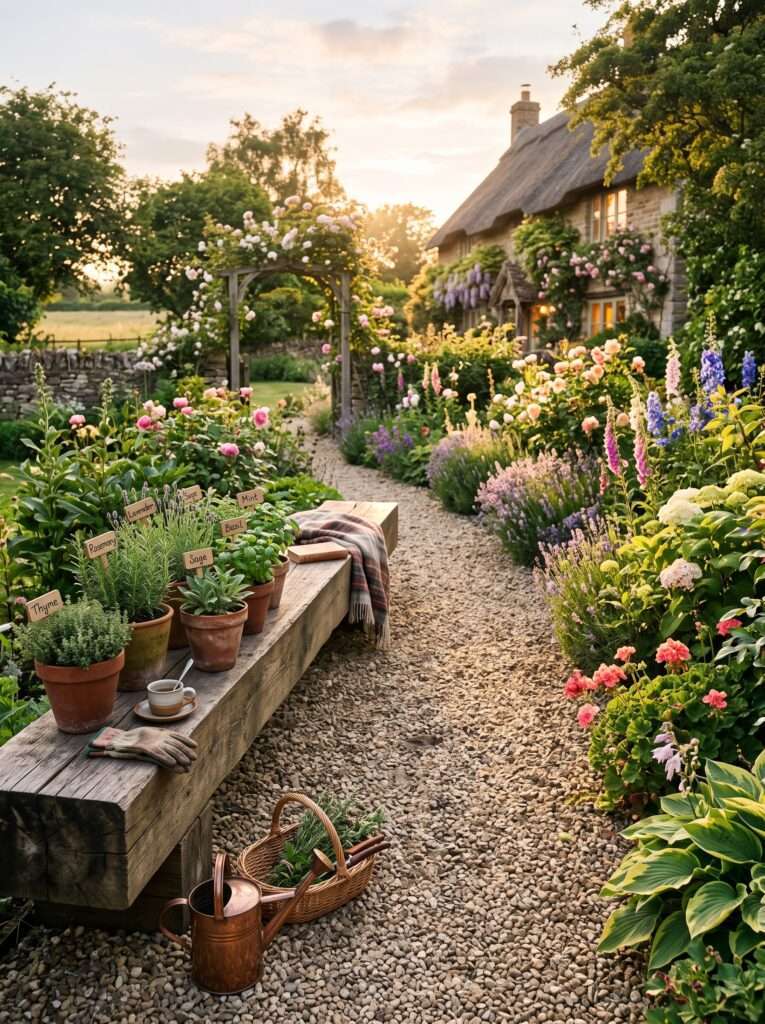
If you have an extra-wide pathway, you can make the framing double as a functional feature by using extra-thick 6×12 beams laid flat on one side of the walk. This creates a low, continuous wooden platform that stands about six inches above the gravel path, giving you a built-in place to sit down, weed your garden beds, or set down your morning coffee.
It’s an incredible way to add vertical structure to an otherwise flat yard. You can plant low, fragrant herbs like rosemary, lavender, and lemon thyme right against the seating side of the beam, so every time you sit down or walk past, your clothes brush against the leaves and release their scent.
This heavy-duty setup works incredibly well if your path winds past a larger structural feature in your yard. For instance, if you want to frame a beautiful walk that leads up to a stunning vertical element, you can tie it in with a diy cattle panel garden trellis arch to create a gorgeous, immersive green tunnel over your gravel path.
15. The Angled 4×4 Corner-Notched Border
If you like a look that feels highly crafted but doesn’t require complex carpentry skills, you can use thick 4×4 timbers and notch the ends where they meet. Instead of just butting them up against each other, you cut a half-lap joint (cutting away half the thickness of the wood on the ends of both boards) so they lock together like Lincoln Logs at every turn.
This creates a incredibly stable, interlocking framework that handles ground shifting perfectly during winter freezes. Because the corners are physically locked into one another, the weight of the gravel actually helps hold the wooden frame together, rather than pushing it apart.
It gives a very intentional, structural frame to your path that contrasts beautifully if you fill it with wild, self-seeding cottage flowers like columbine or forget-me-nots that constantly try to take over the walking space.
16. The Sunken Vertical Board Accent Line
For an ultra-low-profile look that keeps your path feeling wide and completely open, you can use thin 1×6 pressure-treated boards buried completely on edge, so only the top half-inch of the wood blade sticks out above the dirt. It acts almost like a metal or plastic edging strip, but with the warmth and natural texture of real wood.
The trick to this one is stabilization. Because the board is thin and sitting vertically, you need to pack the dirt on the garden side and the gravel on the inside simultaneously as you go. To keep it straight, screw small 1×2 wooden stakes to the garden side every three feet, burying the stakes completely out of sight beneath the topsoil.
It is one of the best tricks for creating a totally clean separation between a delicate creeping lawn (like bentgrass or clover) and your gravel path, without having a bulky piece of lumber dominating the visual landscape.
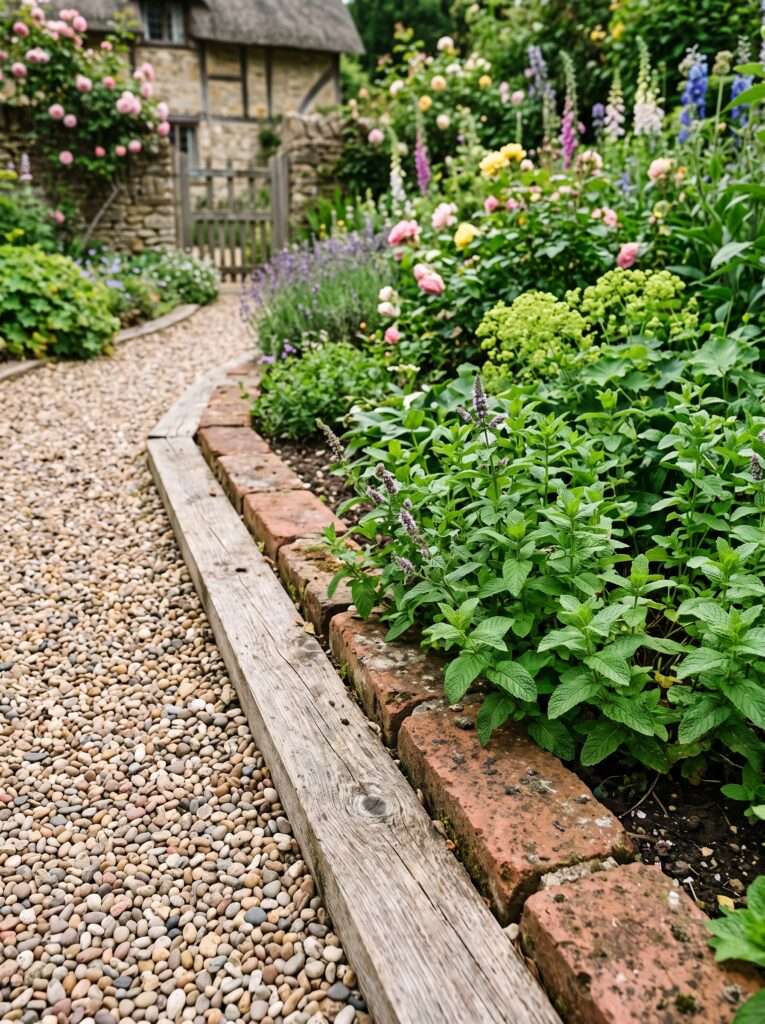
17. The Mixed Brick-and-Wood Cobble Border
If you happen to have a handful of old, red clay bricks left over from a chimney remodel or a patio project, you can combine them with 2×4 wood framing to create a gorgeous, high-texture border. You lay down your standard flat 2×4 wood frame first to act as your straight guide, and then you line the outside of the wood with a single row of red bricks pushed tightly against the timber.
The wood keeps the gravel from shifting inward, while the bricks give you a wide, stable decorative shoulder on the outside that prevents your garden plants from completely smothering the path. The combination of warm red brick tones and weathered brown wood looks incredibly classic, reminiscent of old European cottage estates.
I used this method around a small herb node in my yard, and it instantly made the space feel grounded and permanent, even though the whole setup only took me a Saturday morning to lay down.
Common Mistake: Never skip using a high-quality, woven landscape fabric under your gravel when building paths with wood borders. I tried skipping it on a small path to save twenty bucks, and within three months, the native grass and dandelion weeds grew straight up through the stones. It was impossible to weed without pulling up all my gravel with it. Lay the fabric down first, staple it to the inside of your wood frames, and save yourself a massive headache.
Premium Upgrades & Long-Term Maintenance
| Recommended Product | Why You Need It | Estimated Price | Action |
| [Non-Toxic Clear Wood Preserver] | Extends the lifespan of your timber borders, protecting them against ground-contact rot and moisture. | $25 – $55 | [Check Price on Amazon ↗] |
| [Ergonomic Spring-Action Cultivator Rake] | Perfect for periodic maintenance to keep your pea gravel smooth, level, and clear of fallen leaves. | $20 – $40 | [Check Price on Amazon ↗] |
Disclaimer: As an Amazon Associate, we earn a small commission from qualifying purchases at no extra cost to you.
How to Start (Simple Plan)
Building a basic, wood-framed gravel path doesn’t require expensive heavy machinery. Here is a simple, realistic weekend plan to get a basic 10-foot section done.
+-------------------------------------------------------+
|  [Planting Bed]                                       |
|  ================= Wood Border (2x4) ================  |
|  ::::::::::::::::: PEA GRAVEL PATH :::::::::::::::::  |
|  :::::::::::::::: (Over Landscape Fabric) :::::::::::  |
|  ================= Wood Border (2x4) ================  |
|  [Lawn / Grass]                                       |
+-------------------------------------------------------+
- Step 1: Mark and Dig. Outline your path using garden hoses or string lines. Dig out the grass and soil to a depth of roughly 3 inches. Make sure the bottom of your trench is relatively flat and well tamped down using your feet or a hand tool.
- Step 2: Set the Wood Frames. Lay your pressure-treated 2x4s or chosen timbers along the edges of the trench. Cut them to size with a simple hand saw. Drive 12-inch wooden stakes into the ground on the inside of the path every 4 feet, then drive outdoor deck screws through the stakes into your border boards to lock them in place.
- Step 3: Fabric and Stone. Lay your heavy-duty woven landscape fabric across the bottom of the trench, folding it up the inside edges of the wood frames. Trim any excess with scissors. Finally, dump in your pea gravel or crushed stone until it sits about half an inch below the top of your wooden border, and rake it smooth.
Things That Didn’t Work for Me
- Using Untreated Pine Furring Strips: When I first tried making curved paths, I bought cheap, untreated pine strips because they bent easily. They completely rotted out and turned into mush within eighteen months under the damp garden soil. Always use pressure-treated lumber or naturally rot-resistant woods like cedar or redwood.
- Making the Path Too Narrow: I once built a beautiful winding path that was only 18 inches wide to save space for more flowers. It looked lovely until I tried pushing my standard wheelbarrow down it, and the wheels kept jamming into the wooden borders. Make your primary paths at least 3 feet wide so two people can walk comfortably or a wheelbarrow can pass without scraping.
- Filling the Gravel All the Way to the Brim: In my early days, I filled the gravel right up to the exact top edge of the wood framing because I thought it looked nice and full. Every time anyone walked down the path, stones kicked out over the borders into the lawn, creating dangerous flying projectiles when I ran the lawnmower. Always leave at least a half-inch of wood lip exposed to catch shifting stones.
FAQ
Pressure-treated pine lumber rated for ground contact is the most budget-friendly option and lasts for many years. If you prefer a completely natural look without chemicals, rough-sawn cedar or white oak are incredible alternatives that age gracefully to a rustic gray.
You need to anchor them into the ground using either long wooden stakes driven along the inside of the frame or by drilling holes directly through thick timbers and pounding 18-inch metal rebar stakes straight into the dirt.
If you don’t use landscape fabric, yes, aggressive lawn grass will crawl right under the wood. Running a heavy-duty woven fabric completely under the path and pinning it tightly against the inside walls of your wood borders prevents this.
Yes, you can create segmented curves by cutting your straight boards into shorter 2-foot or 3-foot sections and joining them at slight angles. Alternatively, you can use thin, flexible wood bender boards for smooth, continuous curves.
A depth of 2 to 3 inches of gravel is ideal for a garden walkway. Any deeper than that and your feet will sink too far into the stones, making it tiring and difficult to walk on comfortably.
Building a beautiful path doesn’t have to be a massive, stressful renovation project that breaks your back or your bank account. Don’t worry about making every single joint absolutely perfect or hyper-aligned; a true cottage garden thrives on little imperfections and natural character. Start with a couple of ideas first, tackle a small ten-foot section over a weekend, and adjust things as you go.
Most ideas in this article come from years of real gardening experience and testing different setups at home. Results may vary depending on climate, space, and maintenance.
Aagam – Founder of SpruceTouch
Hi, I’m the creator behind SpruceTouch. i am a home and garden enthusiast who shares practical ideas for backyard design, garden projects, patio decor, and small outdoor spaces. Through SpruceTouch, he focuses on simple and budget-friendly ways to improve outdoor living spaces.