
If you have a small backyard, you know the struggle. You want that relaxing sound of moving water, but those massive, heavy concrete fountains at the garden center cost a fortune and require a forklift to move.
Over my last fifteen years of getting my hands dirty in the garden, I’ve tried just about every shortcut to get a water feature without digging up my entire lawn.
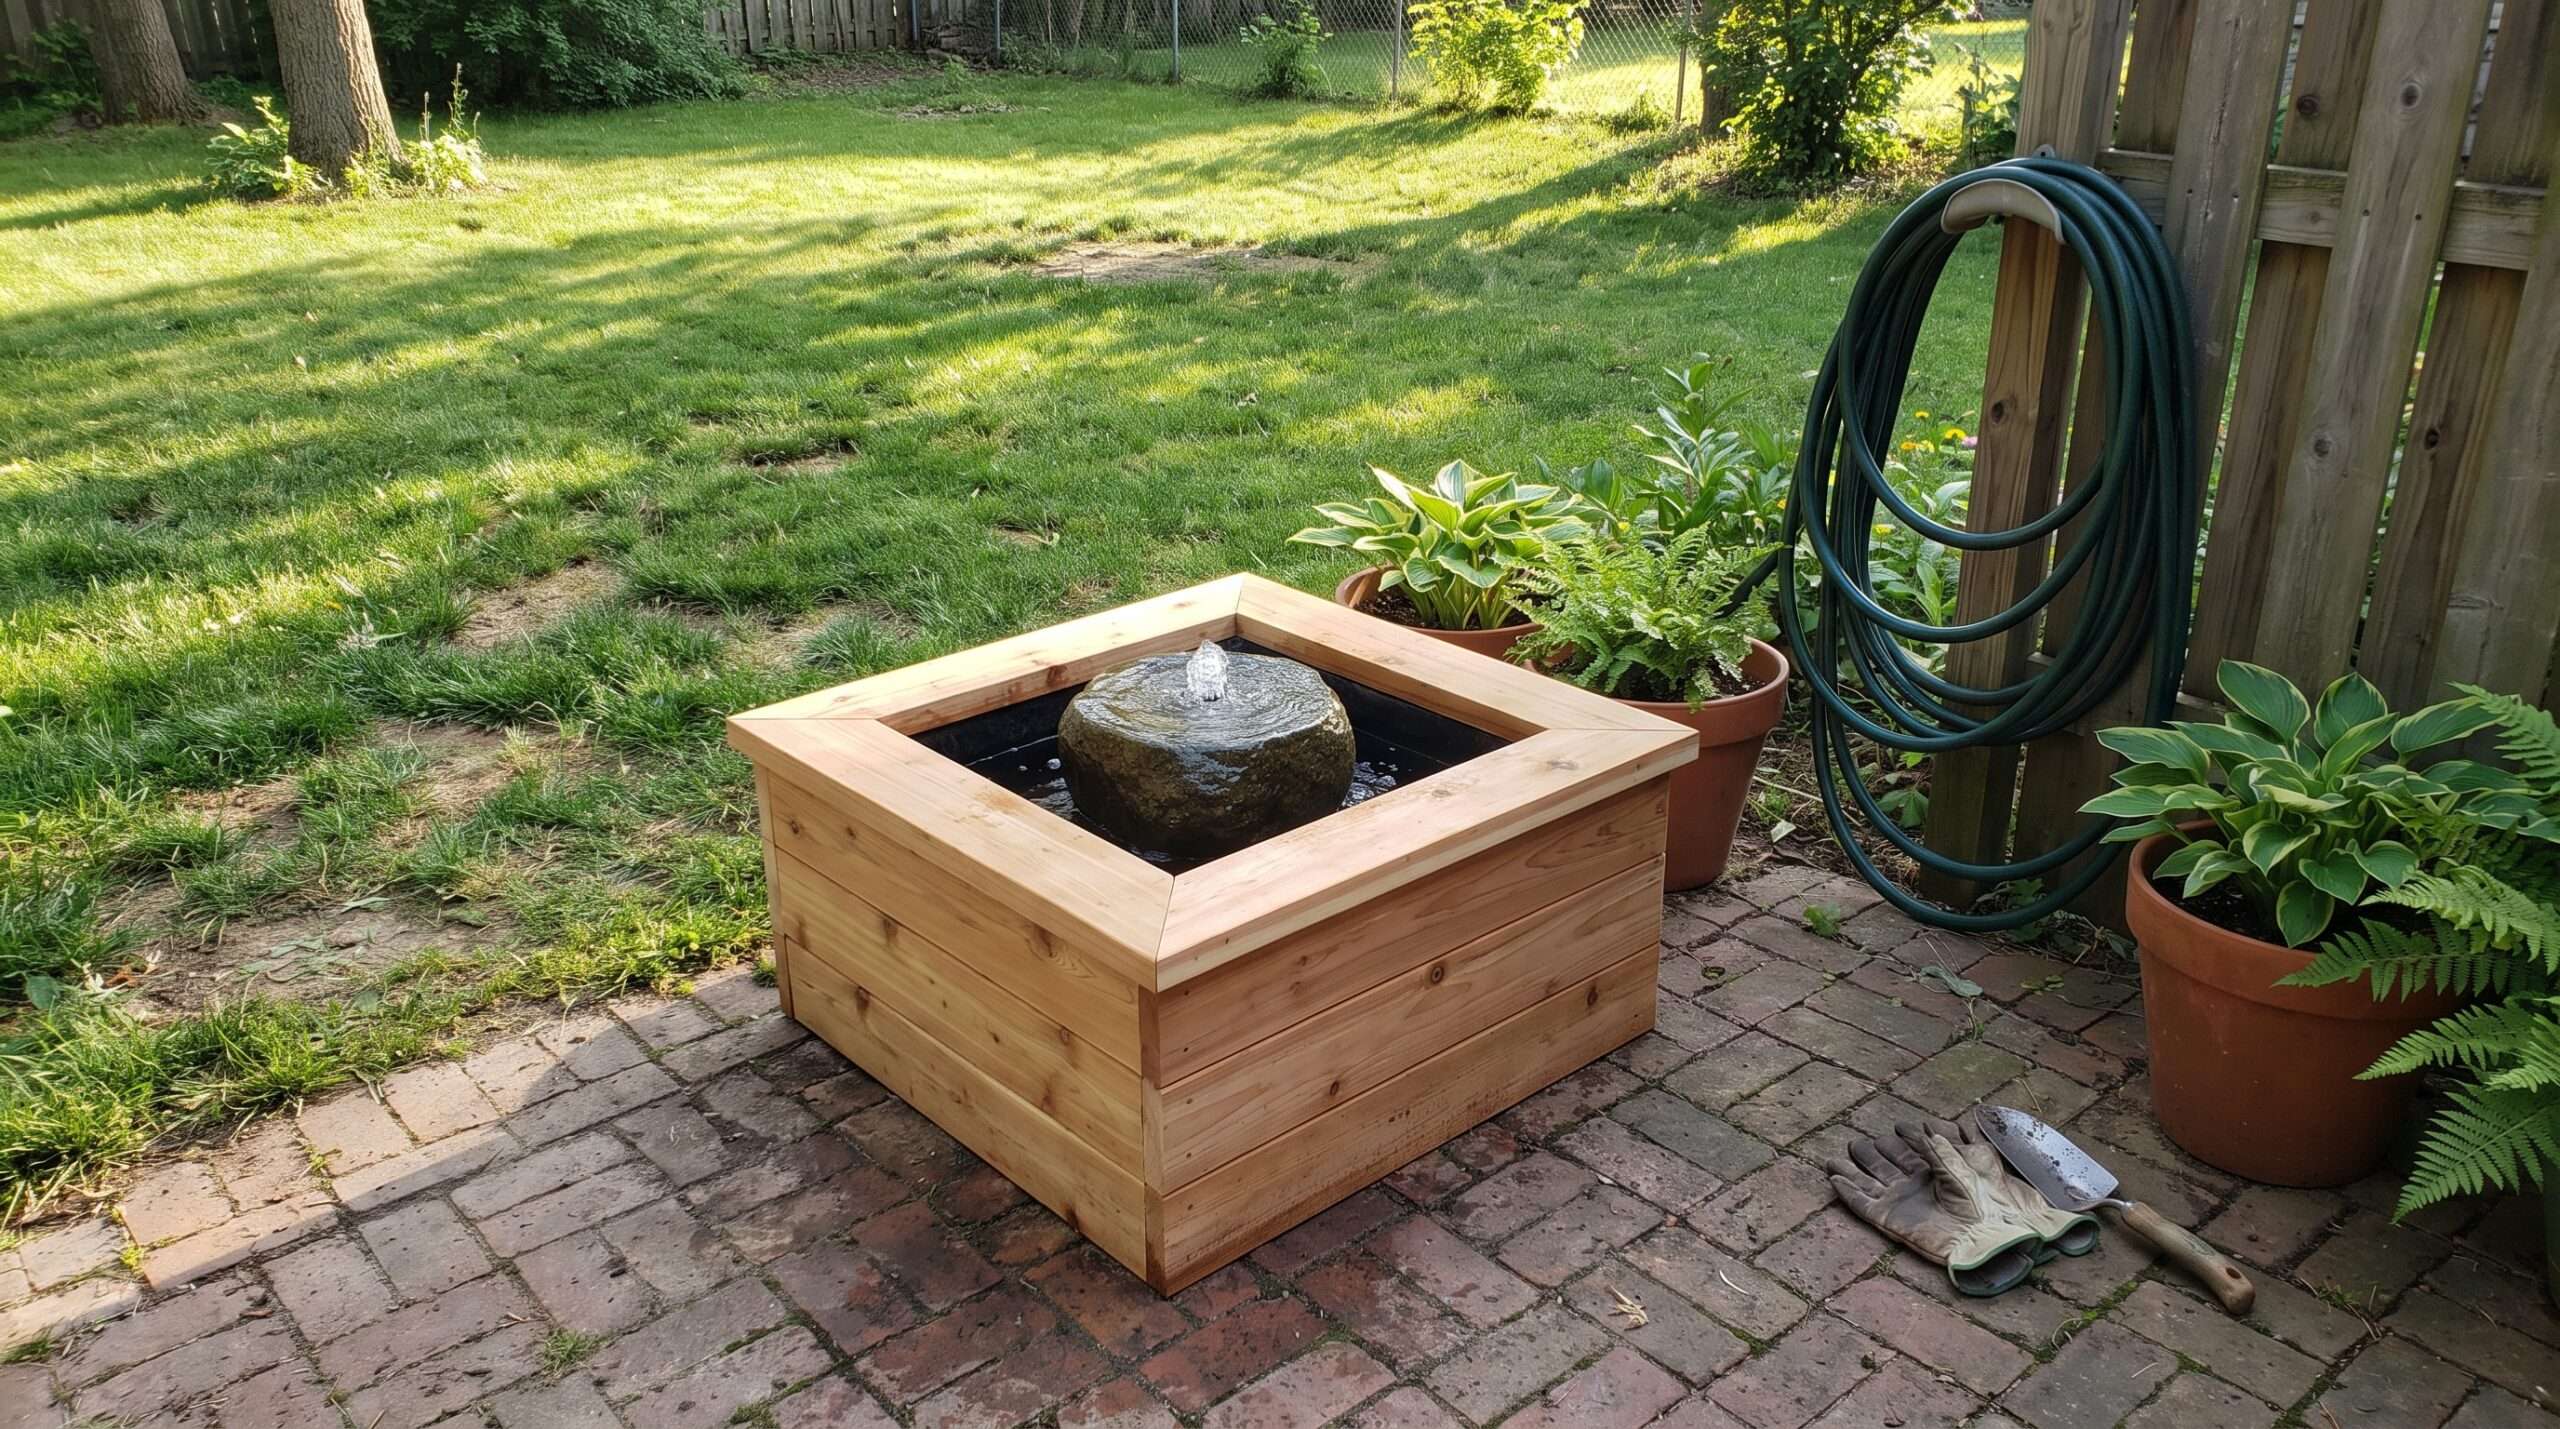
I’ve ruined a few cheap plastic tubs and flooded a patio corner or two along the way, but I finally hit gold with this specific project: a small, self-contained solar fountain enclosed in a handmade wooden surround box.
It gives you that high-end, built-in look but stays completely above ground, making it perfect for tight patios, renters, or anyone who just doesn’t want to dig. Let’s dive into how you can build one of these over a weekend without losing your sanity.
Essential Planning Checklist (Before You Start)
| Recommended Product | Why You Need It | Estimated Price | Action |
| Tuff Stuff Heavy Duty Round Tub | Buying your rugged inner plastic water basin first ensures you can build your frame perfectly around its exact dimensions. | $15 – $30 | [Check Price on Amazon ↗] |
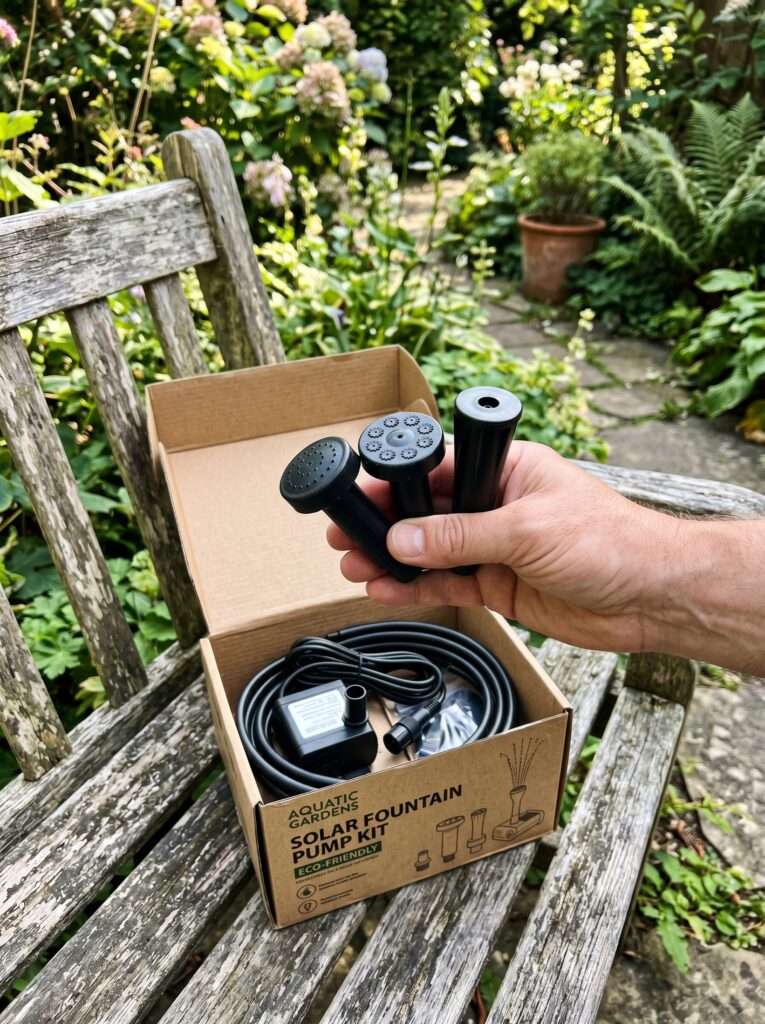
| Solar Fountain Pump with Battery Backup | Essential for keeping the water moving smoothly even when clouds pass over or after the sun goes down late into the evening. | $25 – $50 | [Check Price on Amazon ↗] |
Disclaimer: As an Amazon Associate, we earn a small commission from qualifying purchases at no extra cost to you.
Quick Check
- Sunlight is king: Your solar panel needs at least 5 to 6 hours of direct, unshaded sun daily.
- Container depth: Ensure your water tub is at least 12 inches deep so the pump stays fully submerged.
- Wood selection: Cedar, redwood, or treated pine will handle the inevitable water splashes best.
- The evaporation factor: Small ponds dry up faster than you think, especially in July and August.
Why the Box Matters (and Why Piling Rocks Failed Me)
When I first bought a cheap solar pump, I just threw a black plastic utility tub into a corner of my patio and piled some leftover river rocks around it.
I thought it looked natural. My wife politely told me it looked like a construction site hazard.
But here’s the kicker: she was right. The rocks shifted, mosquitoes loved the hidden gaps, and cleaning the tub meant dismantling a giant puzzle of heavy stones every single time.
That’s when I built my first rough wooden surround box.
A simple, clean wooden frame completely hides the ugly plastic liner, lifts the water feature to eye level, and gives you a flat ledge to set down a cup of coffee or a small potted plant.
It turns an eyesore into an intentional piece of garden architecture.
The Container Secret Most People Miss
You can’t just use any old box. You need the inner plastic liner to do the heavy lifting of holding the water, while the wooden box just acts as a beautiful jacket.
I learned this the hard way: never build your wooden box first and then try to find a plastic tub that fits inside it.
You will spend hours driving around Home Depot or Lowe’s, getting frustrated because every tub is an inch too wide or too shallow. Always buy your plastic basin first, then build the frame around its exact dimensions.
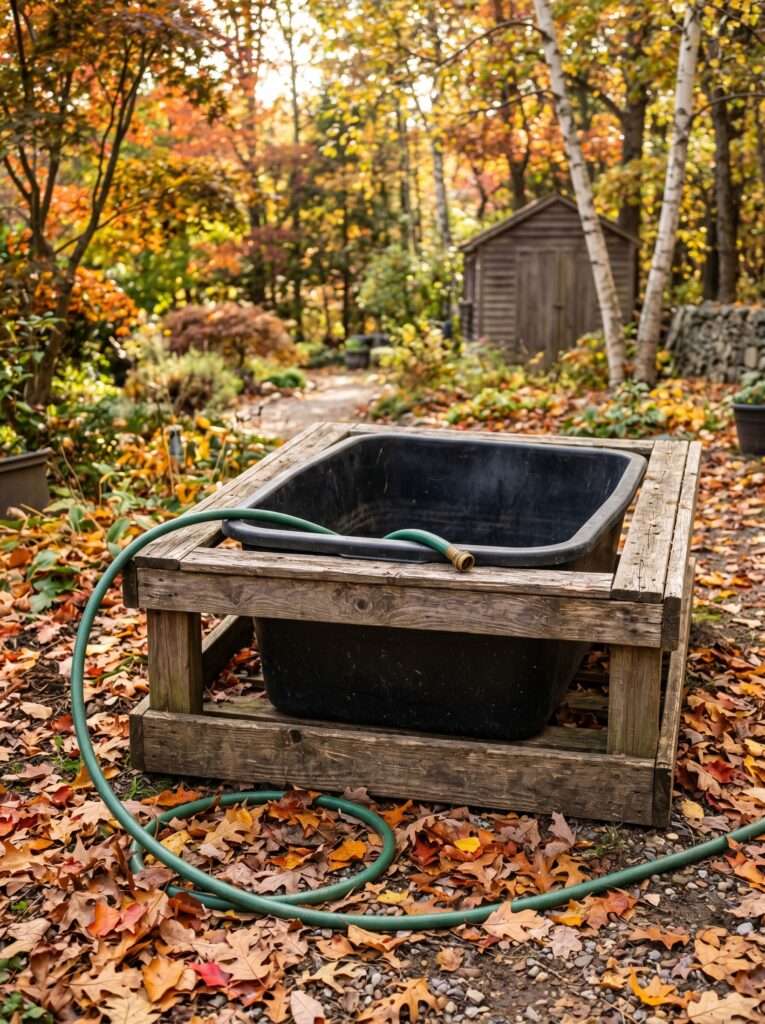
I highly recommend using a heavy-duty 9-gallon to 15-gallon plastic utility tub or a rugged storage tote.
These are incredibly tough, cheap, and won’t crack when the water freezes if you live in a colder climate.
Once you have that tub sitting on your lawn, you can pull out your tape measure and figure out your cuts.
Finding the Right Spot for Solar Power
Here’s where most people go wrong: they build a beautiful water feature under a gorgeous shade tree or right next to their covered patio furniture.
Then they realize their solar panel doesn’t get enough juice to move a single drop of water.
One thing I noticed over the years is that modern solar fountain pumps are surprisingly powerful, but they are incredibly sensitive to clouds and shadows.
Even a single overhanging leaf casting a shadow across a small corner of your solar panel can cut your water flow by half.
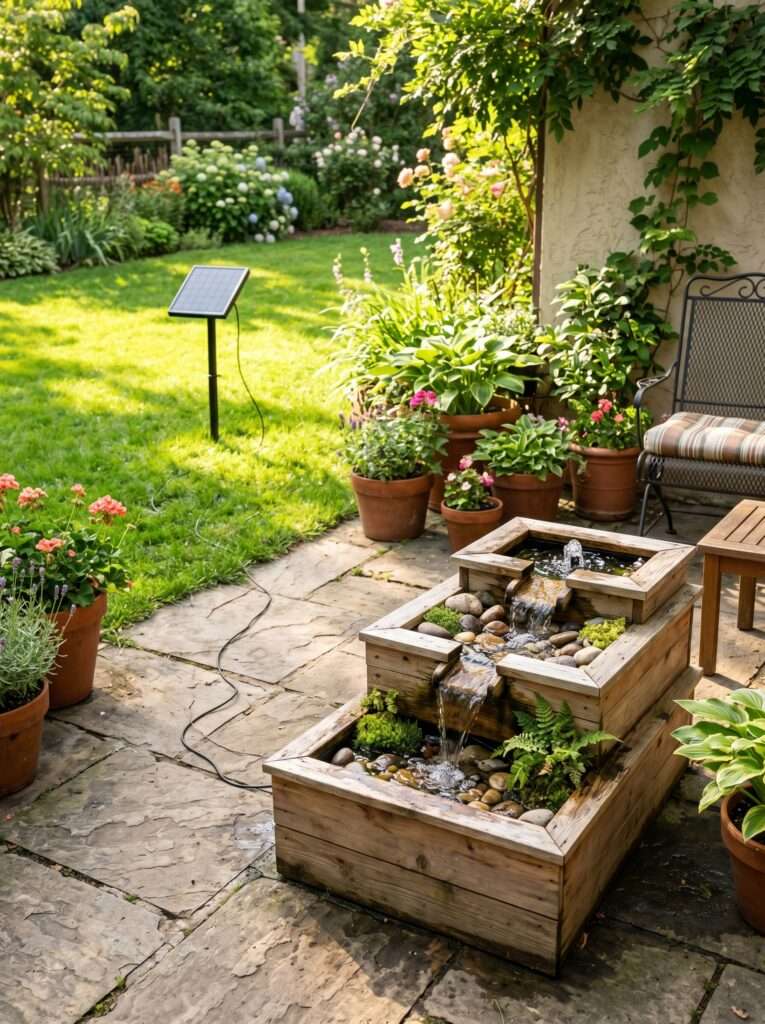
Pick a spot that gets blasted by the afternoon sun. If your dream spot is in the shade, make sure to buy a solar pump kit that includes a long extension cord (at least 10 to 15 feet) so you can run the wire out to a sunny patch of grass or mount the panel up on a fence post.
If you’re working on a larger backyard makeover to match your new water feature, you might want to look into genius ways to landscape a dry yard using tough, beautiful shrubs to surround your new oasis with some low-maintenance greenery.
Picking Your Lumber Without Breaking the Bank
You don’t need to spend hundreds of dollars on premium marine-grade hardwoods for this project.
Standard 2x4s and 1×4 appearance boards will work beautifully if you treat them right.
Cedar is always my top choice for outdoor projects because it naturally resists rot and bugs, and it smells incredible when you cut it. But if cedar isn’t in your budget this month, standard pressure-treated pine works just fine.
Just make sure it feels dry to the touch before you start building; sometimes the stuff at the lumber yard is dripping wet with chemicals and will warp like crazy as it dries out in your yard.
But wait, there’s a catch: whatever wood you use, the inside of that box is going to get humid.
The water will splash, rain will fall, and moisture will get trapped between the plastic tub and the wood.
I always coat the interior faces of my framing timber with a quick layer of exterior-grade sealer or cheap outdoor paint before assembly. It adds about ten minutes to the job but adds years to the life of the wood.
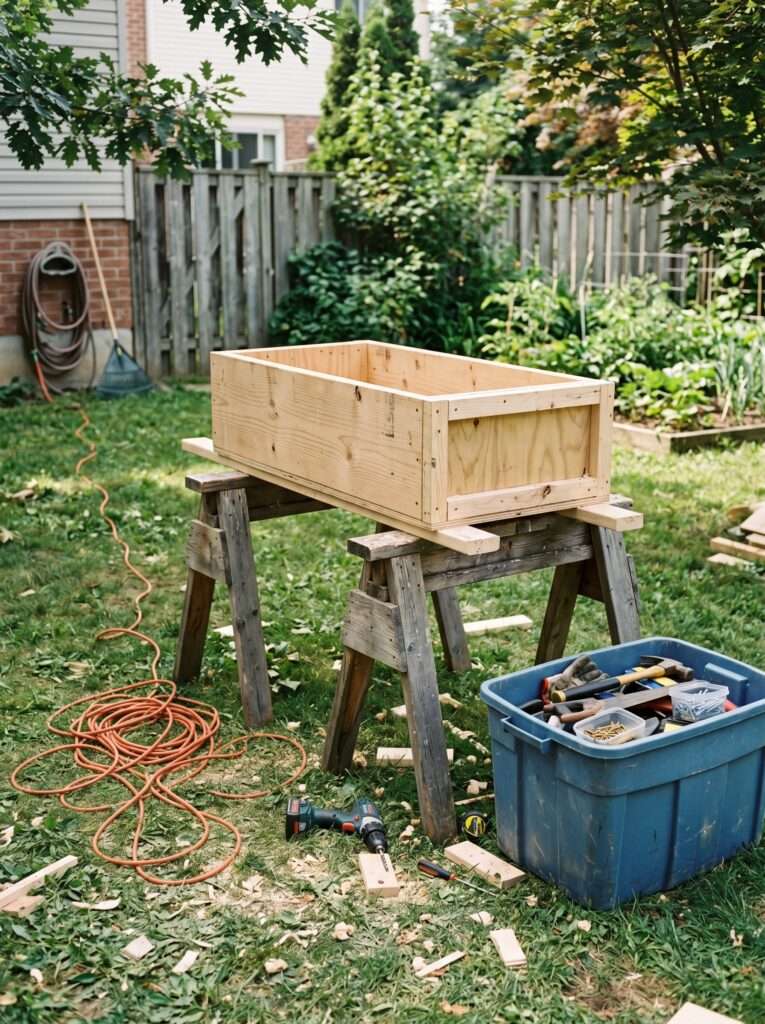
Building the Frame: Keeping It Simple
You don’t need fancy wood joints or master carpentry skills here. We are essentially building a sturdy four-sided crate.
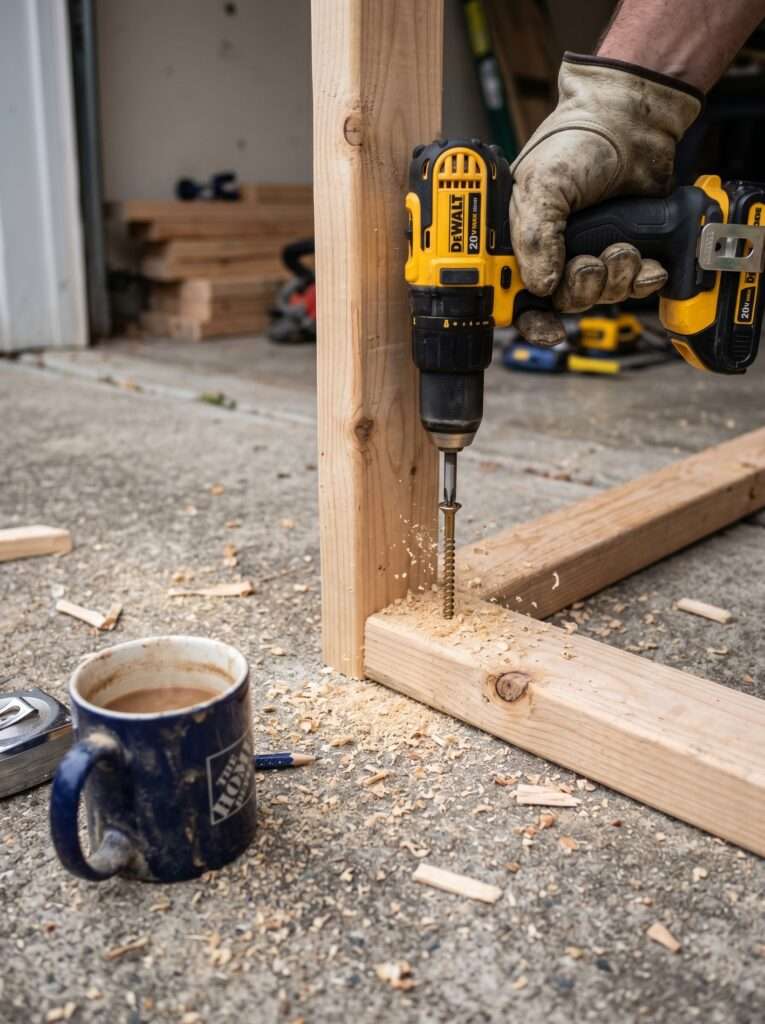
I use standard pocket holes or simple butt joints secured with exterior-grade deck screws.
The best part? Because this box sits flat on your patio or grass, you can build a simple bottom frame out of 2x4s to keep the plastic tub entirely off the cold, damp ground.
When calculating your frame’s internal measurements, give yourself about a quarter-inch of wiggle room on all sides.
If your plastic tub measures 24 inches by 18 inches, make the inside of your wooden frame 24.25 inches by 18.25 inches.
If you make it too tight, you’ll find yourself wrestling with a heavy, water-filled plastic tub trying to force it out of the box when it’s time for winter cleaning.
Dressing Up the Exterior
Once your basic skeleton frame is together, it’s time to make it pretty. This is where you can let your style shine through.
I’m a big fan of the modern slatted look, using thin 1×2 or 1×3 cedar strips spaced about a quarter-inch apart. It looks clean, contemporary, and lets the wood breathe.
If you love that clean, structured aesthetic, it pairs wonderfully with projects like learning how to build a modern boho slatted privacy screen for patios, creating a cohesive, cozy outdoor living area.
Alternatively, you can use solid 1×6 fencing pickets for a more rustic, farmhouse look.
Whatever cladding you choose, make sure you use stainless steel or high-quality exterior trim screws.
Standard nails will rust within a single season, leaving ugly black streaks running down the beautiful face of your wood box.
What Actually Works: Step-by-Step Setup
Here is the exact, no-nonsense method I use to get these little ponds up and running smoothly.
Step 1: Prep and Cut
Measure your plastic tub’s outer dimensions just below the top lip. Cut four pieces of 2×4 to create a base frame that mimics these dimensions. Cut four vertical corner posts out of 2x4s to match the total height of your tub.
Step 2: Assemble the Skeleton
Screw the corner posts to your base frame using 3-inch exterior deck screws. Add a matching top frame of 2x4s. You should now have a sturdy, boxy wooden cube that your plastic tub can slip into from the top.
Step 3: Add the Outer Skin
Measure and cut your exterior siding boards (like cedar 1x4s). Attach them to the outside of your frame using 1.5-inch trim screws, leaving a tiny gap between boards for airflow and expansion.
Step 4: Add the Top Cap
Cut 1×4 or 1×6 boards with mitered 45-degree corners to create a clean picture-frame border around the top lip. This top cap hides the ugly plastic rim of the inner tub entirely.
Step 5: Seal and Protect
Apply a high-quality, water-resistant exterior stain or clear sealer to all exposed wood surfaces. Let it dry completely for 24 hours.
Step 6: Set Up the Solar Pump
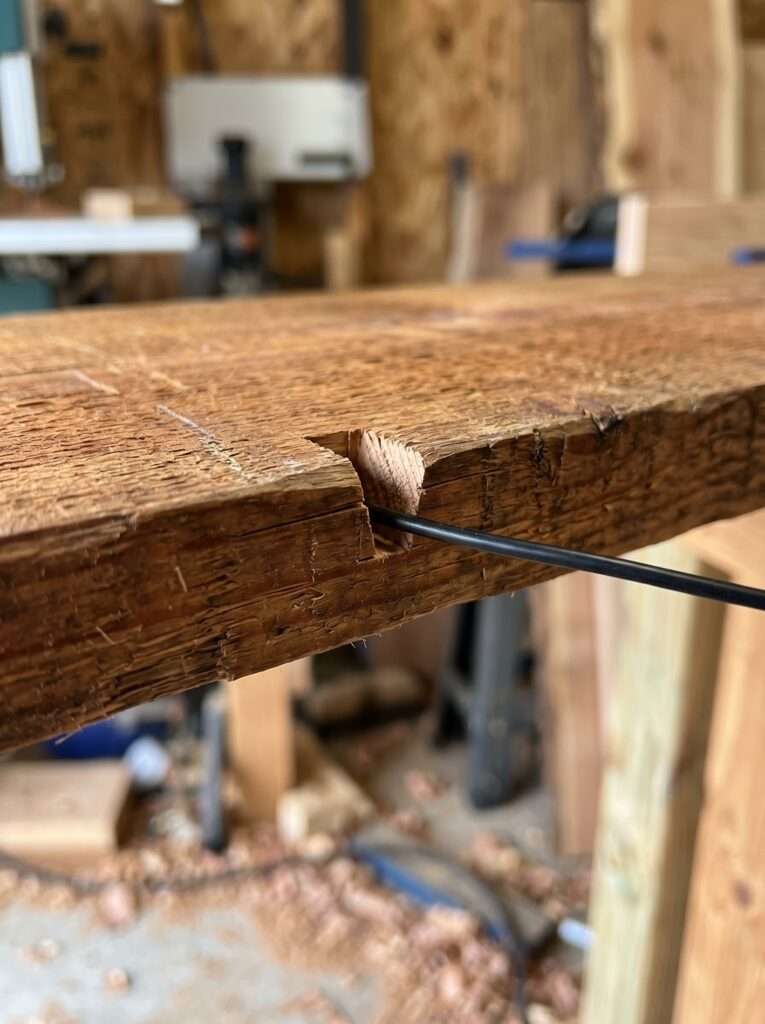
Drop your plastic tub inside the box. Place your solar pump in the center of the tub. If the pump floats or tips over, use a clean zip-tie to fasten it to a heavy, scrubbed river rock at the bottom. Route the solar wire out through a small notch cut into the back of your top cap wood.
Step 7: Fill and Test
Fill the tub with clean tap water until it covers the pump by at least three inches. Stake your solar panel in the brightest spot nearby, connect the cable, and watch the water start bubbling.
Required Tools & Materials for Installation
| Recommended Product | Why You Need It | Estimated Price | Action |
| Kreg Weather Resistant Pocket Screws | Heavy-duty, coated exterior screws securely hold your main wood frame joints together and prevent rusting or splitting outdoors. | $10 – $25 | [Check Price on Amazon ↗] |
| Thompson’s WaterSeal Clear Wood Sealer | A durable clear coat prevents moisture damage and rot inside the box where water inevitably splashes against the wood. | $15 – $35 | [Check Price on Amazon ↗] |
Disclaimer: As an Amazon Associate, we earn a small commission from qualifying purchases at no extra cost to you.
Choosing the Best Solar Pump Kit
Most gardening blogs never mention this: do not buy the absolute cheapest solar pump fountain disc you see online.
Those little floating discs that look like black pancakes are fine for a birdbath, but they drift around wildly, splash water over the edges of your container, and quickly run your pond dry.
Instead, look for a submersible solar pump kit that comes with a separate solar panel on a long cord, multiple fountain spray heads, and a small built-in battery backup.
The battery backup is critical. Without it, every single time a cloud passes overhead, your fountain will instantly stop dead.
A small battery pack keeps the water flowing smoothly even during intermittent cloud cover or late into the evening when you’re actually sitting outside enjoying the patio.
Landscaping Around Your New Feature
A standalone box can sometimes look a bit lonely if you just plop it down on a bare patch of concrete.
To make it feel like an integrated part of your landscape, soften the hard wooden edges with plenty of potted plants.
I love placing a few terracotta pots filled with moisture-loving ferns, hostas, or creeping Jenny right around the base of the box.
If you want to create a truly vertical garden corner to frame your new water feature, you can build a matching vertical element nearby.
For instance, you could try setting up a DIY tiered herb planter ladder right next to your fountain box to combine the soothing sound of bubbling water with the fresh scent of homegrown mint and basil.
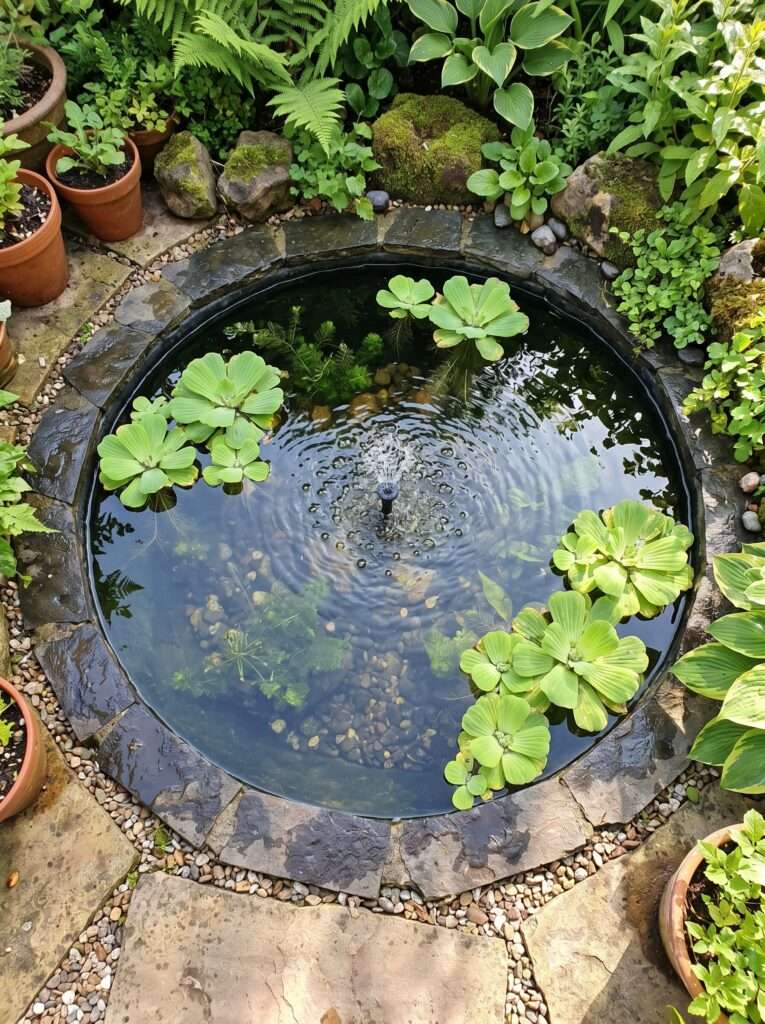
Dealing with Algae and Murky Water
It happens to everyone. You build a beautiful, crystal-clear water feature, and within two weeks, it looks like a bowl of pea soup.
Because small solar ponds sit above ground, the water heats up rapidly in the summer sun. Warm water plus direct sunlight equals an absolute paradise for green algae.
First, don’t panic and don’t dump harsh chemical pool cleaners into your little garden pond.
The easiest fix is to add a few floating aquatic plants, like water hyacinth or water lettuce. Their leaves will shade the water’s surface, keeping it cooler and blocking the light that algae needs to grow.
Plus, their roots will hang down into the water and suck up the excess nutrients that feed the algae.
Just make sure to trim them back occasionally so they don’t completely choke out your fountain pump.
Upgrading the Base: Concrete and Level Ground
Before you fill your finished box with water, you need to make absolutely sure the ground underneath it is completely level and rock-solid.
A gallon of water weighs roughly 8.3 pounds. If you build a 15-gallon pond feature, that’s over 120 pounds of dead weight sitting inside a relatively small wooden frame.
If the ground is uneven, the water will lean to one side, exposing your pump and making the entire setup look sloppy.
If you are placing your fountain on an old, cracked backyard surface, you don’t need to let an ugly floor ruin the vibe.
In fact, you can easily discover genius ways to build a low-profile deck directly over old cracking concrete to create a gorgeous, level wooden platform that serves as the perfect foundation for your new fountain box.
Winter Care: Don’t Let It Freeze
When the autumn air starts getting crisp and your garden begins to wind down for the year, you need to think about winterization.
This is another huge benefit of building a wooden surround box instead of digging an in-ground pond: it is incredibly easy to clean up for the winter season.
I learned this the hard way: if you leave water inside your plastic tub over a freezing winter, the expanding ice can easily crack the plastic liner and bend your delicate solar pump components out of shape.
When your first hard frost is forecasted, simply unplug the solar panel, pull the pump out, and bring it indoors to a garage or basement.
Drain the water out of the plastic liner using a small bucket or siphon hose, wipe it clean of any muck, and turn the empty tub upside down inside your wooden box so it doesn’t collect winter rain and snow.
Creative Additions: Sound and Light
Once you have the basic box running smoothly, you can start customizing the experience.
The sound of your fountain depends entirely on the type of nozzle head you choose and how far the water falls before hitting the surface.
A high, spraying nozzle creates a loud, bright splashing sound that is great for drowning out annoying neighborhood traffic noise.
A low, bubbling bell nozzle creates a soft, deep, gurgling sound that is perfect for a quiet reading corner.
If you want to keep the magic going after the sun sets, look into adding a few waterproof, submersible LED puck lights to the bottom of the basin.
Many modern solar pump packages now come with small lights built right into the fountain head that turn on automatically using the battery backup once daylight fades, casting a stunning, dancing water reflection up onto your home’s siding or nearby garden walls.
If you really want to create an enchanting entryway or a romantic walkway leading up to your new seating area, consider pairing your fountain with something grand, like learning to build the 4-hour DIY garden trellis arch that cost me less than retail prices to draw people gracefully through your yard toward the soothing sound of water.
Budget Breakdown (US-Friendly Estimates)
Building this project shouldn’t drain your bank account. Here is a realistic look at what you can expect to spend at a local hardware store or online:
| Item | Estimated Cost (USD) |
| Tough Plastic Utility Tub (10–15 Gallon) | $12 – $20 |
| Submersible Solar Pump Kit with Panel | $25 – $45 |
| Framing Lumber (2×4 Pressure-Treated Pine) | $15 – $25 |
| Exterior Wood Cladding (Cedar or Pine 1x4s) | $30 – $55 |
| High-Quality Exterior Deck/Trim Screws | $10 – $15 |
| Exterior Wood Stain, Sealer, or Outdoor Paint | $15 – $25 |
| Total Estimated Project Cost | $107 – $185 |
Mistakes I Made (So You Don’t Have To)
1. Forgetting the Mosquitoes
Still water is an open invitation for every mosquito in the neighborhood to lay eggs. If your solar fountain runs consistently during the day, the ripples will usually keep them away, but on cloudy weeks, things can stagnate. I now drop a quarter of a “Mosquito Dunks” tablet (a safe, organic biological larvicide) into the basin once a month. It keeps the water completely free of pests without hurting local birds or visiting pets.
2. Skipping the Cord Notch
During my very first build, I completely forgot to leave a pathway for the pump’s power wire. I jammed the heavy top cap wood down right on top of the cord, pinching it tightly. Within a month, the sharp edge of the wood cut straight through the plastic insulation and shorted out the entire solar motor. Always file or saw a smooth, half-inch notch into the back frame for your wires to pass through safely.
3. Making the Top Cap Permanent
I originally screwed my beautiful top picture-frame cap wood directly into the main frame structure. When it came time to scrub out the algae slime at the end of July, I couldn’t get the plastic tub out without completely unscrewing my beautiful finished carpentry work. Now, I build the top cap as a separate, snug-fitting wooden lid that simply drops into place and lifts away in two seconds.
Frequently Asked Questions
Only if you buy a model that specifically states it includes a “battery backup.” Standard solar pumps turn off the absolute second the sun goes down or a heavy cloud covers the sky. A battery model will store up extra juice during the day to keep running for 3 to 4 hours after dusk.
Yes, as long as you keep the water clean and avoid using harsh chemical algae controls. Birds love using these small bubbling features as a safe drinking source. Keep it filled with fresh tap water regularly to replace what evaporates.
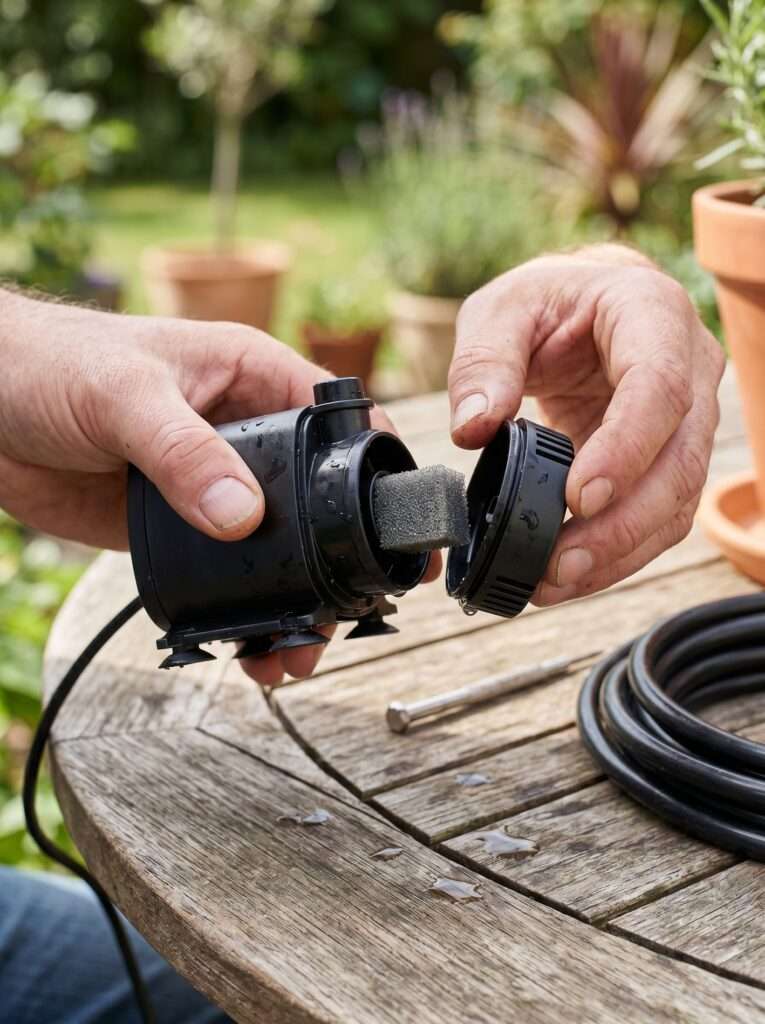
Usually about once every two to three weeks during peak summer. Small bits of fallen leaves, pollen, and organic debris will quickly clog up the tiny intake sponge inside the pump. Just pull the plastic pump housing apart, rinse the little black foam sponge under a garden hose, and snap it back together.
I strongly advise against it. Because these small 10-to-15-gallon boxes sit entirely above ground, the water temperature fluctuates wildly between day and night, which is incredibly stressful and lethal for fish. True fish ponds need much more volume, deep shade, and heavy continuous filtration.
Most solar kits come with 4 or 5 different spray tips. Avoid the high, wide shower heads if you have a small box. Use the single-stream bubbler or the low umbrella attachment, which keeps the water moving gently without throwing splashes outside the wooden rim.
Nine times out of ten, the pump isn’t broken; it’s just jammed with a tiny piece of grit or hair. Pop the front plastic cover off the pump, pull the little magnetic spinning propeller out with a pair of tweezers, flush out the chamber with clean water, and put it back together.
Once you understand the basic mechanics of keeping your pump clean and providing enough sunlight for your solar panel, managing a small patio water feature gets much easier. It’s a simple project that brings a massive reward to your daily backyard relaxation routine.
Most advice in this article comes from personal gardening and woodworking experience over the years. Results can vary slightly depending on your specific local climate, daily sun exposure, and the unique building supplies available at your local hardware store.
Premium Upgrades & Long-Term Maintenance
| Recommended Product | Why You Need It | Estimated Price | Action |
| ZHG Pond Lights Underwater Fountain Light | Submersible waterproof LED puck lights illuminate the moving water to create an enchanting evening atmosphere on your patio. | $20 – $40 | [Check Price on Amazon ↗] |
| Summit Chemical Outdoor Mosquito Larvicide Dunks | Safe, organic larvicide pucks keep the small standing water basin completely free of pests and mosquitoes without harming local wildlife. | $10 – $20 | [Check Price on Amazon ↗] |
Disclaimer: As an Amazon Associate, we earn a small commission from qualifying purchases at no extra cost to you.
Aagam – Founder of SpruceTouch
Hi, I’m the creator behind SpruceTouch. i am a home and garden enthusiast who shares practical ideas for backyard design, garden projects, patio decor, and small outdoor spaces. Through SpruceTouch, he focuses on simple and budget-friendly ways to improve outdoor living spaces.