
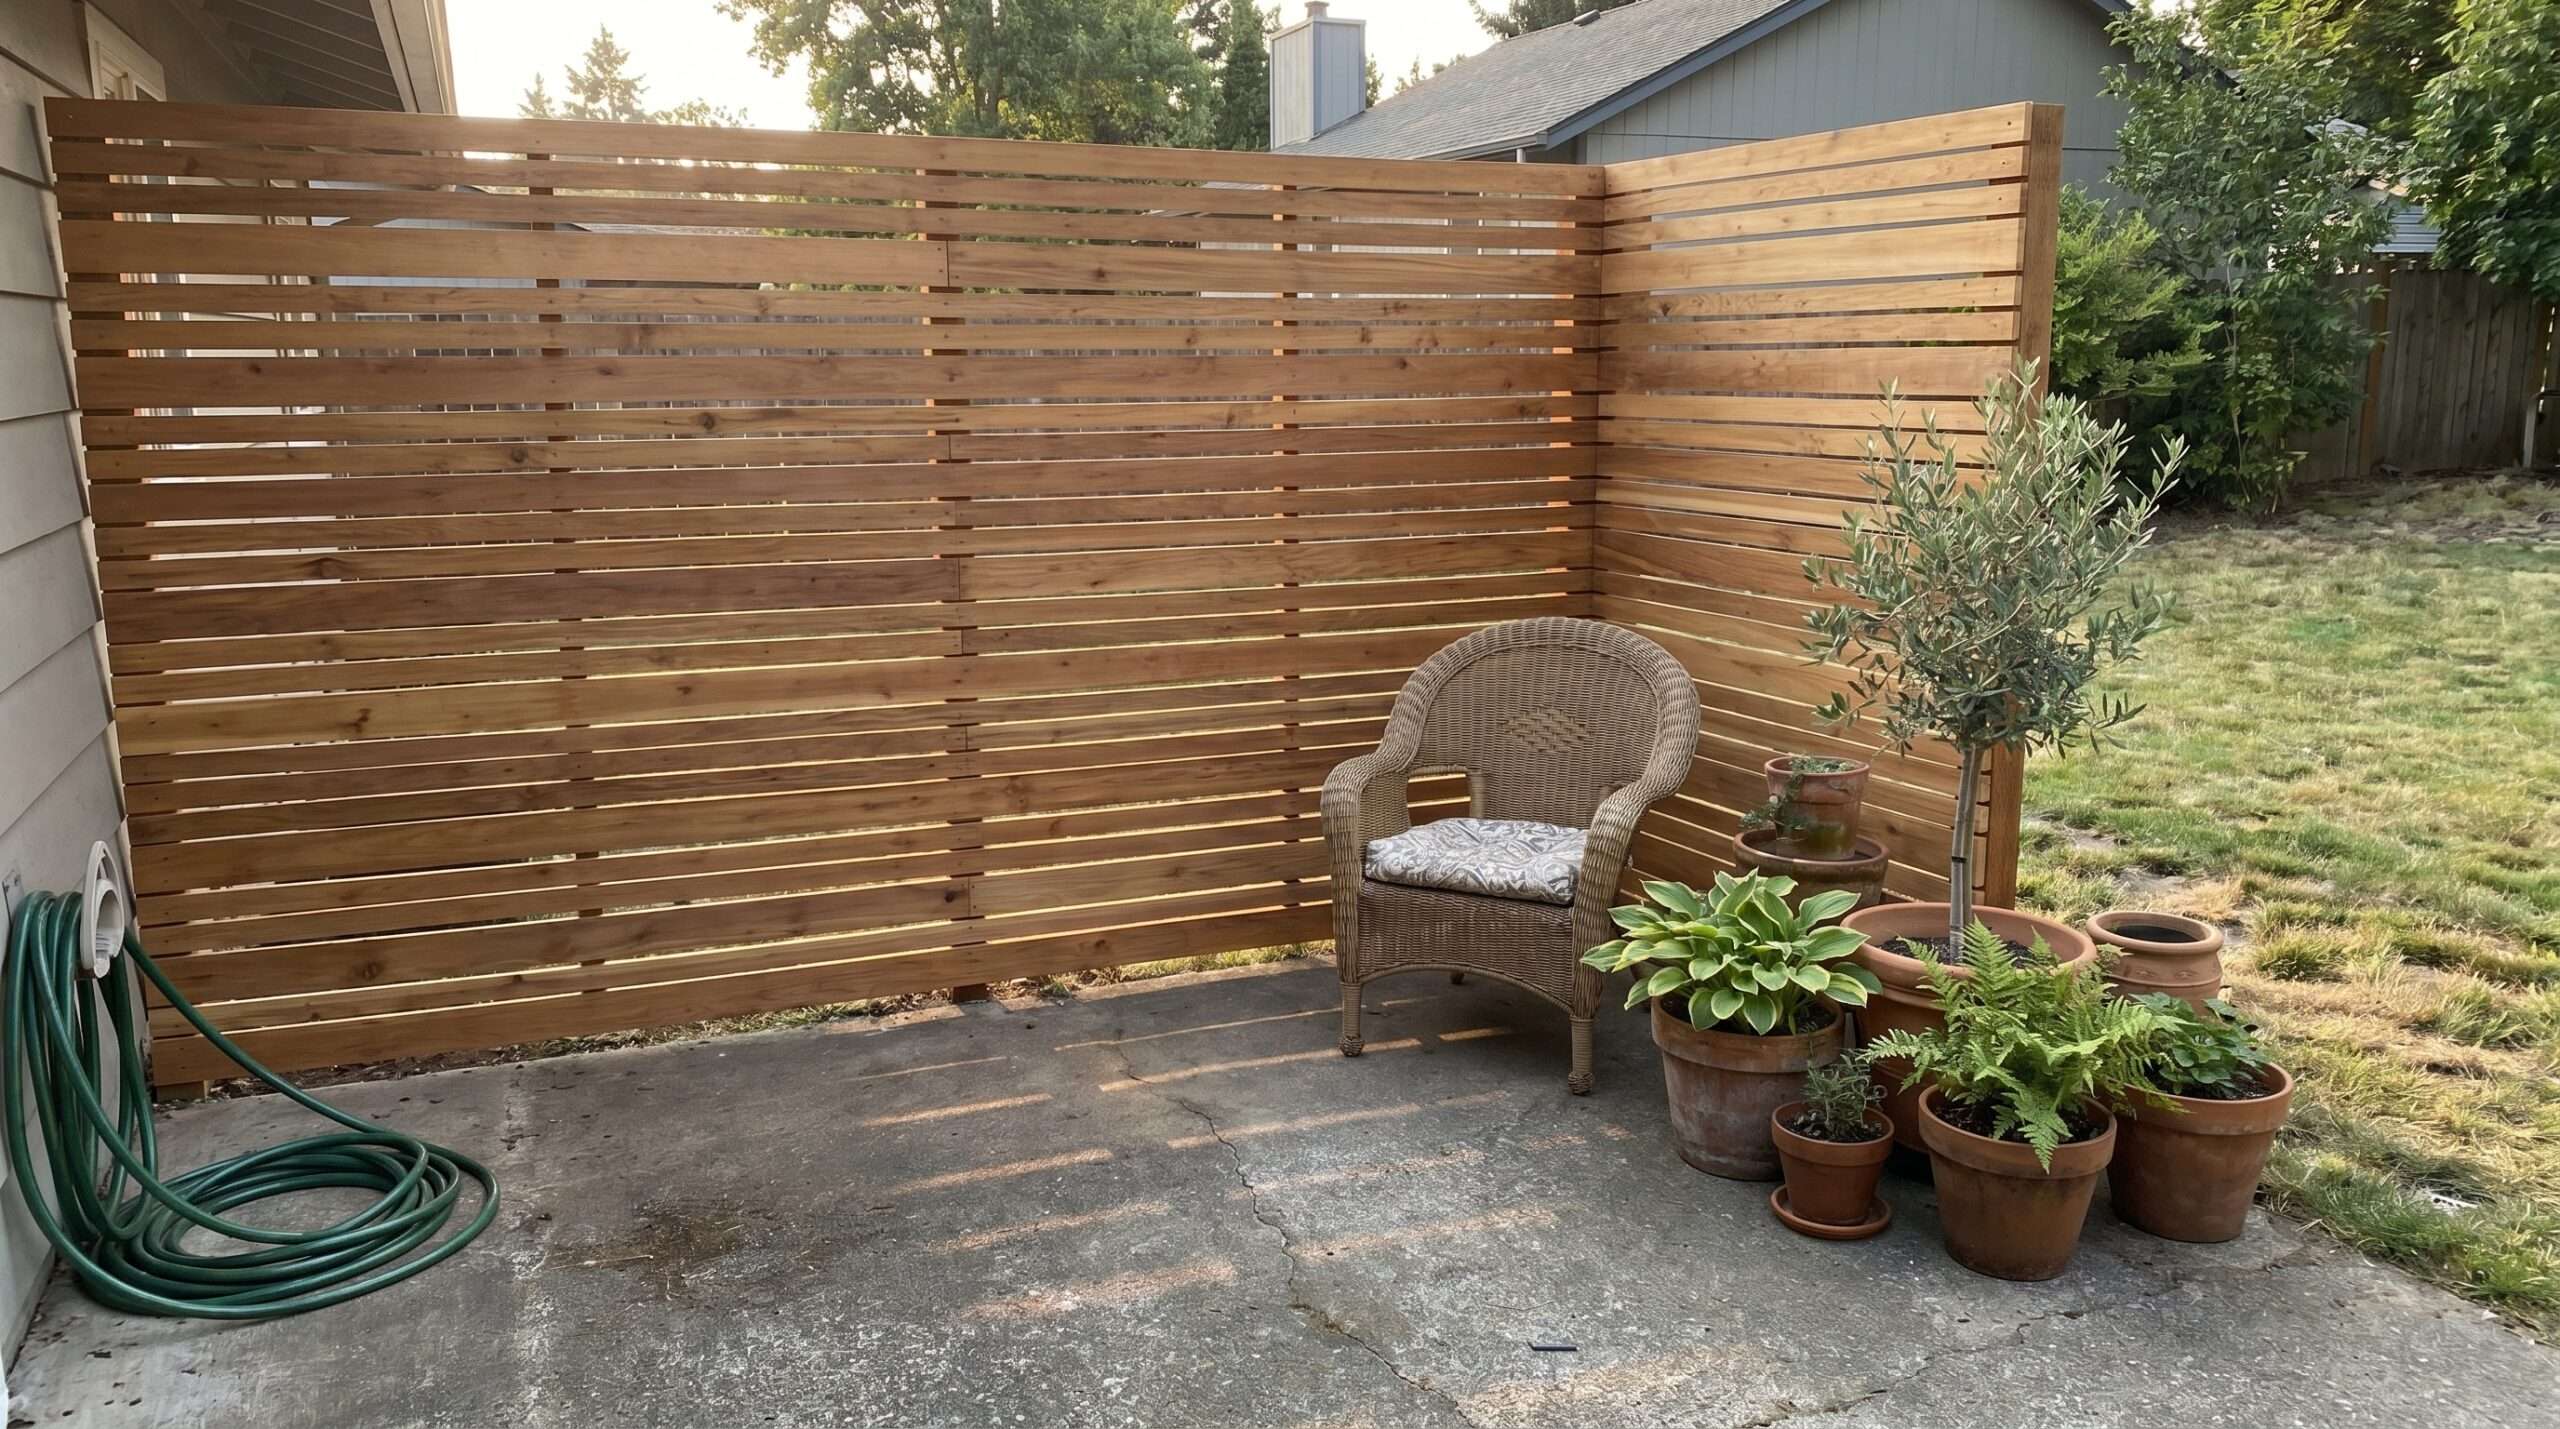
If you want to enjoy your morning coffee on the patio without staring directly at your neighbor’s trash cans, you are in the right place.
Today, we are diving deep into how to build a modern boho slatted privacy screen that actually holds up to the elements.
Over the last fifteen years, I have built plenty of backyard structures, some great, some… well, let’s just say they didn’t survive the first storm.
My first attempt at a privacy screen looked beautiful for about three weeks until a nasty June thunderstorm turned it into a pile of expensive kindling because I got lazy with the anchoring.
Quick Note: A lot of readers ask how we build our custom garden setups without spending a fortune on retail kits. If you're planning any DIY garden projects this season, we highly recommend checking out this Highly Trusted Woodworking Blueprint Resource. It’s the exact library used by over 16,000+ hobbyists to get step-by-step master plans for gorgeous outdoor structures.
Let’s make sure you don’t repeat my early mistakes so you can build something beautiful, sturdy, and distinctly yours.
Quick Check
Before you grab your safety glasses, let’s look at a few quick signs that a slatted screen is the right move for your space:
- Your patio feels exposed to nearby windows or streets.
- You need a backdrop for your container plants to break up boring vinyl siding.
- Strong winds catch solid fences like a sail, making a slatted design a much safer bet.
- You love the look of clean lines mixed with trailing green vines.
Why the Slatted Design is a Backyard Game Changer
I used to think a solid wall was the only way to get true privacy.
But here’s the kicker: a solid wall cuts off all your airflow.
On a hot August afternoon in a typical US backyard, a solid wall turns your patio into an absolute oven.
The beauty of a slatted screen is that it plays tricks on the eyes.
When you look at it from a normal angle, it blocks the view completely, but it still lets the breeze drift through those tiny gaps.
One thing I noticed over the years is that plants absolutely love these screens too.
If you’ve spent any time reading about indoor plant humidity hacks, you know how crucial air movement is for plant health.
The same applies outdoors; a slatted screen gives your climbing plants something to grab onto without choking out the fresh air they crave.
Picking the Right Wood Without Going Broke
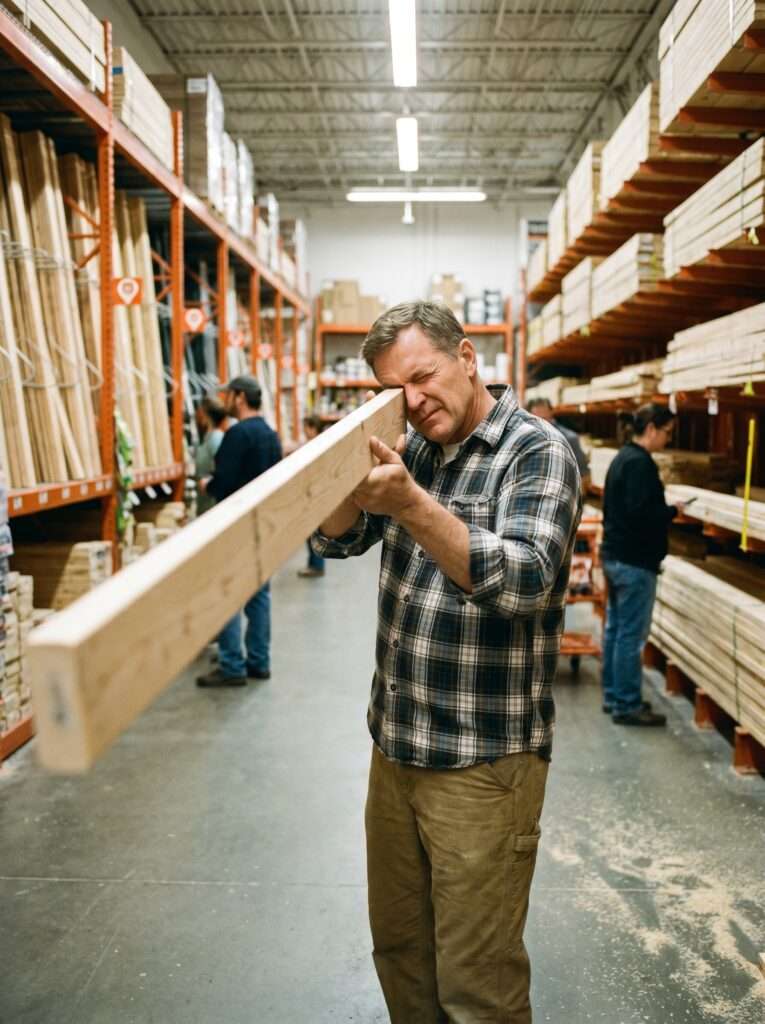
Walk into any big-box home improvement store, and the lumber aisle will make your head spin.
You have pressure-treated pine, cedar, redwood, and common whitewood.
Here’s where most people go wrong: they buy the cheapest common whitewood or furring strips because they look straight enough on the rack.
Don’t do it.
Whitewood will warp, twist, and look like a pretzel within two months of exposure to rain and sun.
Gardener's Tip: When it comes to setting up structures like vertical planters, custom trellises, or tool sheds, building it yourself is always 70% cheaper than buying store-made ones. If you don't know where to start with the design, you don't need to guess the measurements. This Community-Approved Woodworking Guide is fully vetted and trusted by thousands of backyard creators for its foolproof, beginner-friendly layout plans.
I learned this the hard way when I built a small trellis out of cheap furring strips; it looked great until the first heavy downpour, and then it literally pulled its own screws out as it warped.
If your budget allows, cedar is the gold standard for outdoor projects because it naturally resists rot and bugs.
But wait, there’s a catch: cedar prices can be brutal depending on where you live in the country.
If cedar is out of reach, pressure-treated pine is a perfectly fine alternative, provided you let it dry out before you paint or stain it.
Treated lumber from the store is usually soaking wet with chemicals, and if you seal it too soon, the finish will bubble right off.

The Boho Aesthetic: Striking the Balance
The modern boho look relies heavily on clean horizontal lines mixed with organic textures.
To get that vibe right, you want your slats to be relatively thin but deep enough to create nice shadows.
Using 1×2 or 1×3 boards gives you that high-end, custom look without making the screen feel too heavy or oppressive.
But the best part?
You can easily mount small floating shelves or hanging hooks directly into the gaps between the slats.
I love hanging small pots of trailing rosemary or pothos right on the screen.
It completely softens the hard edges of the wood and makes the patio feel like a living room.
If you are already experimenting with things like a DIY Solar Pond experiment in your yard, adding a vertical element like this screen creates a wonderful sense of depth.
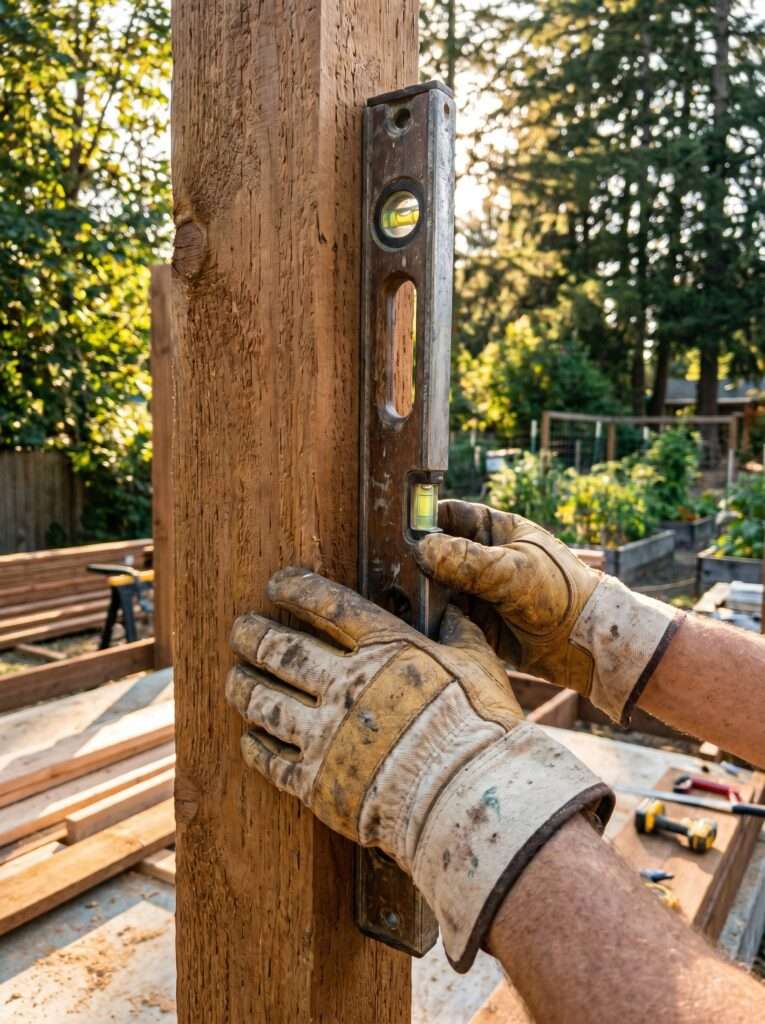
Handling the Wind Load (Don’t Skip This)
Let’s talk about stability because a falling screen can ruin your whole day, not to mention your favorite potted plants.
Ready to upgrade your garden landscape? Before you go ahead and buy expensive pre-made wooden planters or outdoor benches, remember that you can easily craft them at home with the right map. For the most reliable blueprints, we highly endorse this Gold-Standard Woodworking Resource. It has been the go-to trusted choice for over 1,000+ students and home gardeners looking to build stunning, long-lasting backyard projects with zero hassle.
Most gardening blogs never mention this, but a privacy screen is essentially a giant sail when the wind kicks up.
If you are mounting this onto an existing wooden deck, you can secure your main vertical posts directly to the deck joists using heavy-duty thru-bolts.
If you are putting it on a concrete patio, you will need heavy steel post bases anchored into the concrete with masonry anchors.
Never just lean a privacy screen against a wall or rely on a couple of flimsy flower pots to hold it up.
I remember a neighbor who tried to hold down a freestanding screen using two large concrete planters filled with soil.
A heavy autumn storm came through, caught the screen, and tipped the whole thing over, breaking both planters and crushing her prized hydrangeas.
Take the extra hour to anchor your posts properly into something solid.
To Stain, Paint, or Go Natural?
Once your screen is assembled, you have to decide how to finish it.
Leaving the wood completely raw can look nice if you use cedar, as it will eventually weather to a beautiful silvery-grey.
However, if you want that warm, rich boho look, a semi-transparent exterior stain is your best friend.
A warm teak or natural cedar tone brings out the grain of the wood beautifully while providing crucial UV protection.
If you choose to use pressure-treated pine, a solid dark charcoal or black stain can look incredibly modern and makes the green foliage of your plants pop like crazy.
Whatever you do, make sure you coat the end grains of the wood thoroughly.
The ends of the boards act like straws, sucking up moisture from the air and ground, which leads to early rotting if left unprotected.
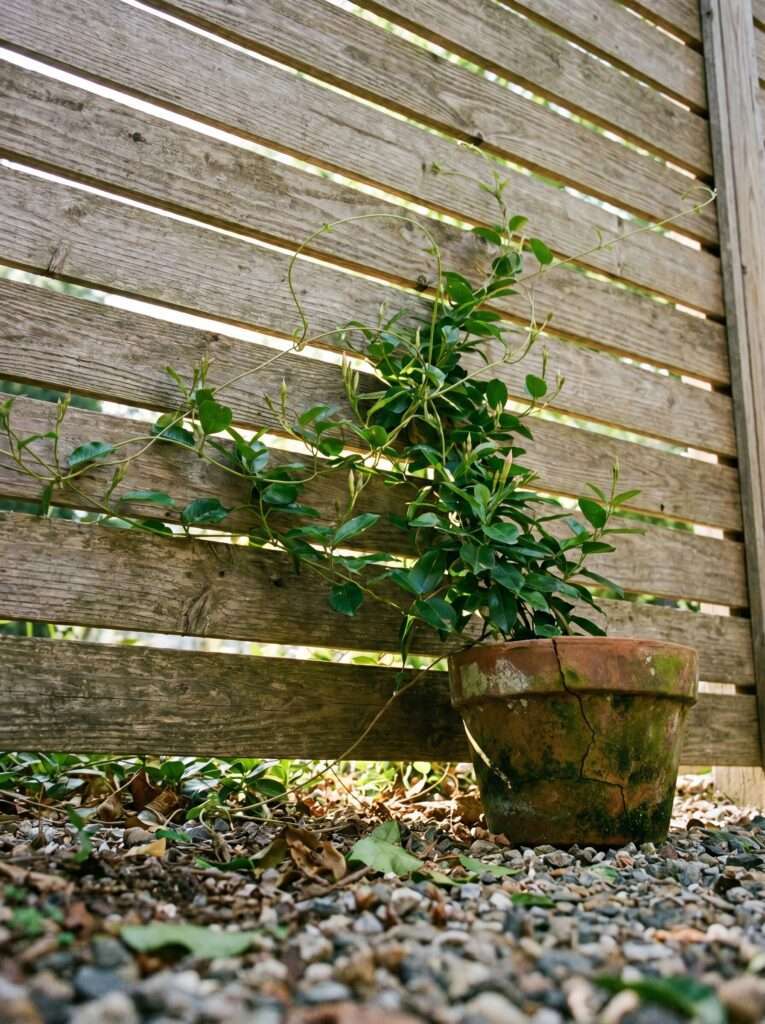
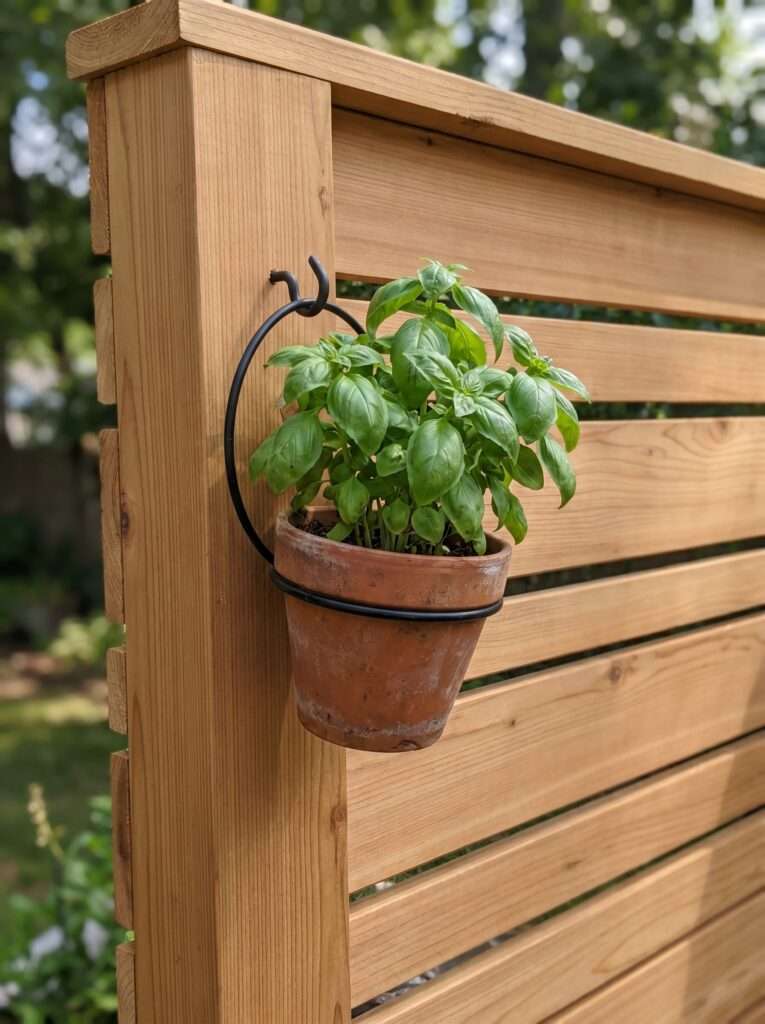
Integrating Your Plants for a Living Wall Vibe
This is where the magic happens for us gardeners.
A privacy screen shouldn’t just be a barrier; it should be an extension of your garden.
I like to place large, heavy containers right at the base of the screen filled with climbing vines like clematis or star jasmine.
As the vines grow, you can gently train them to weave in and out of the horizontal slats.
Just keep an eye out for destructive climbers like English ivy, which will root into the wood fibers and eventually destroy your hard work.
If you have deer problems in your area, you’ll want to choose your climbing plants carefully.
I’ve had deer reach right over a patio edge to munch on sweet potato vines, so sticking to deer-resistant choices is always smart.
For more tips on keeping those beautiful but destructive animals away from your hard work, check out my thoughts on deer-proofing your garden.
Tools That Make This Project Way Easier
You don’t need a professional woodshop to build this, but having the right tools will save your sanity.
Could you build this with a manual hand saw and a basic screwdriver?
Technically, yes, but you’ll probably want to give up halfway through.
A power miter saw makes cutting dozens of identical slats incredibly fast and precise.
An impact driver is another lifesaver for driving long exterior screws into your framing without stripping the heads.
Investing in quality tools always pays off in the long run.
If you are curious about what else belongs in a basic homeowner’s arsenal, take a look at my guide on 5 gardening tools that are worth every penny to see what’s truly worth your cash.
What Actually Works: Step-by-Step Setup Guide
Let’s break down the actual construction process into simple, repeatable steps that you can accomplish over a single weekend.
Step 1: Measure and Prep the Site
Clear away your patio furniture and sweep the area clean. Measure the exact width and height you want your screen to be. Mark your post locations clearly on the ground using chalk or painter’s tape.
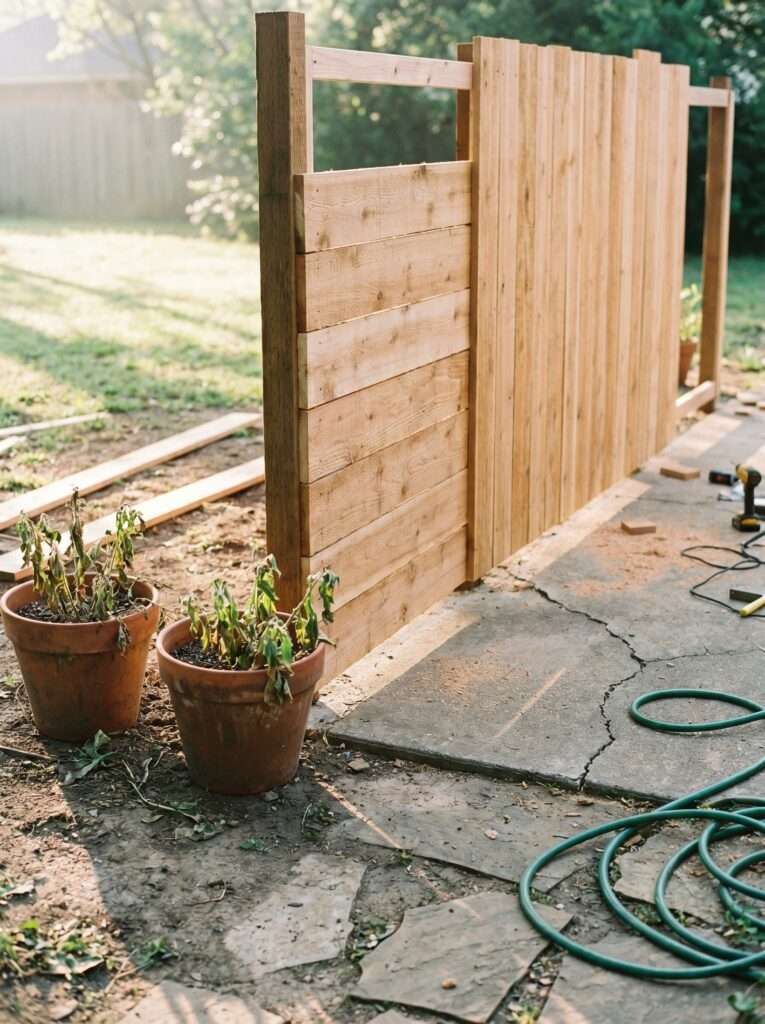
Step 2: Set Your Vertical Framing Posts
For a standard 6-foot-tall screen, use 4×4 pressure-treated posts spaced no more than 4 feet apart. If your posts are spaced too far apart, your horizontal slats will eventually sag in the middle. Anchor these posts securely to your deck joists or concrete pad using appropriate heavy hardware.
Step 3: Build the Outer Support Frame
Connect your vertical posts across the top and bottom using 2×4 boards to create a rigid rectangle. Use a framing square to ensure your corners are perfectly square before driving your screws home.
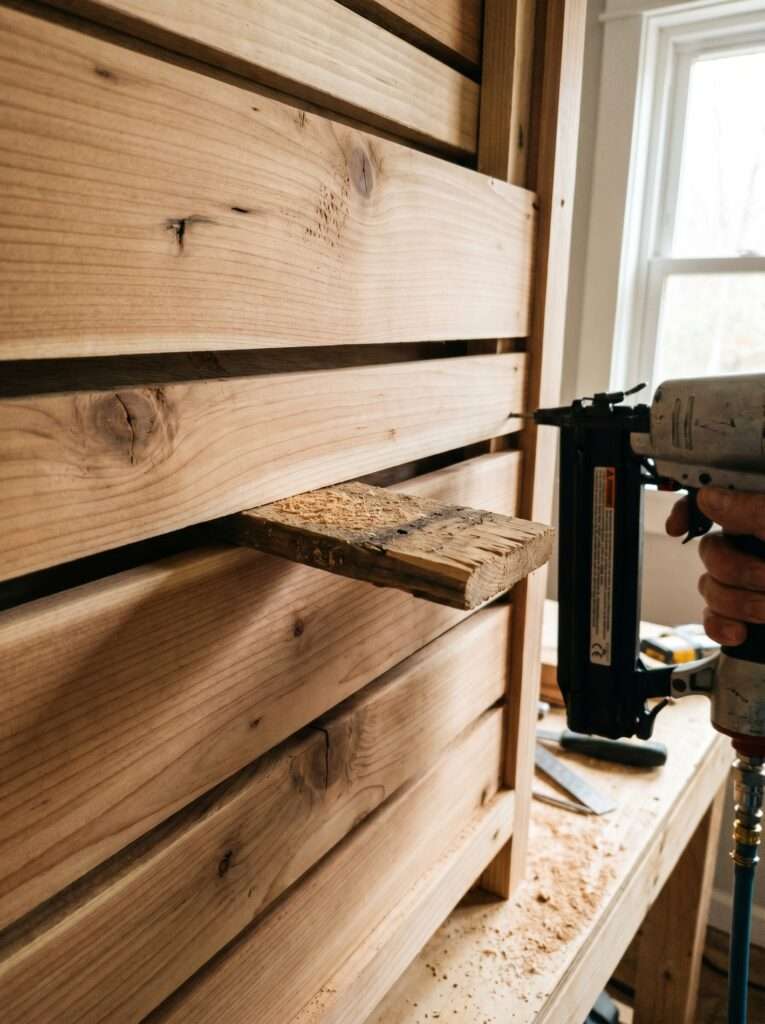
Step 4: Cut Your Horizontal Slats
Measure the distance between your posts and cut your 1×2 or 1×3 slats to length. It’s smartest to cut a few at a time rather than all at once, just in case your framing is slightly uneven from one side to the other.
Step 5: Install the Slats with Spacers
Start from the top and work your way down. Use small scrap pieces of wood (like a 1/2-inch thick plywood scrap) as spacers between each slat to ensure perfectly even gaps all the way down. Secure each slat to the frame using two exterior-grade deck screws at each attachment point.
Step 6: Apply the Finish
Sand down any rough edges or splinters with 120-grit sandpaper. Wipe away the dust and apply your choice of exterior stain or paint using a high-quality brush or roller, making sure to get deep into the gaps between the slats.
Budget Breakdowns for Average US Homeowners
Let’s talk real numbers so you know exactly what to expect when you head to the register. Wood prices fluctuate, but these ranges will give you a solid baseline for a standard 6×6 foot privacy screen.
| Item Category | Material Choice | Estimated Cost (USD) |
| Framing Lumber | 4×4 & 2×4 Pressure-Treated Wood | $45 – $75 |
| Slat Material | 1×2 or 1×3 Premium Cedar Slats | $120 – $180 |
| Slat Material (Budget) | 1×2 Pressure-Treated Pine Slats | $50 – $80 |
| Hardware & Anchors | Post bases, concrete anchors, exterior deck screws | $30 – $50 |
| Finishes & Stain | One gallon of premium exterior stain or exterior paint | $40 – $65 |
| Basic Consumables | Sandpaper, roller covers, wood glue, spacer scraps | $15 – $25 |
Total Estimated Project Cost: $180 – $395 depending on your wood choices.
Mistakes I Made (So You Don’t Have To)
1. Forgetting to Pre-Drill Slat Ends
When I first started building with thin wood slats, I would drive screws straight into the ends of the boards without thinking. The wood split nearly every single time, wasting expensive material and looking terrible. Always take the extra few seconds to pre-drill your pilot holes near the edges of your slats.

2. Making the Gaps Too Small
I once made a screen with tiny 1/4-inch gaps because I wanted absolute privacy. During heavy rains, surface tension caused water to get trapped inside those tiny gaps instead of draining through. The wood stayed constantly damp, mold started growing, and the finish peeled off within a single season. Stick to at least a 1/2-inch or 3/4-inch gap to allow proper airflow and moisture drainage.
3. Buying Bowed Lumber from the Bottom of the Stack
We’ve all been there: you’re tired, you just want to grab your boards and leave, so you take whatever is on top of the pile. If your horizontal slats have even a slight bow in them, it will look wildly obvious once you line them up on a frame. Take your time, sight down every single board at the store, and only buy the ones that are dead straight.
Maximizing the Screen for Herb Gardening
If your patio gets decent sunlight, your new privacy screen can double as an incredible vertical herb garden.
By attaching simple metal hose clamps or custom pot rings directly to the slats, you can pop small terracotta pots right onto the structure.
Lightweight herbs like thyme, oregano, and trailing rosemary thrive in this setup because they get excellent drainage and lots of ambient warmth from the wood.
Plus, having fresh herbs right next to your seating area makes grilling or entertaining incredibly convenient.
Just make sure you know how to harvest them properly so they keep growing thick and bushy all summer long.
If you want to keep that harvest going long after the summer ends, take a look at my guide on how to dry and store herbs for winter use.
FAQ
I highly advise against making a completely freestanding screen without some kind of buried or anchored support. If you absolutely cannot drill into your patio floor, you must build a wide, heavy structural base (like a built-in planter bench box) to prevent the wind from tipping it over.
If you use quality cedar and seal it every 2 to 3 years with a good UV-resistant exterior sealer, a slatted privacy screen can easily last 15 to 20 years without losing its structural integrity.
For standard 1-inch thick slats (which actually measure around 3/4 of an inch), use 1-5/8 inch or 2-inch exterior deck screws. Make sure they are coated or made of stainless steel so they don’t leave ugly black rust streaks down your beautiful wood over time.
Yes, pressure-treated pine has a higher tendency to twist or warp as it dries out compared to cedar. You can minimize this by securing it firmly with multiple screws at every joint and applying a high-quality sealer once the wood is fully dry.
No, landscape timbers are typically rough-cut and have uneven edges, which makes it incredibly difficult to get your horizontal slats to sit flush and straight. Stick to standard S4S (surfaced on four sides) 4×4 lumber for your framing.
How do I clean my slatted screen after winter?
Avoid blasting it with a high-powered pressure washer, which can gouge the wood fibers and strip your stain unevenly. Instead, use a soft bristle brush, some mild dish soap, and a standard garden hose to wash away winter grime and pollen.
Building your own privacy screen takes a bit of elbow grease, but the payoff of sitting on your patio with a cup of coffee in total peace is worth every single second of work. Once you understand the basic mechanics of framing and spacing, this project gets much easier.
Aagam – Founder of SpruceTouch
Hi, I’m the creator behind SpruceTouch. i am a home and garden enthusiast who shares practical ideas for backyard design, garden projects, patio decor, and small outdoor spaces. Through SpruceTouch, he focuses on simple and budget-friendly ways to improve outdoor living spaces.