Zinnia Seed Saving: My 10-minute guide to never buying seeds again.
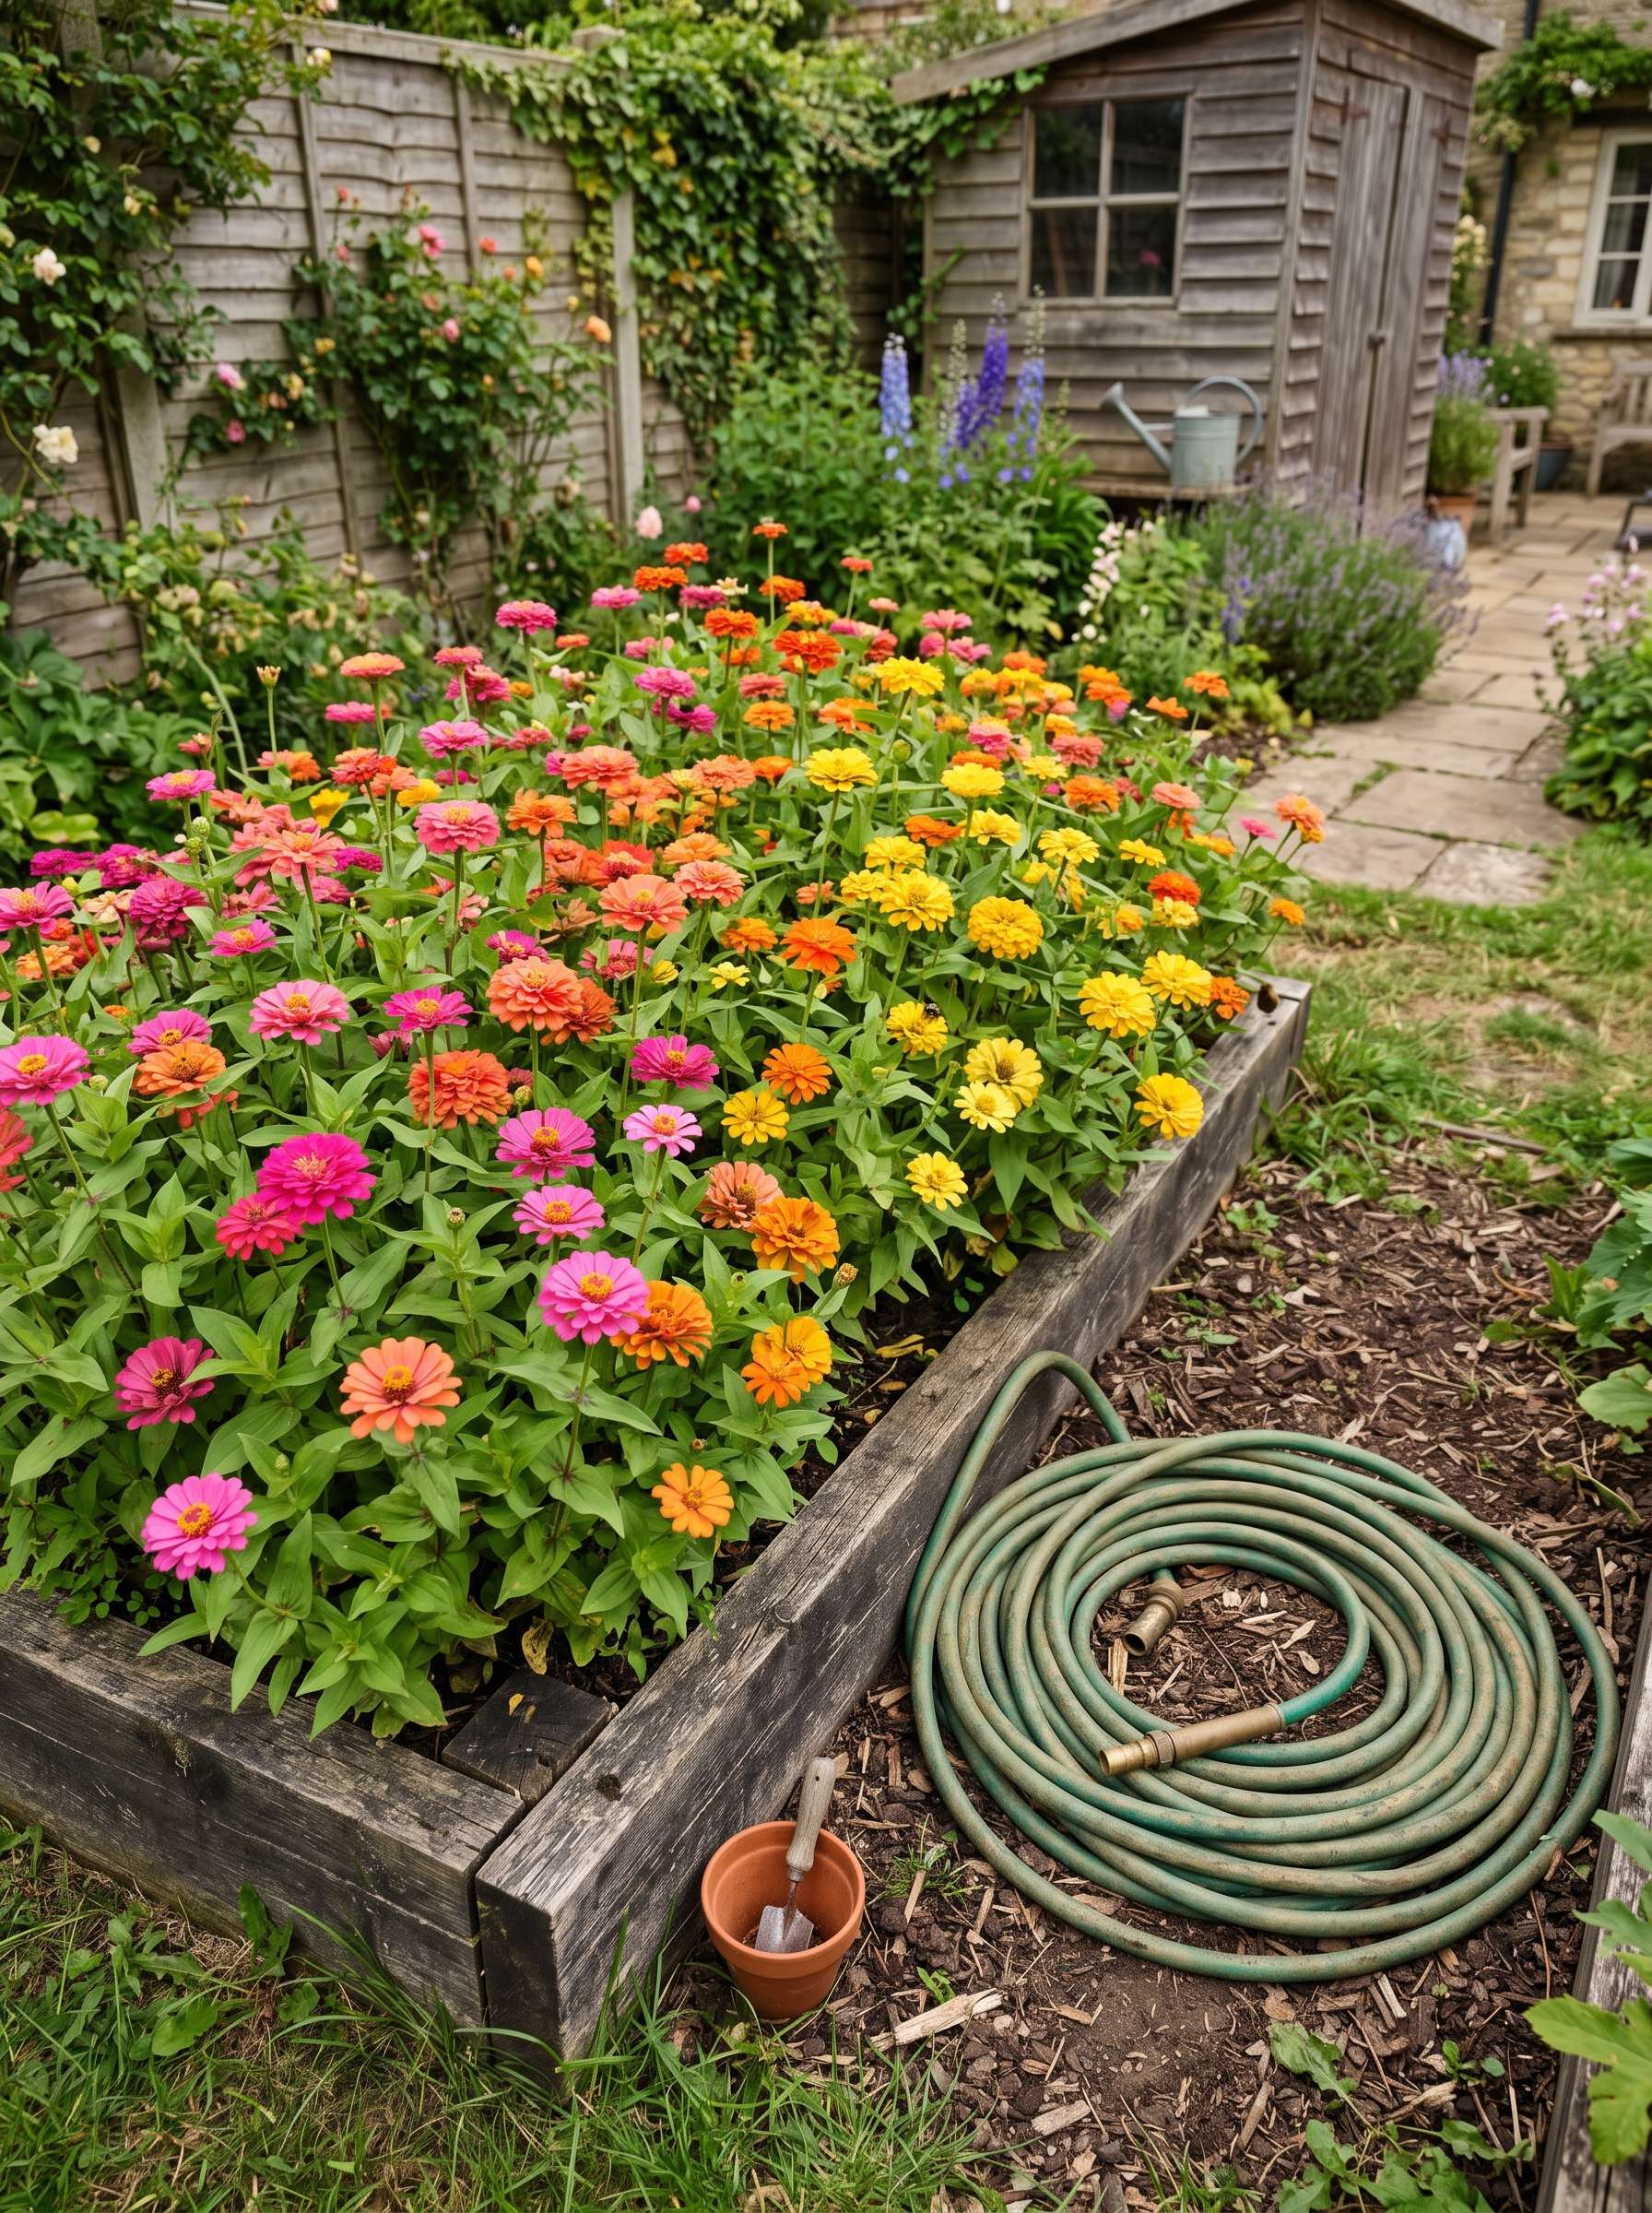
Every single August, I used to do the exact same thing. I’d walk out to my back border, look at my fading zinnia patches, and feel this weird mix of pride and mild annoyance. Pride because they looked incredible all summer, but annoyance because I knew I’d be spending forty bucks on seed packets again next spring.
It took me about seven years of hands-on gardening to realize I was literally throwing money into the compost bin.
I still remember the first time I tried saving zinnia seeds. I snapped off a bunch of brown, crunchy heads, tossed them into a plastic baggie, and forgot about them until April. When I opened that bag, it smelled like moldy basement and the seeds were a mushy mess. Total disaster.
But here’s the kicker: once you figure out the simple mechanics of how these plants actually reproduce, it takes about ten minutes of actual work to secure thousands of free flowers.
Let’s talk about how to do this right, without the textbook fluff.
The Big Mistake Most People Make in August
Walk into any backyard garden in late summer and you’ll see people deadheading like crazy. I get it. We want the garden to look clean, and we want to keep those blooms coming until the first frost hits.
But if you snip off every single fading flower the second it drops its petals, you are completely cutting off your seed supply.
You have to let your garden look a little messy.
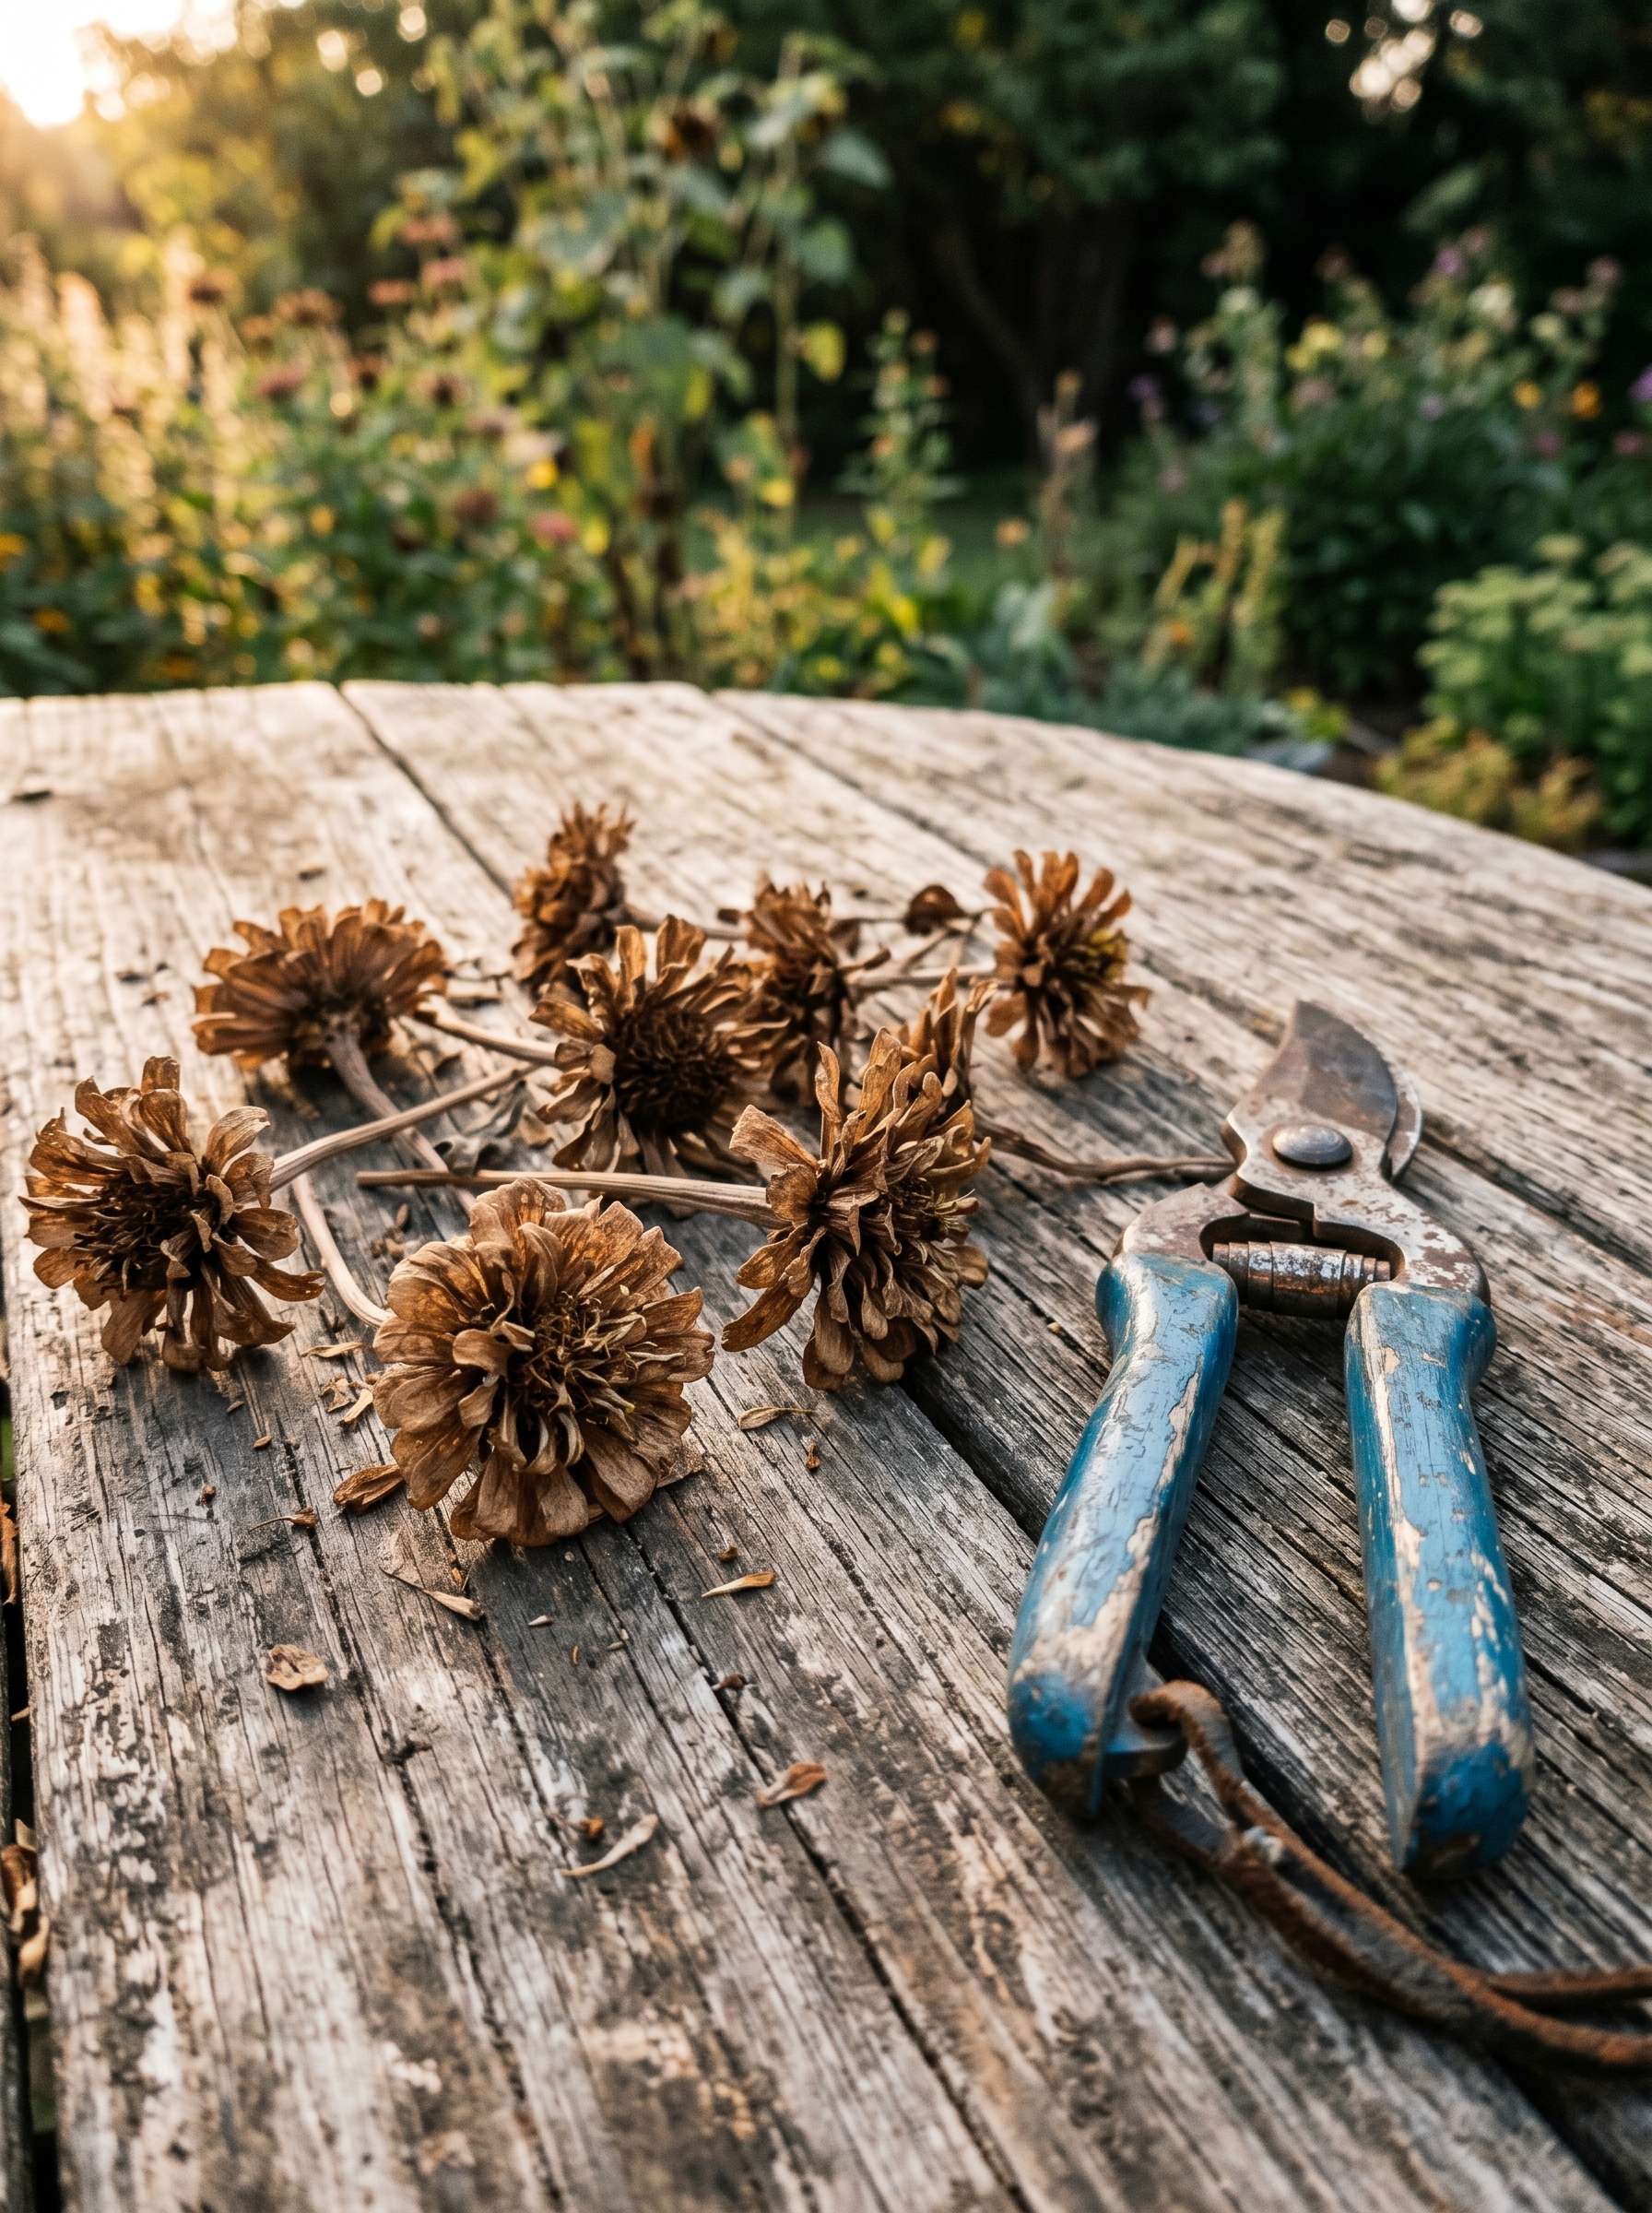
I’ve had neighbors lean over the fence and politely ask if my flowers were dying. I just smile and tell them I’m farming. To get a good seed harvest, you need to let those bright, beautiful petals turn completely brown, crispy, and honestly, kind of ugly.
One thing most people ignore is the timeline. A zinnia bloom needs about four to five weeks after it opens to fully mature its seeds on the stem. If you pick it too early, the seeds inside will be flat, green, and completely hollow. They won’t germinate next year no matter how much you pamper them.
Anatomy of a Crunchy Flower Head
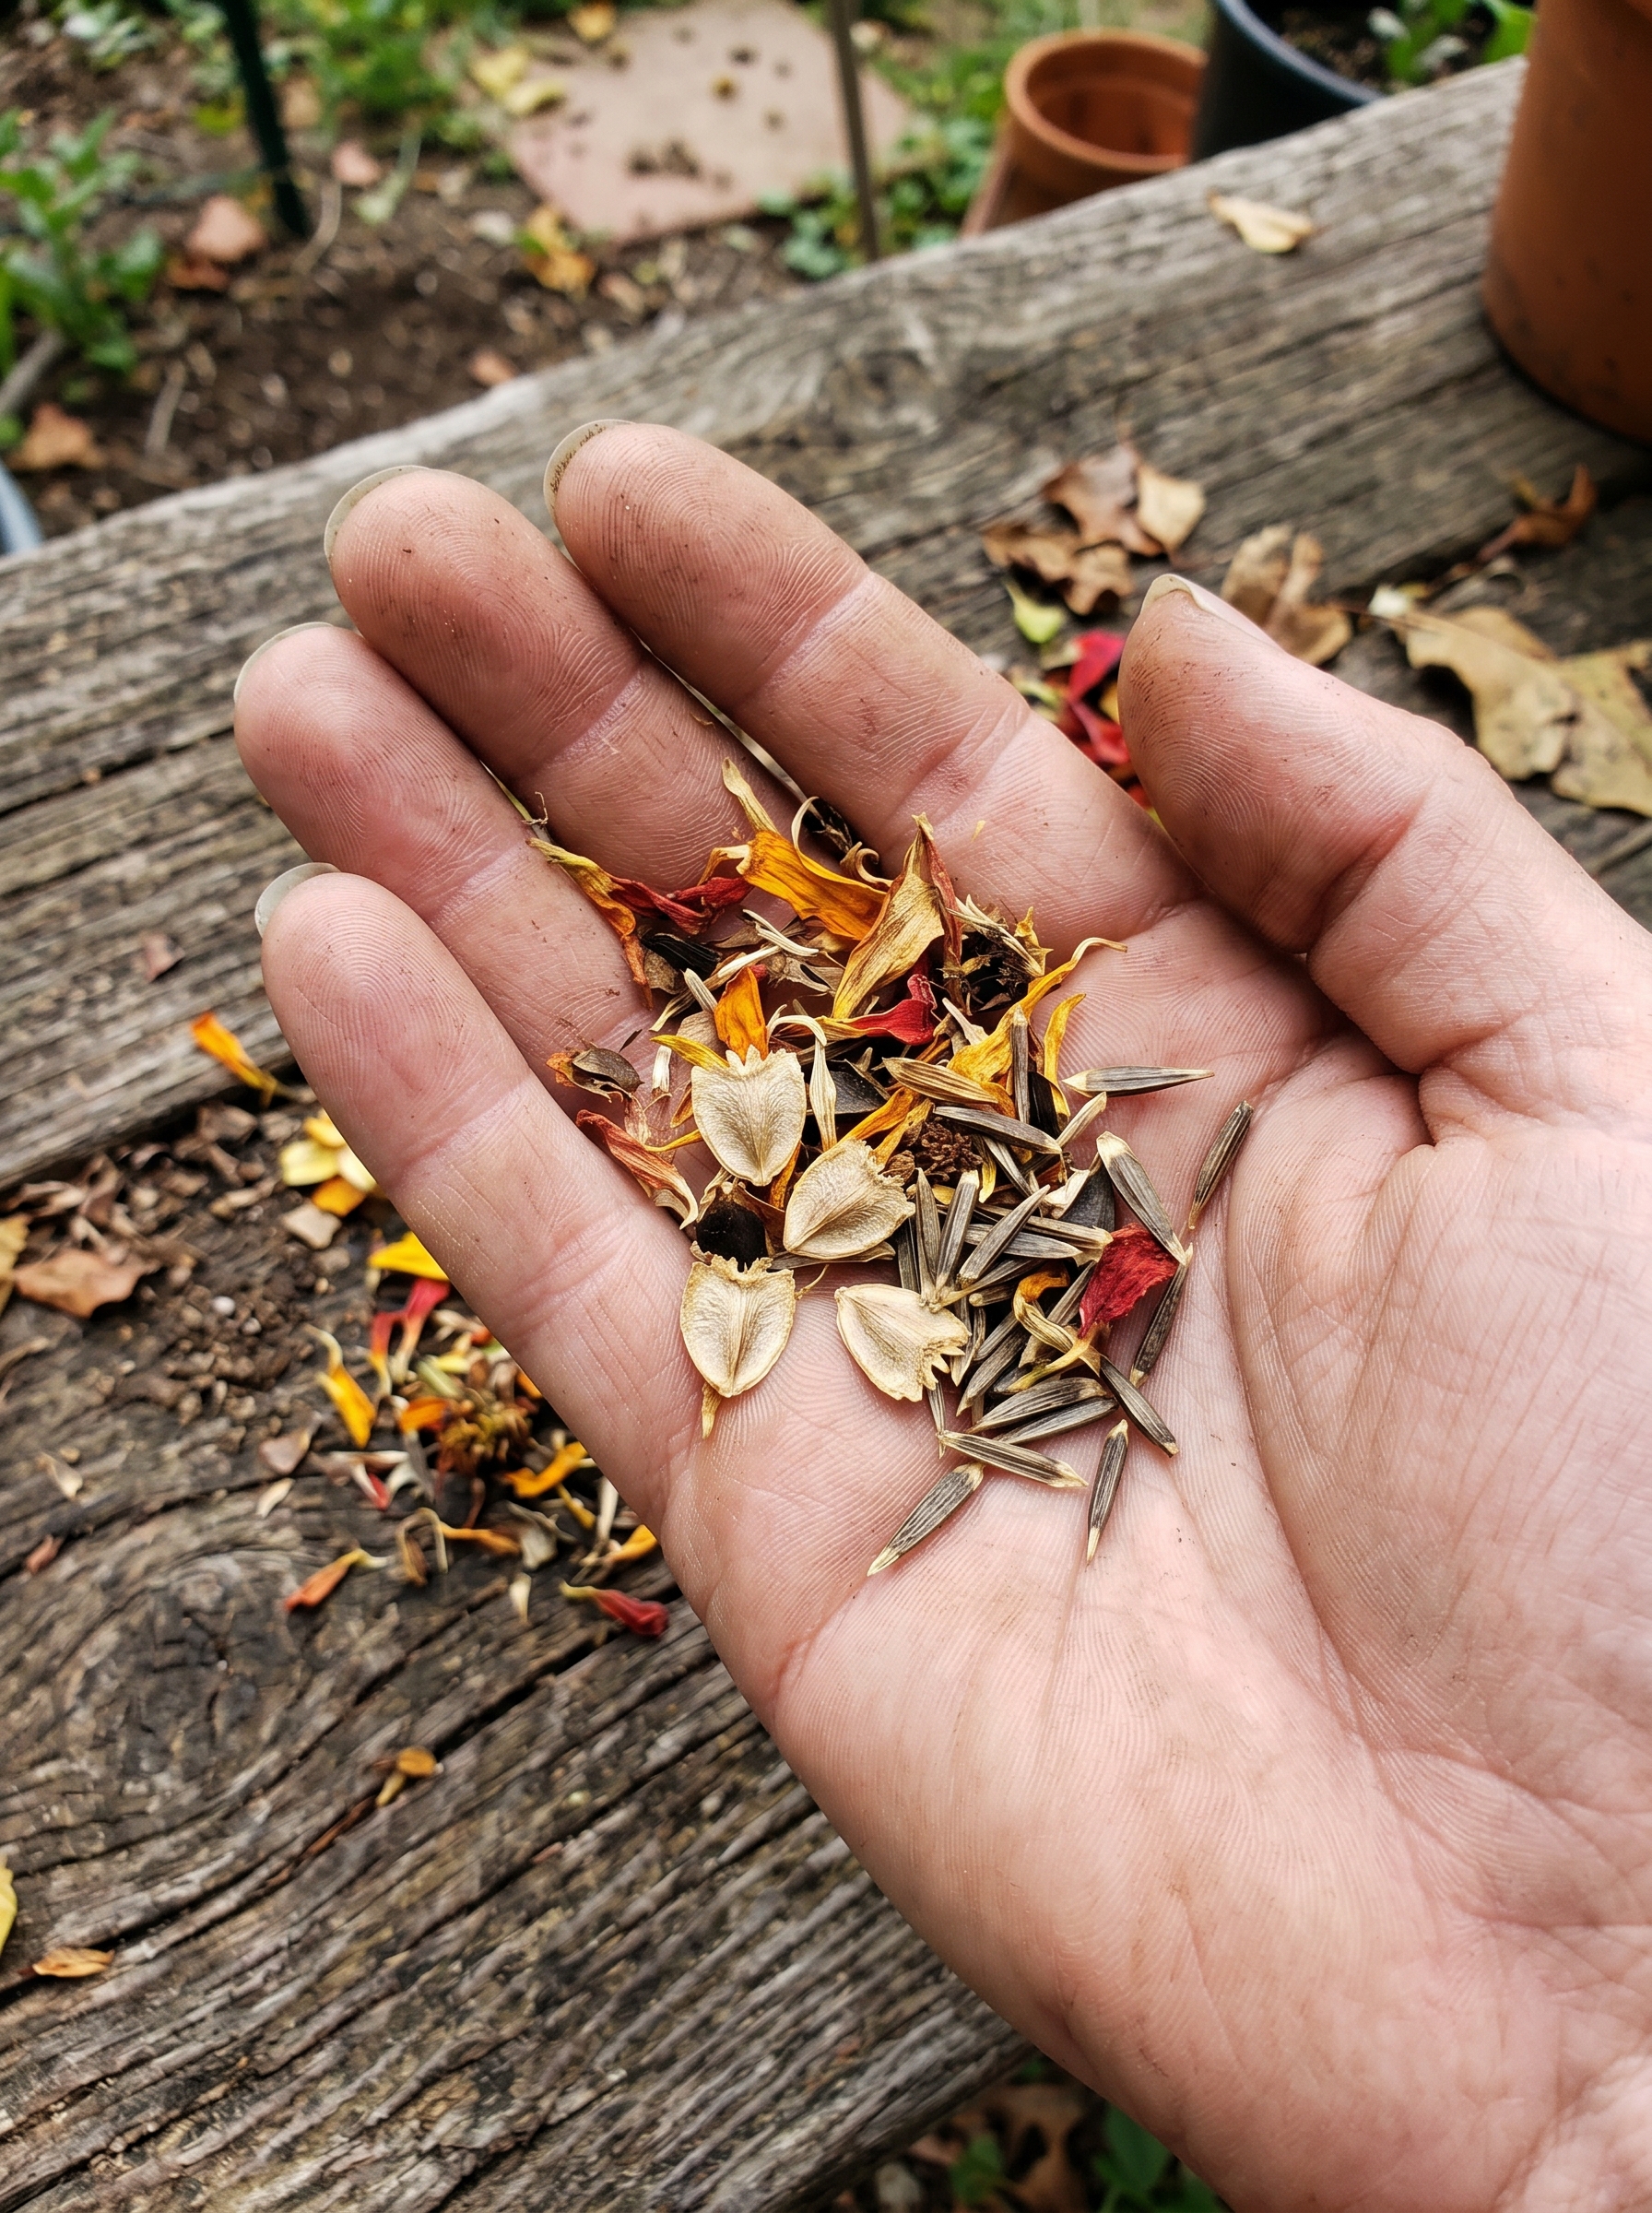
If you pull apart a dry zinnia head, it looks like a pile of chaff and debris. It’s easy to get confused about what is actually a seed and what is just old petal junk.
I learned this the hard way during my second attempt. I kept all the wrong parts and threw away the actual seeds.
When you break open the seed head, you’ll find two distinct types of seeds. It sounds strange, but zinnias are overachievers like that.
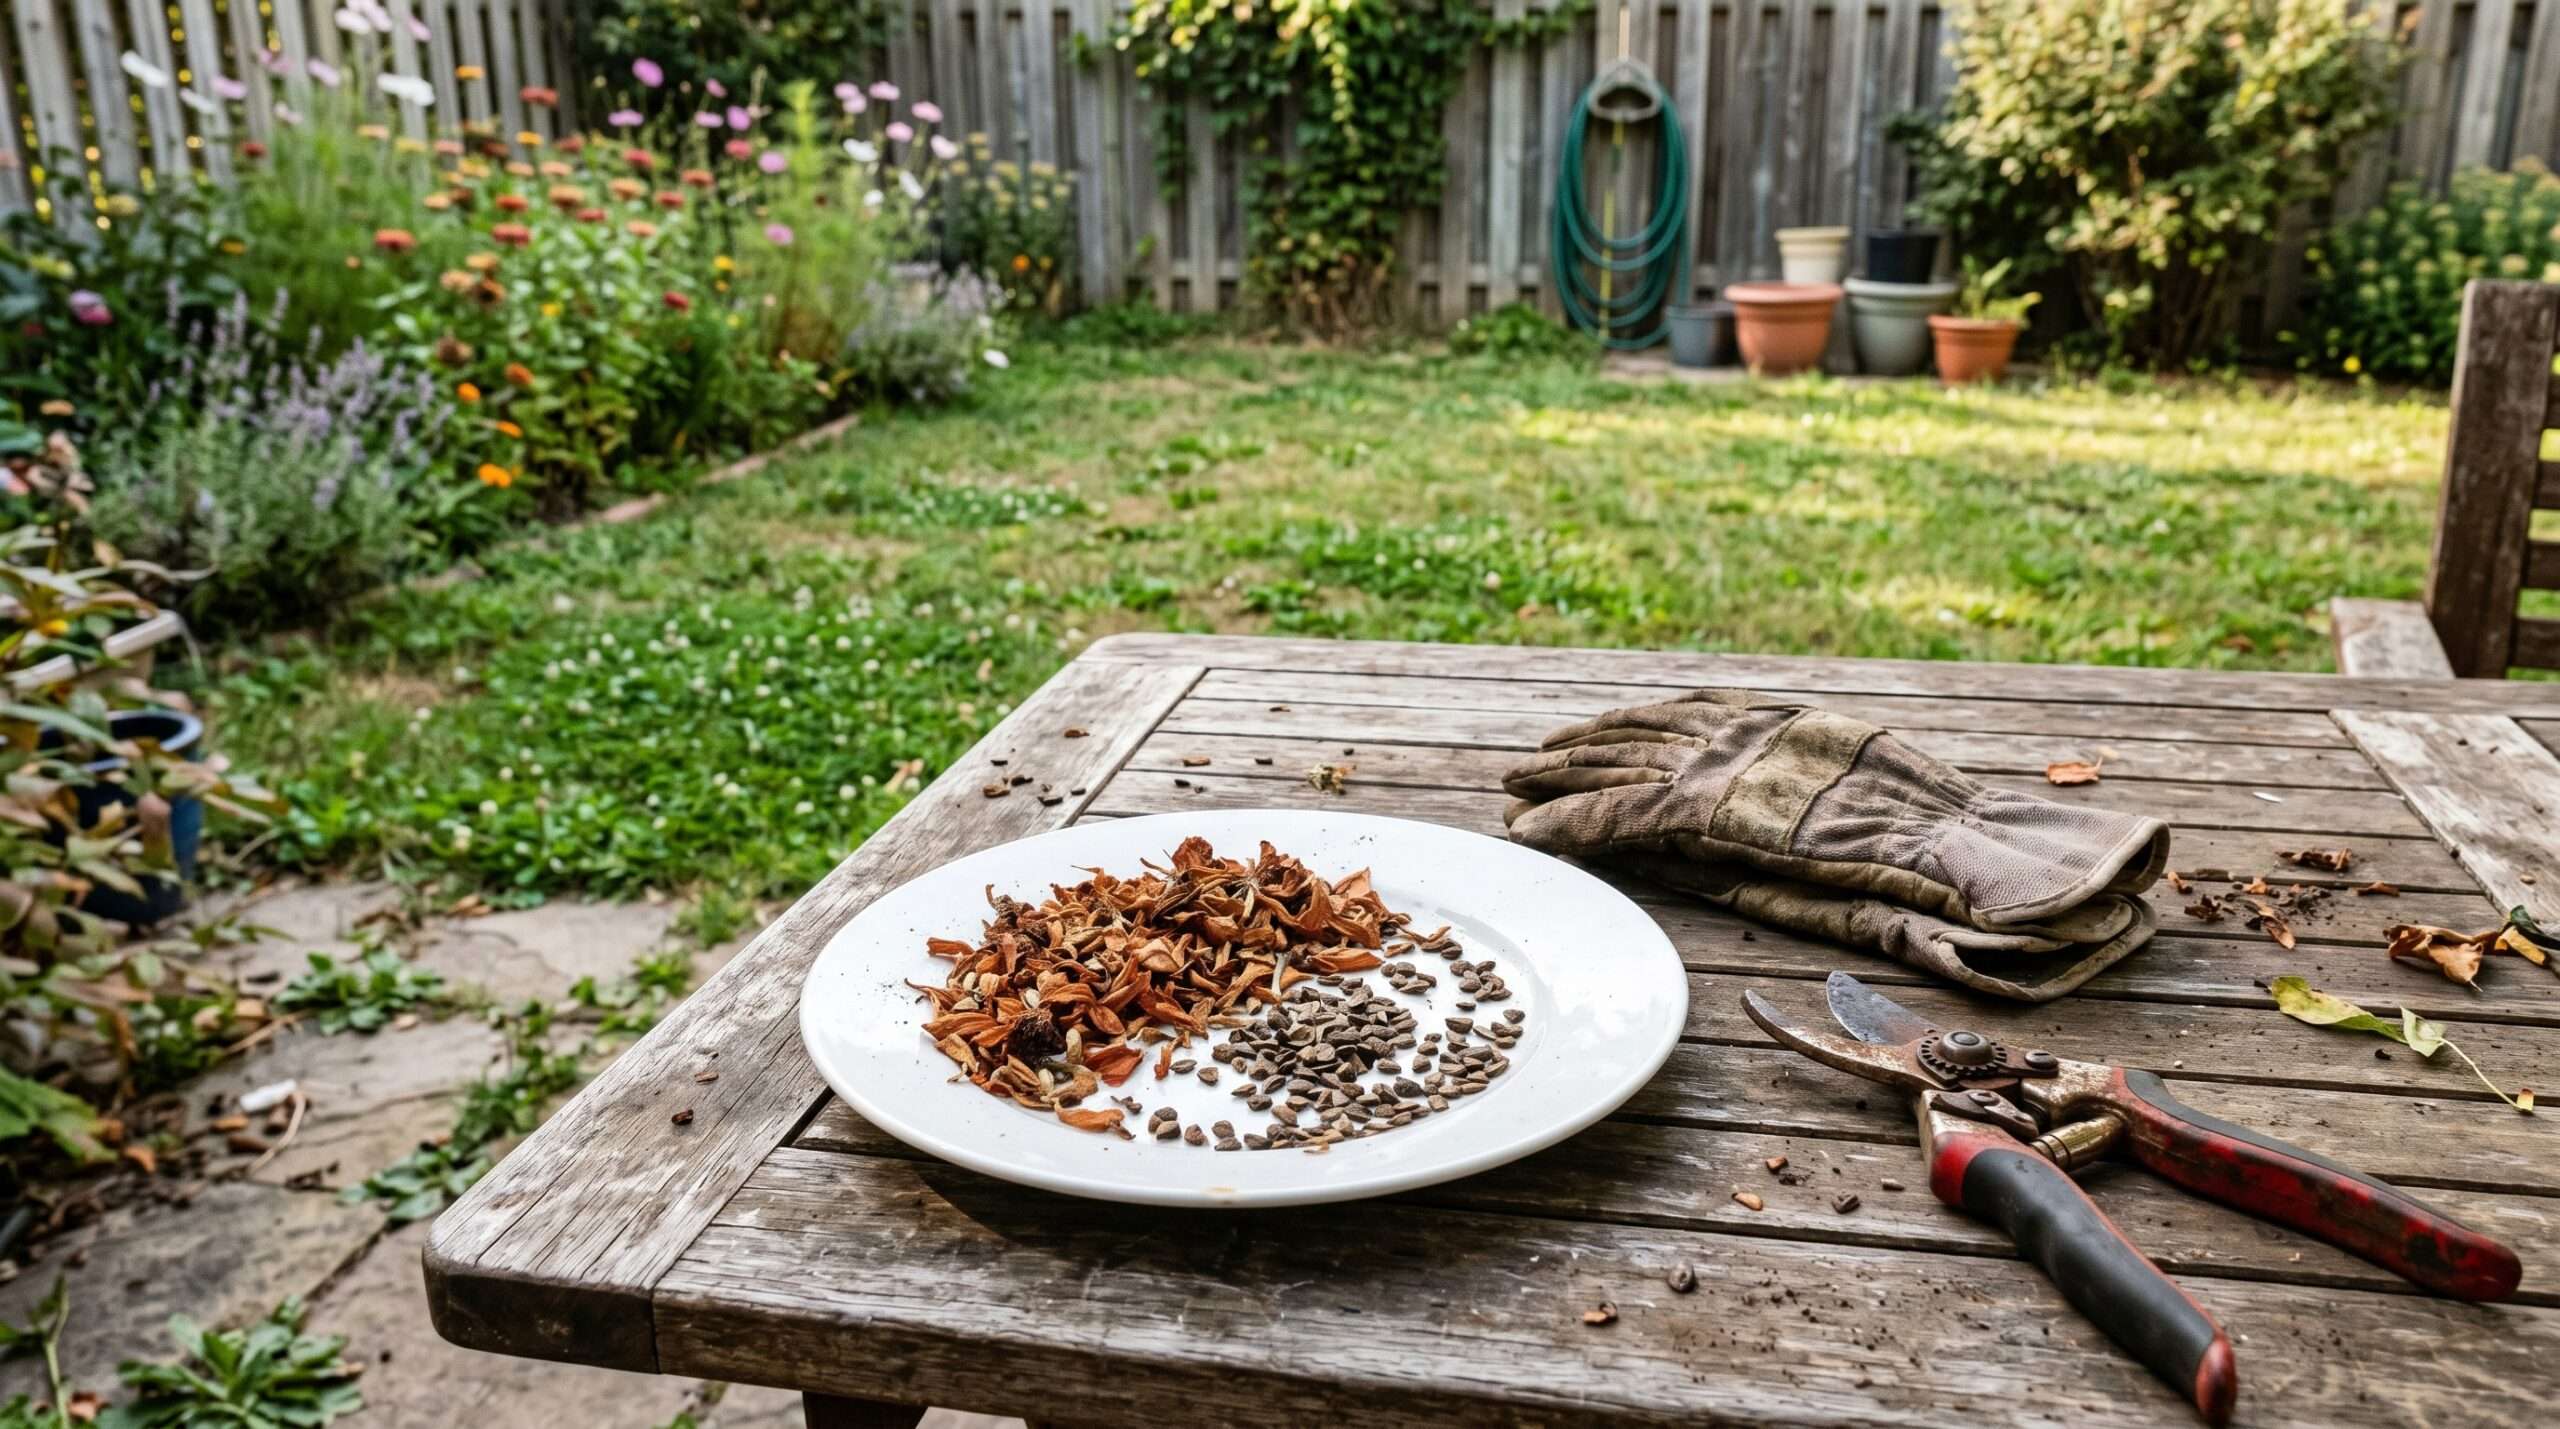
First, you have the ray seeds. These are attached right to the base of the outer petals. They look like little shields or broad arrows.
Then you have the disc seeds, which sit deeper inside the center cone of the flower. These look more like tiny, narrow darts or little scales.
The best part? Both of them will grow into beautiful plants. Some gardeners swear that the outer shield-shaped seeds produce more double-petaled flowers, while the inner dart-shaped ones produce single blooms. Honestly, in my years of doing this, I’ve planted them all mixed together and always gotten a gorgeous, unpredictable mix. It’s perfect if you love that wild cottage garden design look.
When to Harvest (And Why the Weather Forecast Matters)
Timing is everything here, but not in a complicated, scientific way. It’s more about paying attention to the moisture.
Never harvest zinnia seeds on a dewy morning.
I tried that once because I had a free morning before work. The flower heads felt dry-ish to the touch, but the deep interiors were still holding onto dawn moisture. Every single jar I packed that afternoon ended up molding within a week.
Wait for a stretch of at least three dry, sunny days. Walk out to your garden in the late afternoon, around 2:00 or 3:00 PM, when the sun has had hours to bake the plants.
Grab a flower head and give it a gentle squeeze. If it feels soft or spongy, walk away. It needs more time. If it feels stiff, scratchy, and makes a distinct crunching sound between your fingers, it’s ready to come inside.
The Hybrid Trap: What Your New Flowers Will Actually Look Like
This surprised me honestly: your saved seeds probably won’t look like the parent plant next year.
If you bought a packet of fancy, expensive hybrid zinnia seeds last spring—like the Queen Lime series or some specific dwarf variety—the seeds you save from them will likely revert back to whatever their ancestors looked like. You might get a random mix of hot pinks, basic oranges, or single-petaled wild looks.
Personally, I love the surprise. It gives the garden a lot of character and helps build up overall soil health guide resilience over time as the plants adapt to your specific yard.
But wait, there’s a catch: if you are absolutely obsessed with keeping a specific color theme for property value or curb appeal—maybe you read about how specific color schemes work in my jewel tone gardens piece—you might want to isolate your varieties.
Bees love zinnias. They will cross-pollinate your red ones with your yellow ones all day long. If you want pure colors, you have to bag the blooms with little organza bags before they even open. Too much work for me, to be honest. I prefer the genetic lottery.
What Actually Works: The 10-Minute Processing Setup
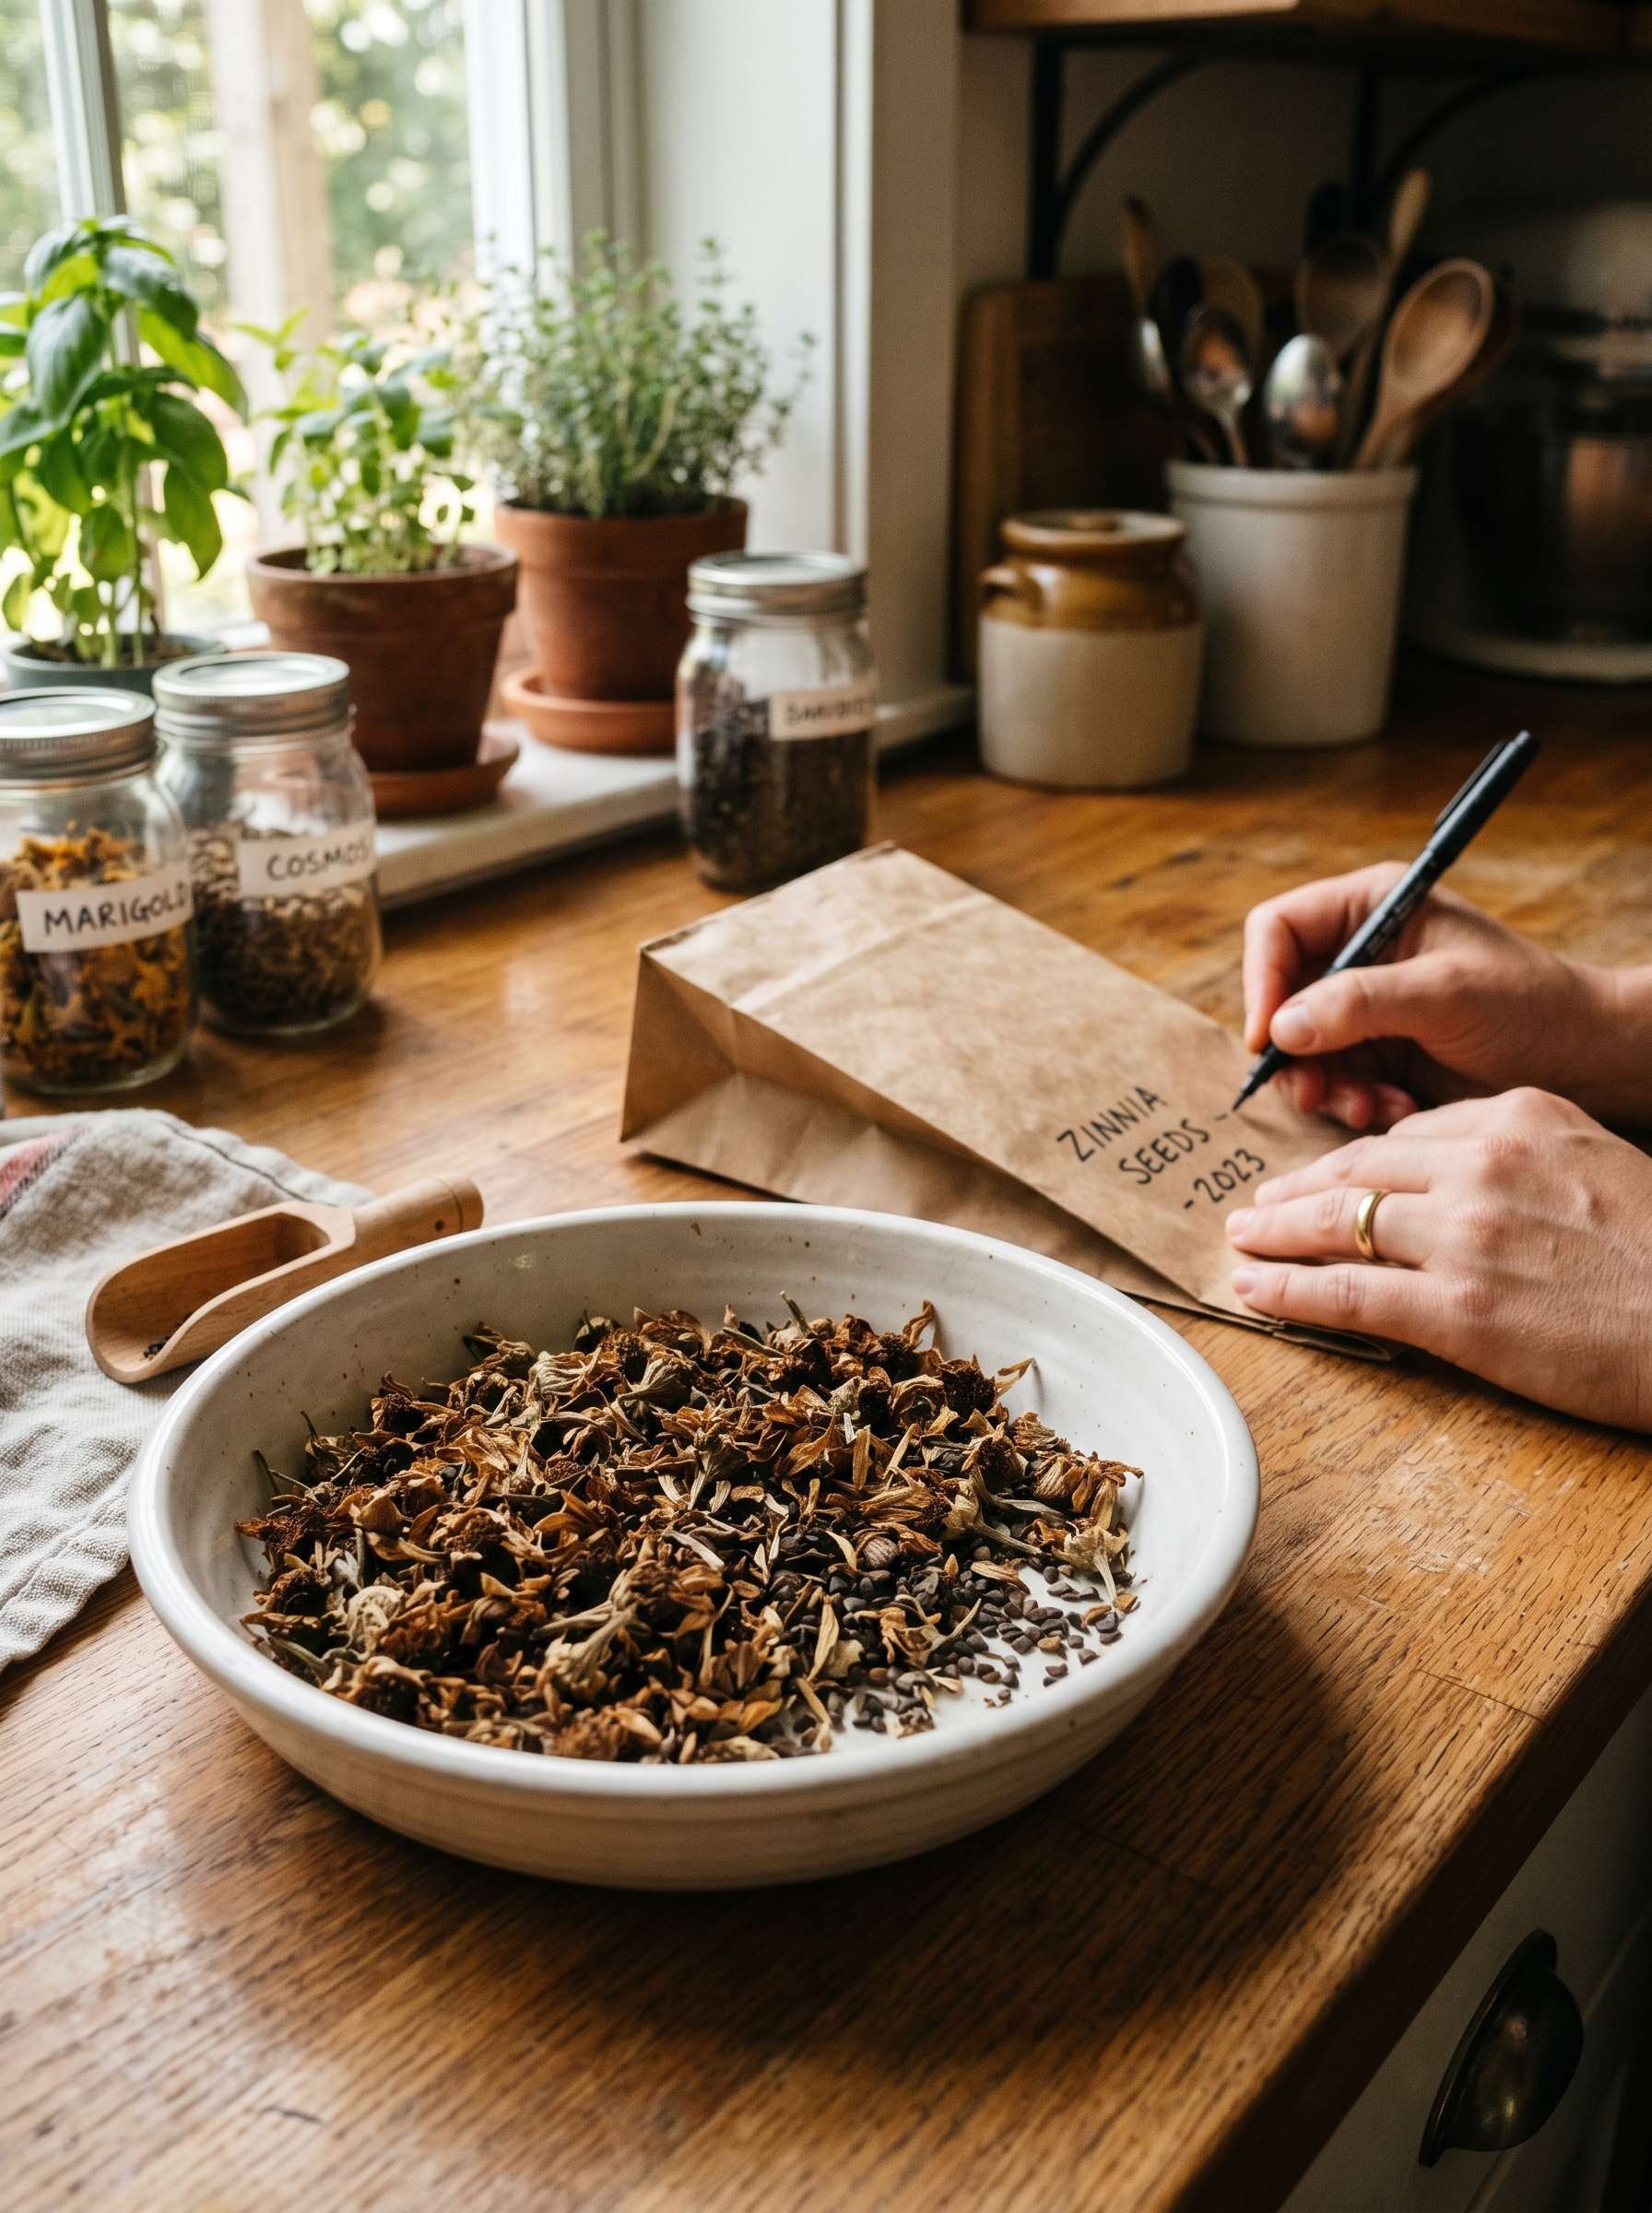
You don’t need fancy tools for this. Don’t buy a seed-separating machine or expensive screens. Here is the exact, low-tech setup I use on my kitchen counter every September.
Gather Your Tools
- A plain ceramic baking dish or a cheap cookie sheet (white works best so you can see the seeds)
- A couple of brown paper lunch bags
- A fine-tip permanent marker
- Your dry flower heads
Step 1: The Snip
Cut the brown flower heads off the stalks, leaving about an inch of stem. This gives you something to hold onto so you don’t crush the seeds while working.
Step 2: The Thumb Smash
Hold the flower head over your baking dish by the little stem stub. Take your thumb and press firmly right into the center of the cone, pushing outward. The whole structure should break apart effortlessly into the pan.
Step 3: Sorting the Good Stuff
Gently blow across the baking dish to get rid of the lightest chaff (do this gently, or you’ll be sweeping your kitchen floor for an hour). Look for the firm, plump seeds at the bottom of the dish. If a seed feels flat and papery like an empty envelope, flick it out. It’s a dud.
Step 4: The Paper Bag Stage
Label your brown paper bag with the date and variety before you put anything inside. Trust me, you think you’ll remember what’s what next spring, but you won’t. Dump the sorted seeds into the bag.
Things That Didn’t Work for Me
Over the last two decades, I’ve made pretty much every mistake a person can make with seed saving. Here are the ones that hurt the most, so you can skip them entirely.
Storing in Plastic Baggies Too Soon
I mentioned this earlier, but it bears repeating. Plastic traps moisture. Even if a seed feels 99% dry, that 1% of trapped humidity will turn into a fungus party in a sealed plastic bag or a mason jar with a tight lid. Air circulation is your best friend until you are absolutely certain they are bone dry.
Saving Seeds from Diseased Plants
Zinnias are notorious for getting powdery mildew late in the season. A little bit on the lower leaves is fine—that’s just August doing its thing. But if the actual flower head is covered in grey fuzz or looks black and rotted from a heavy fungal infection, do not save those seeds. You’re just transferring those fungal spores directly into next year’s seed bed.
The “Drop and Forget” Method
One year I got lazy and just shook the dead flower heads directly onto the soil, thinking they would self-seed naturally like wild flowers. Most of them didn’t survive the winter. Local birds had a massive feast on the exposed seeds all through November, and the ones that survived rotted in our heavy, wet spring soil before they could even think about germinating.
Keeping the Bugs Out of Your Stash
Most gardening blogs never mention this, but pests love stored seeds.
You spend all this time harvesting, drying, and bagging your seeds, only to open the stash in March and find a bunch of tiny webs and little holes chewed through your kernels.
Weevils and pantry moths are sneaky.
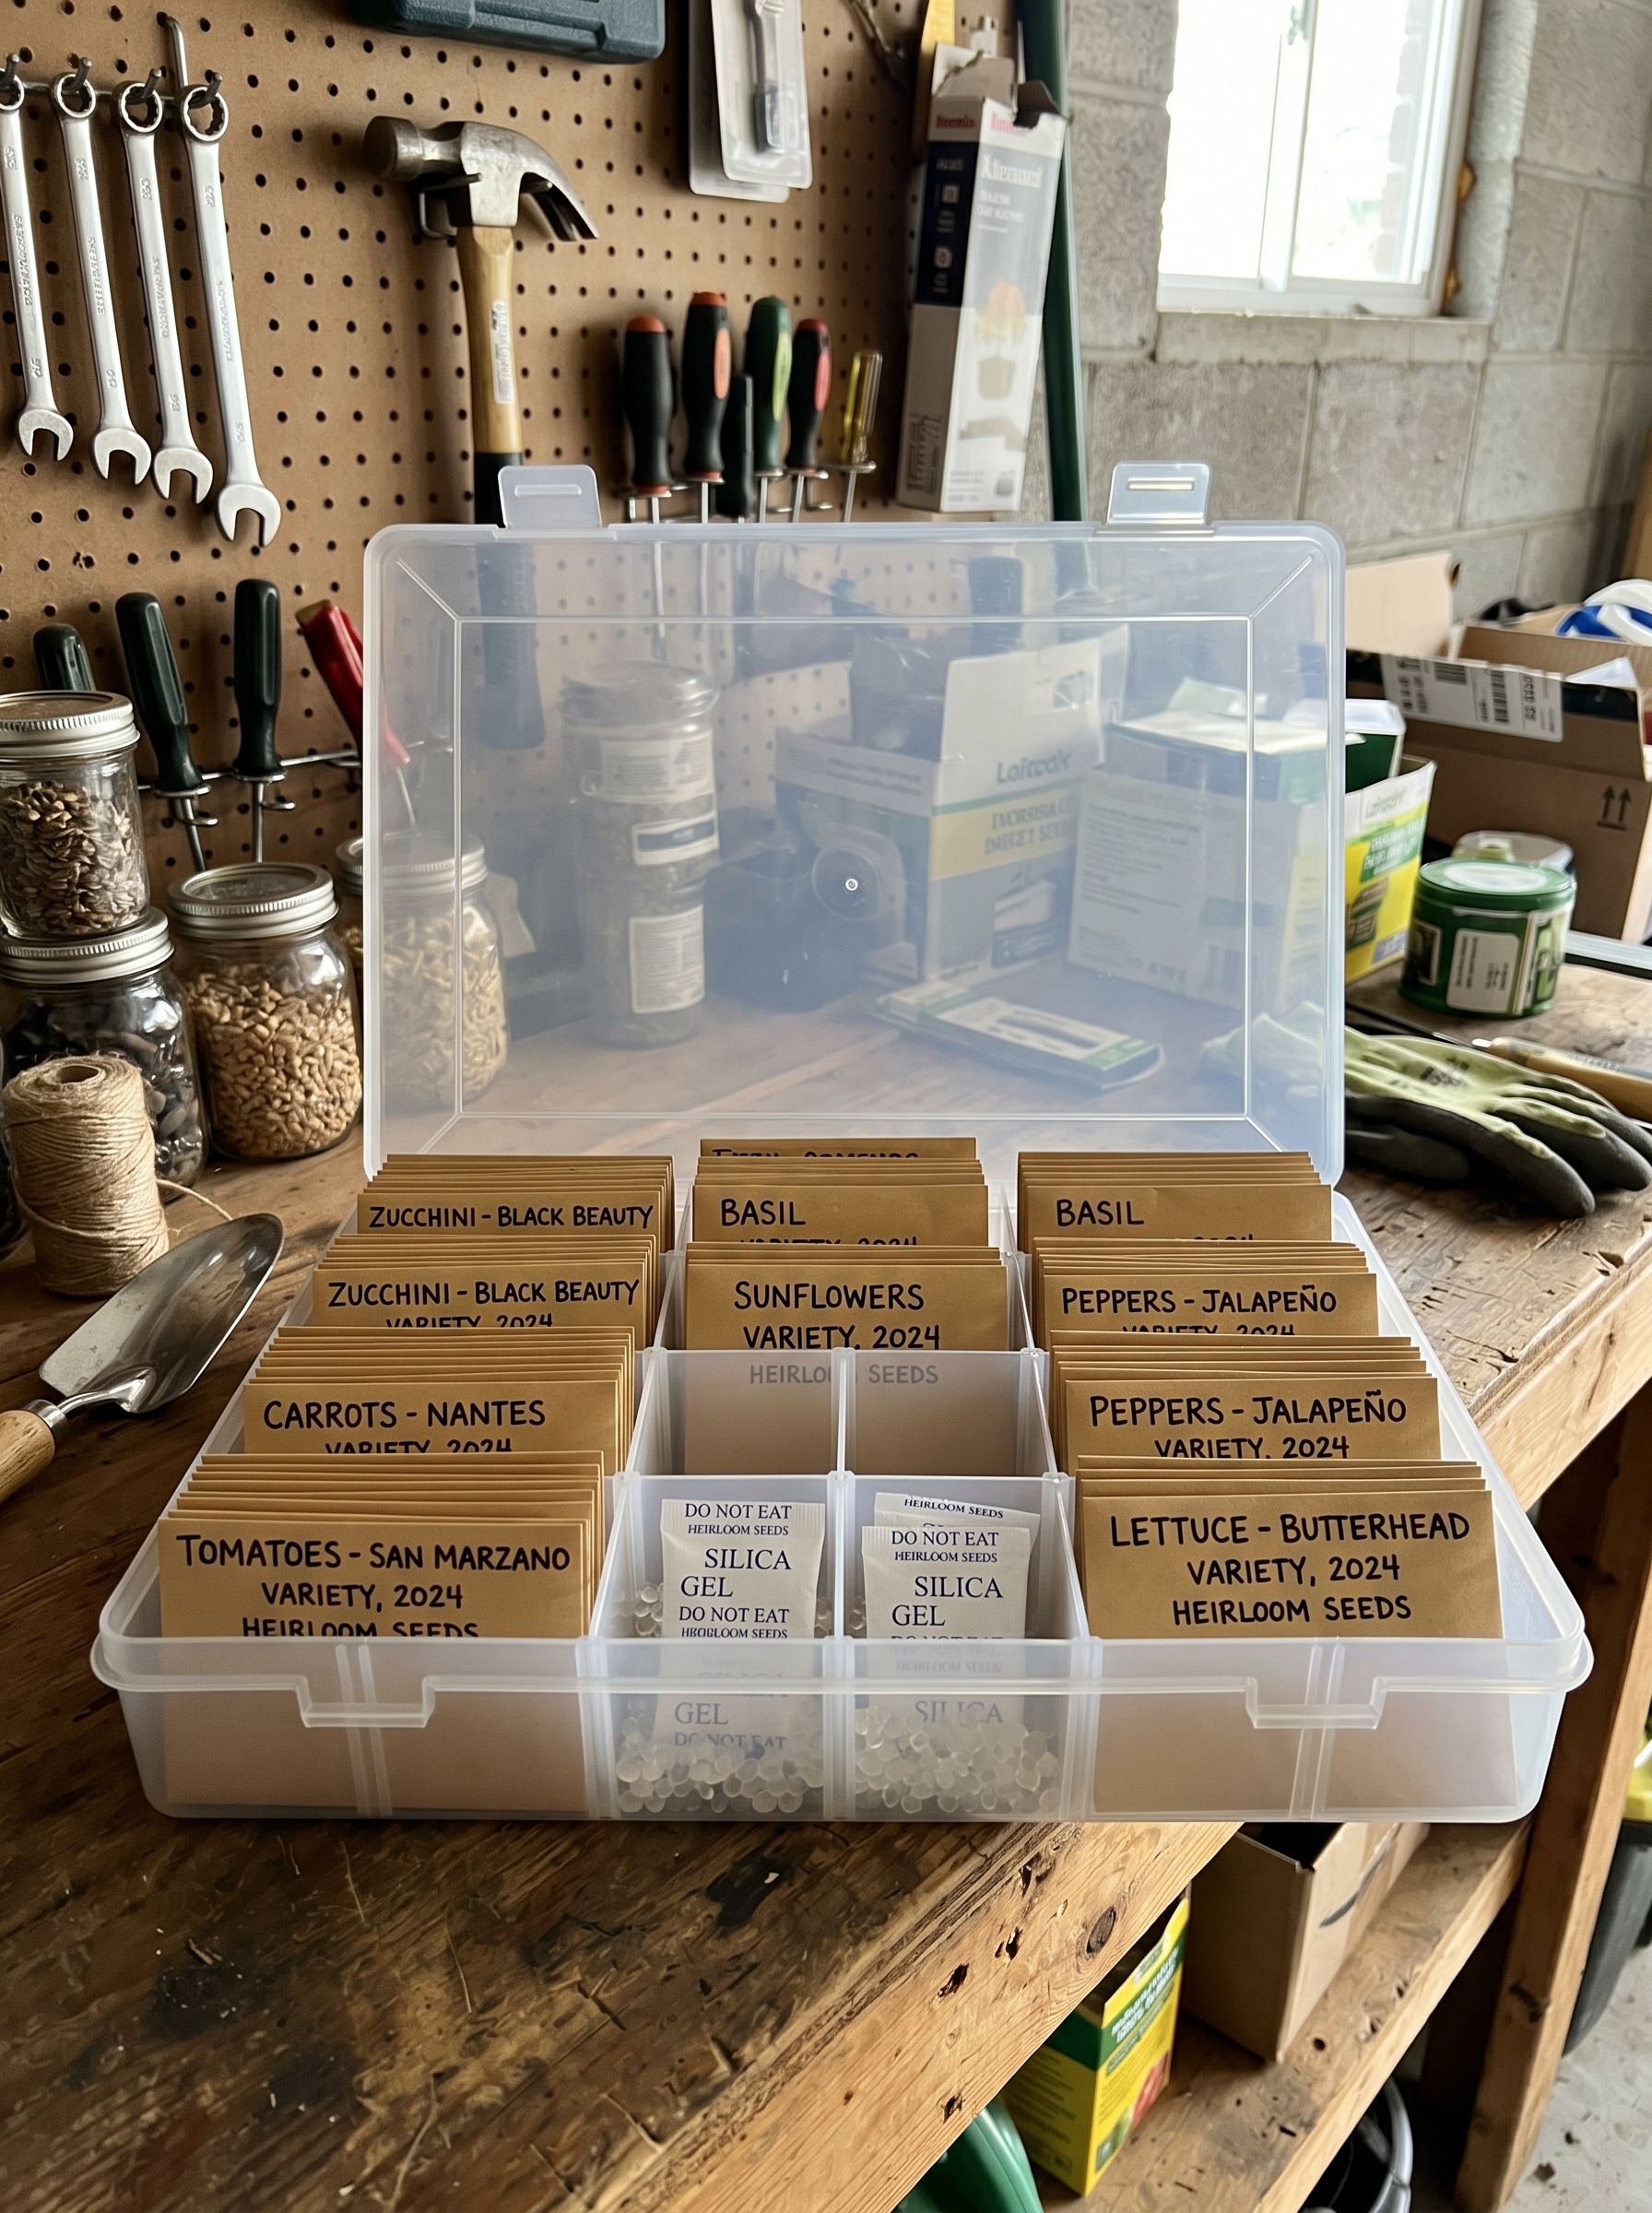
To prevent this, I keep my labeled paper bags in an airtight plastic storage bin, and I toss in a few food-grade silica gel packets—the ones you get in shoe boxes or vitamin bottles. They pull out any residual moisture and keep the environment hostile for tiny bugs.
If you have a major issue with seed pests in your area, you can actually freeze your zinnia seeds. But you have to make sure they are completely dry first. Put the dry seeds in a jar, seal it tight, and leave it in the freezer for two weeks. This kills off any invisible insect eggs without hurting the seed’s viability.
Small Things That Make a Big Difference
- The Fingernail Test: If you aren’t sure if a seed is viable, press your thumbnail into the center of it. If it bends easily or feels squishy, it’s empty. If it feels hard, solid, and resists the pressure, it’s good to go.
- Keep the Stems Long While Drying: If your weather turns rainy before the flower heads are completely dry on the plant, cut them with long 6-inch stems, tie them in a bunch with a rubber band, and hang them upside down in your garage for two weeks.
- Use Old Window Screens: If you are processing a massive amount of zinnias, lay an old window screen over a wheelbarrow. Rub the flower heads across the screen. The seeds and small chaff fall through into the barrow, leaving the big stems and bulky petals on top.
- Label the Height: Always note the approximate height of the parent plant on your seed packet. Planting a surprise 4-foot Benary’s Giant zinnia at the very front of your flower border next year because you forgot its lineage is a frustrating design mistake.
What to Do with Your Mountain of Free Seeds
Once you get good at this, you will have way more seeds than you can ever actually plant in your own yard. My first successful year yielded enough seeds to fill a quart-sized jar.
Don’t let them go to waste.
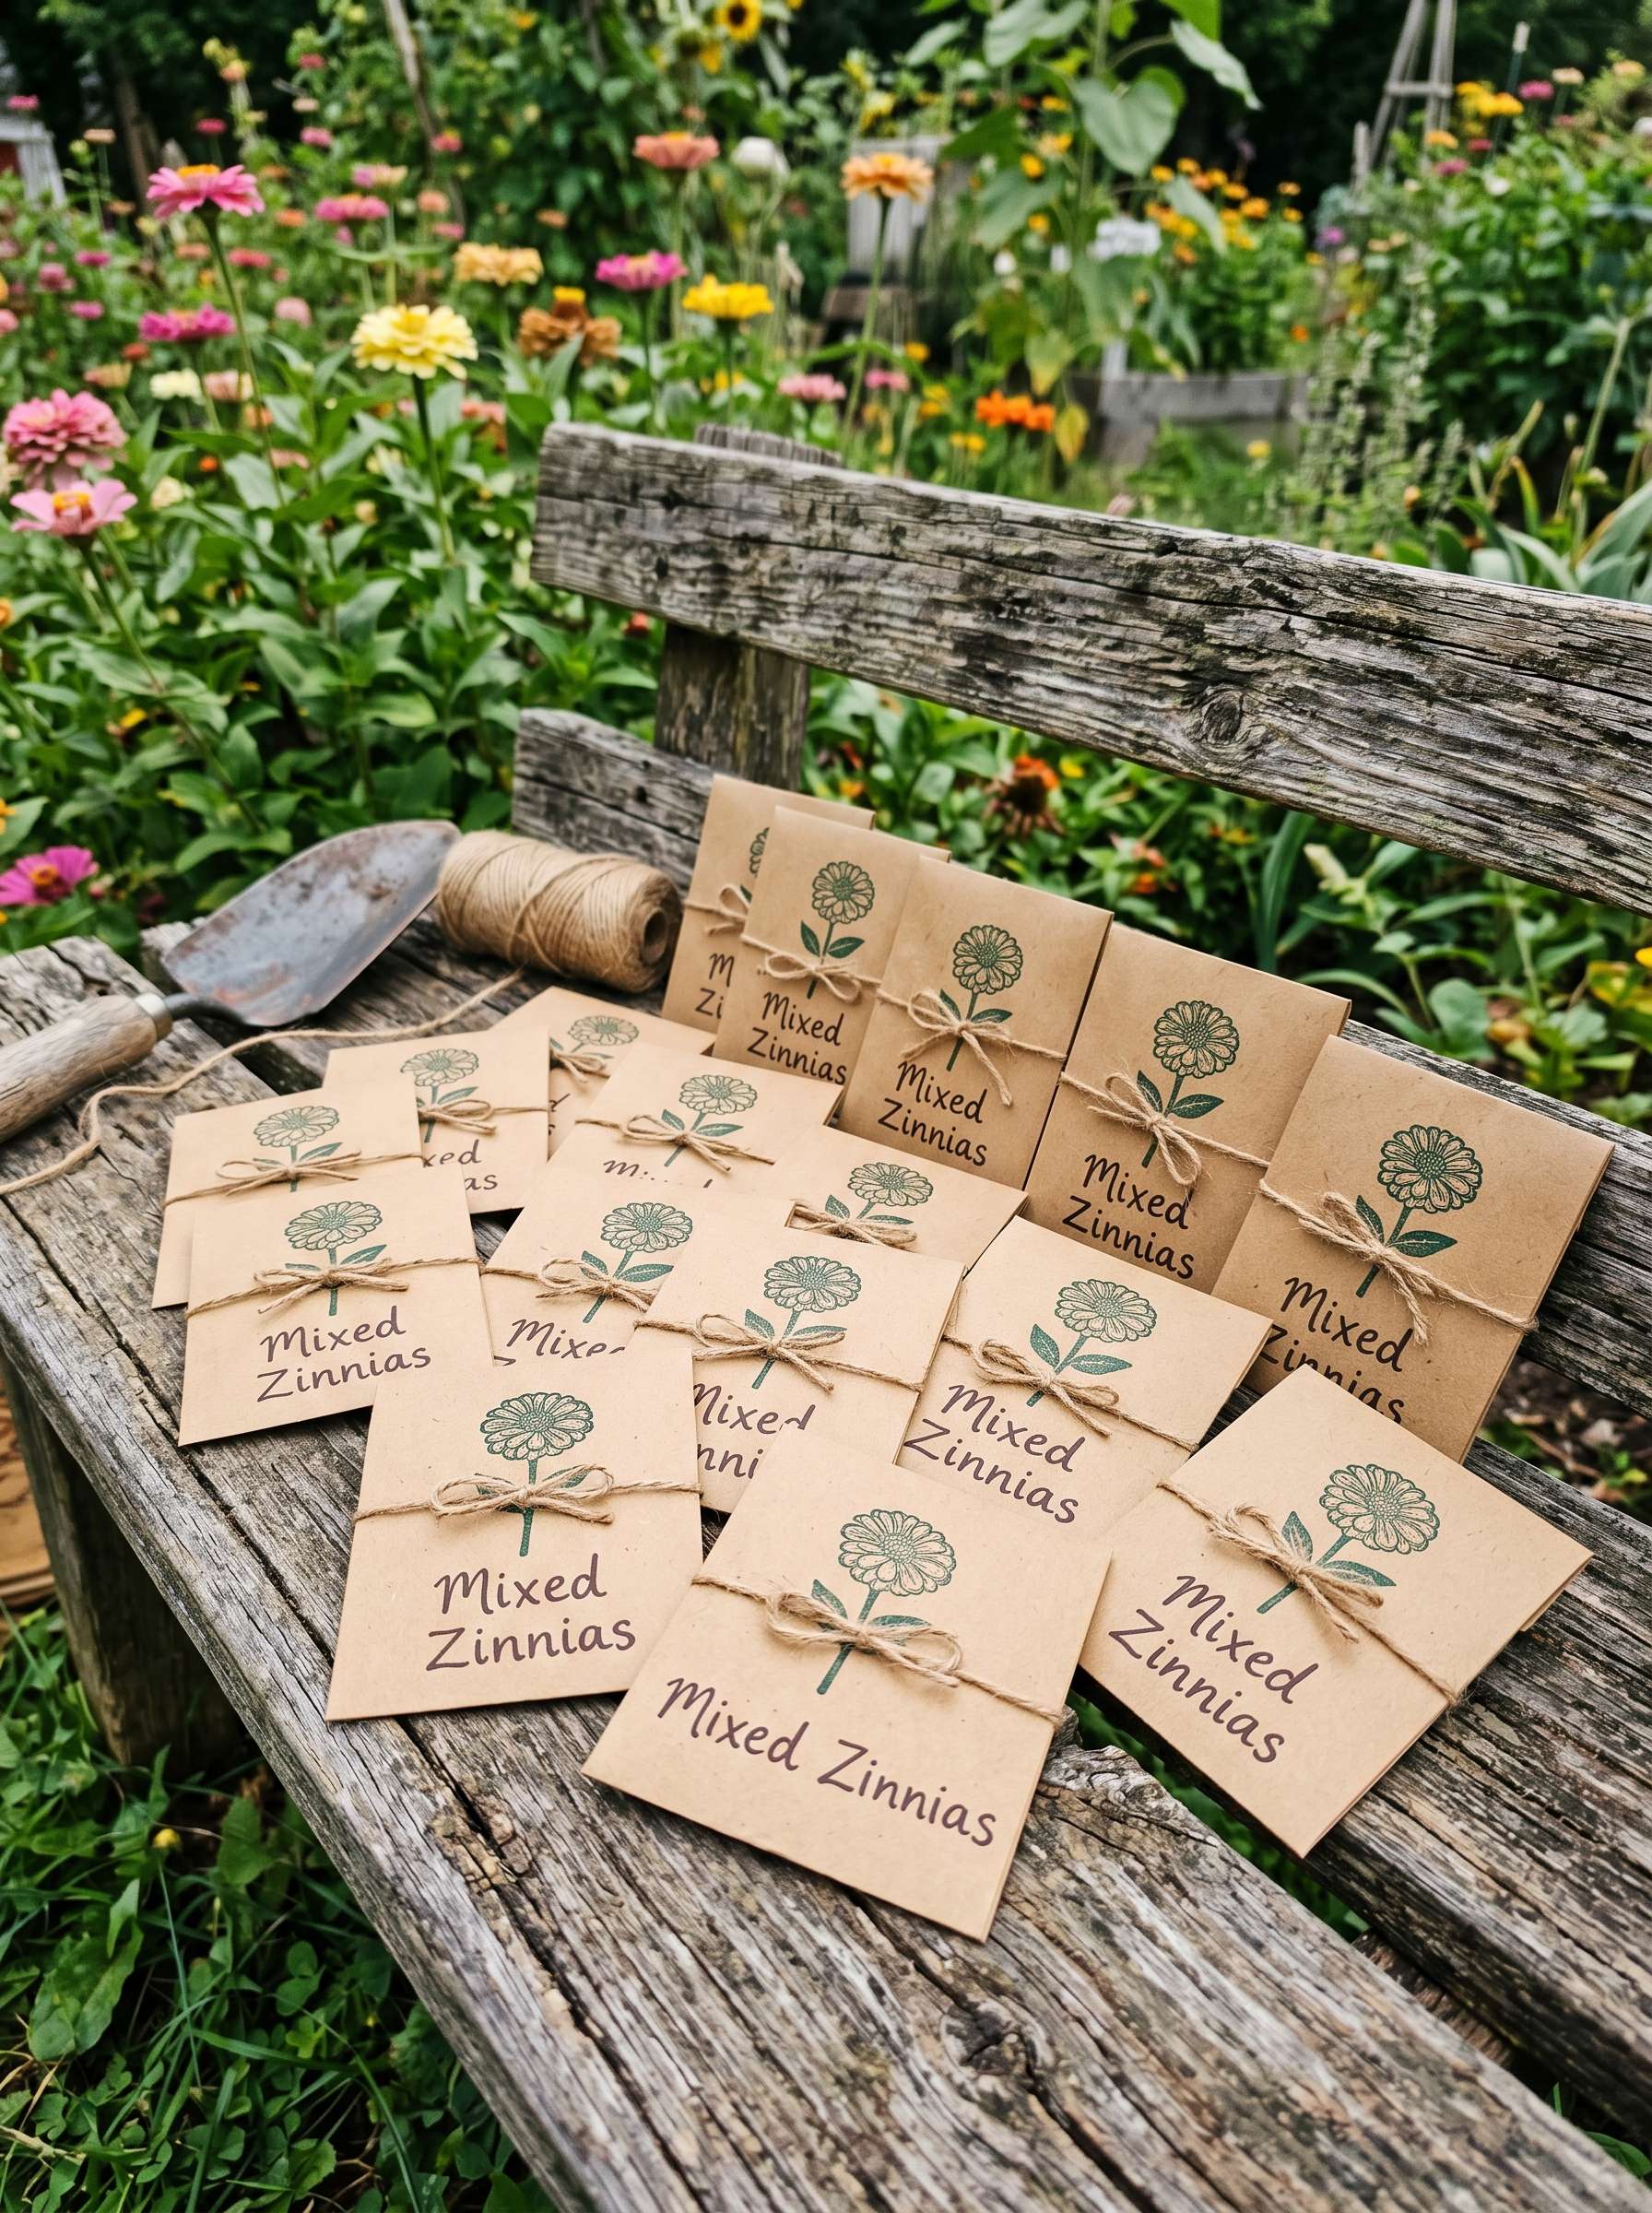
I started making little homemade seed packets using brown Kraft paper and gifting them to neighbors at our spring block parties. It’s an easy way to build community and get people excited about creating beginner gardening tips spaces in their own yards.
You can also use your massive seed stash to create a dense, chaotic pollinator border along a forgotten back fence line. Since the seeds cost you nothing but ten minutes of your time, you can broadcast them heavily without worrying about the cost of failure. The butterflies and bees will thank you for it, especially if you blend them with some resilient native choices like the ones found in our keystone plants resource.
Planting Your Saved Stash Next Spring
When spring finally rolls around and your soil warms up to about 70 degrees, it’s time to unleash your collection.
Zinnias absolutely hate having their roots disturbed.
While you can start them indoors in peat pots, I’ve always had the best luck direct sowing them right into the ground after the last frost date has passed.
Clear out any weeds, scratch up the top inch of dirt, and press the seeds about a quarter-inch deep into the soil. Give them a good drink of water. Since you have hundreds of seeds now, don’t be afraid to plant them closely together—about two or three inches apart.
Once they grow a few inches tall, you can thin them out to their final spacing of 8 to 12 inches. Take those thinned-out seedlings and tuck them into any bare spots around your yard, or use them to fill out spaces in your firescaping home safety zones where low-flammability annuals can help keep soil moist and green.
FAQ
No. Unlike many native perennial seeds, zinnia seeds do not need a cold period to trigger germination. They are tropical annuals by nature. Keep them dry and at room temperature all winter, and they’ll be perfectly happy to sprout when things warm up.
If kept cool, dark, and dry, they will easily last three to five years with a high germination rate. After that, the success rate drops off a bit, but you’ll still get some survivors. I always try to use them within two seasons just to be safe.
Absolutely. The root space doesn’t change the genetic makeup of the seed. Just make sure the container plant stays healthy and the flower heads get enough sunshine to dry out completely before you harvest them.
That’s the genetic reversion of hybrid plants. The complex, fluffy “double” blooms are often a recessive trait or a result of specific hybrid breeding. The seeds revert back to the tougher, simpler single-flower genetics of their wild ancestors. They still look great and actually make it easier for bees to access the pollen.
Yes. If a frost is coming and your seed heads aren’t completely dry yet, clip them all and spread them out in a single layer on paper towels or old newspapers in a warm room with good air movement for two to three weeks.
Once you understand the basic cycle of these plants, the garden stops feeling like something you have to constantly buy packages for and starts feeling like an ongoing loop. You plant once, enjoy the blooms all summer, spend ten minutes breaking apart some crispy flower heads in September, and repeat the whole thing over again next spring.
It’s an easy win in a hobby that can sometimes feel full of complicated rules and expensive mistakes. Just let things get a little brown and messy out there this August—your wallet will thank you next April.
Most advice in this article comes from years of real gardening experience and trial-and-error in home gardens. Results may vary depending on climate and growing conditions.

Aagam – Founder of SpruceTouch
I’m Aagam, a home and garden enthusiast who enjoys growing, building, and improving outdoor spaces. I focus on practical backyard projects, garden ideas, and simple DIY solutions that are useful in real homes. Through SpruceTouch, I share what I’ve learned, what worked, what didn’t, and the small details that can make an outdoor project easier.