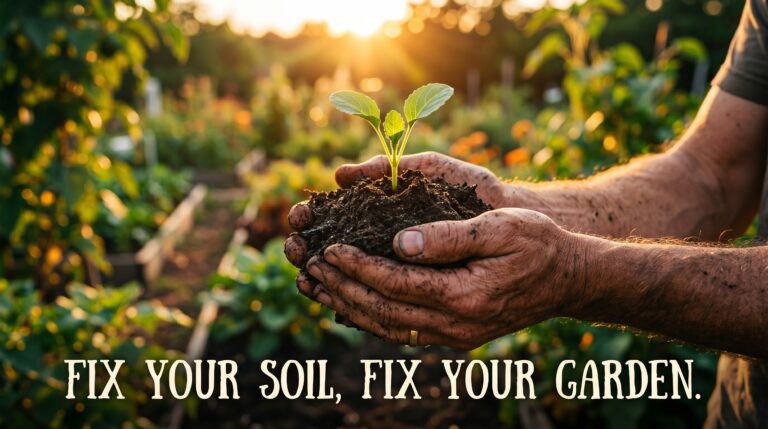
Recharging Tired Soil: My step-by-step prep for the Fall transition
Every single August, it happens like clockwork. I look out at my backyard beds and feel a heavy wave of exhaustion. The soil looks completely baked, pale, and dusty, almost like concrete mix.
My summer tomatoes took everything the ground had to give, leaving the dirt totally spent. After nearly two decades of making a mess in my backyard, I finally figured out how to fix this without losing my mind or spending a fortune.
I used to think you just dumped a bag of cheap store fertilizer on top and called it a day. That mistake cost me an entire crop of autumn greens back in 2009.
Today, I’m going to walk you through exactly how I wake up tired soil so your fall greens, garlic, and root veggies actually thrive instead of just sitting there stunted.
Quick Check: Is Your Dirt Totally Spent?
Before you do anything, you need to look at what you’re actually dealing with.
- The soil is pale, crusty, and water just pools on top instead of soaking in.
- You pull up an old pepper plant and the dirt falls away like dry sand, with zero earthworms in sight.
- The ground feels solid as a brick when you poke it with a finger.
- Your late-summer weeds are looking yellow and weak (when even weeds give up, you know it’s bad).
The Big Summer Burnout
We ask an incredible amount from our backyard dirt between May and August. Think about it. Those heavy-feeding tomatoes and peppers are basically pumps, sucking every drop of nitrogen, calcium, and organic goodness right out of the root zone.
By the time mid-August rolls around, the soil structure isn’t just empty; it’s physically broken down. The intense summer sun bakes the bare spots, killing off the helpful microbes that live near the surface.
I learned this the hard way during a particularly brutal season a few years back. I tried to plant a second round of bush beans directly into an old tomato spot without doing any prep.
They popped up, turned a pathetic shade of lime green, and just stayed three inches tall until the frost took them. The dirt was simply out of gas.
But here’s the kicker: fixing it doesn’t mean you need to dig everything up and start over.
In fact, grabbing a heavy rototiller and pulverizing your beds at the end of summer is one of the worst things you can do. It obliterates what’s left of the natural soil structure and wakes up millions of buried weed seeds that are just waiting for a structural shakeup to sprout.
Stop Digging, Start Layering
Years ago, my back would ache for days because I thought saving the garden meant flipping every square inch of earth with a spade fork. I was convinced that buried nutrients needed to be dragged to the top.
Then I noticed something simple while walking through the woods behind my house. Nobody goes out into the forest with a tiller to prep the trees for autumn. The leaves just fall, rot, and create the most beautiful, rich black earth you’ve ever seen.
Now, I use a strict no-till approach for my fall transition. I leave the deep soil structure alone and focus entirely on building up.
What I Learned: The top two inches of your soil are where the magic happens. If you protect that layer and feed it from the top down, the earthworms will do the heavy lifting for you.
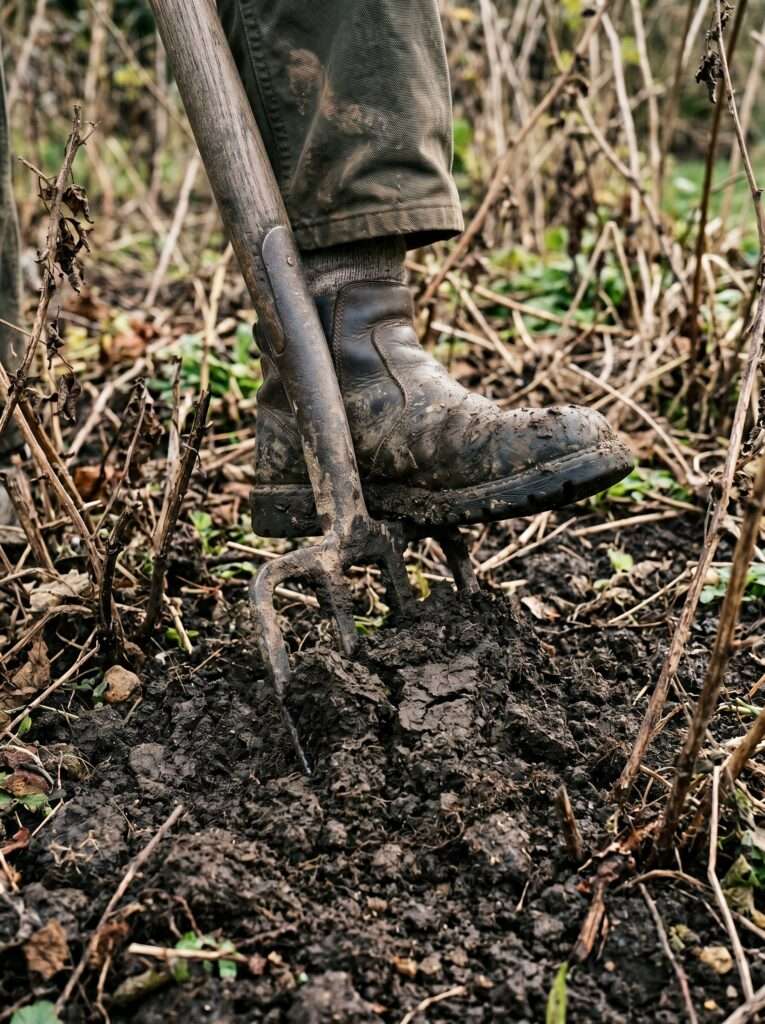
If you have a bed that’s incredibly compacted, just take a broadfork or a regular pitchfork, push it straight down into the dirt, wiggle it back and forth slightly to create deep air channels, and pull it out. Don’t flip the soil. Just crack it open so it can breathe again.
This simple trick lets your autumn amendments wash down deep into the root zone whenever it rains, without disrupting the underground fungal networks that keep your plants healthy.
Feeding the Soil Ghosts
When your dirt is tired, it’s not just low on chemical nutrients like nitrogen or potassium. It’s usually lacking life. Healthy soil is crawling with billions of microscopic bacteria, fungi, and protozoa that break down organic matter and feed your plants.
When the ground gets baked dry all summer, those little guys either die off or go completely dormant. I call them the soil ghosts—they’re still there, but they aren’t doing any work.
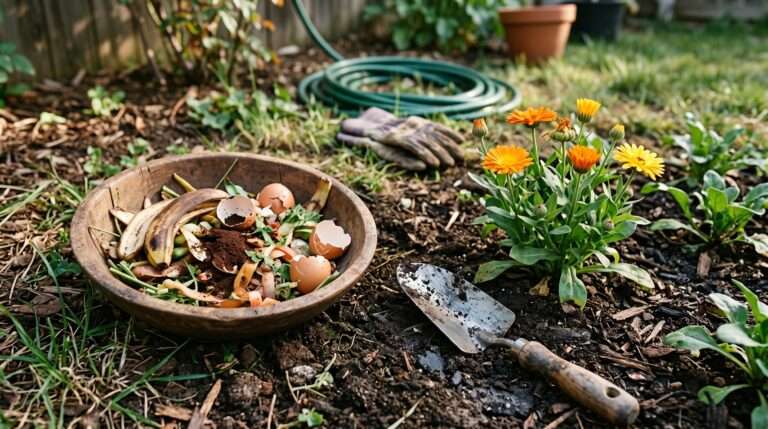
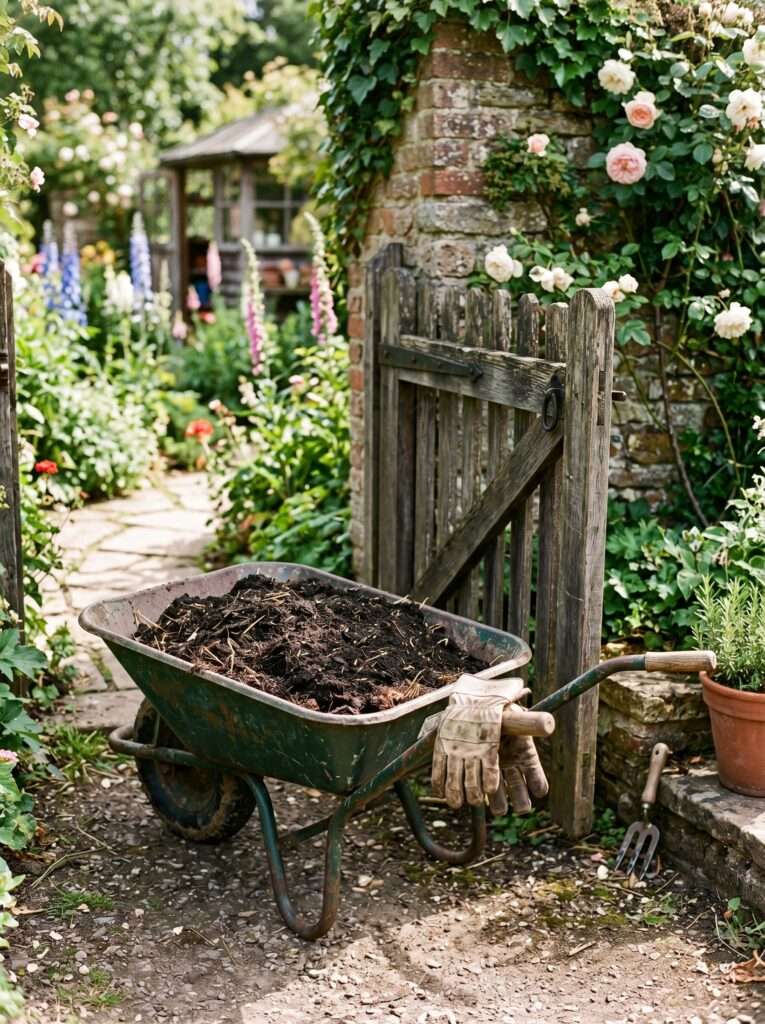
To wake them up, you need to give them something to chew on. My absolute go-to weapon for this is homemade compost, but simple well-rotted leaf mold or aged steer manure works wonders too.
One thing I noticed over the years is that people get way too precious about compost. You don’t need an expensive, laboratory-grade setup.
Just getting into the habit of composting at home with your kitchen scraps, coffee grounds, and yard clippings gives you exactly what you need to jumpstart a dead bed.
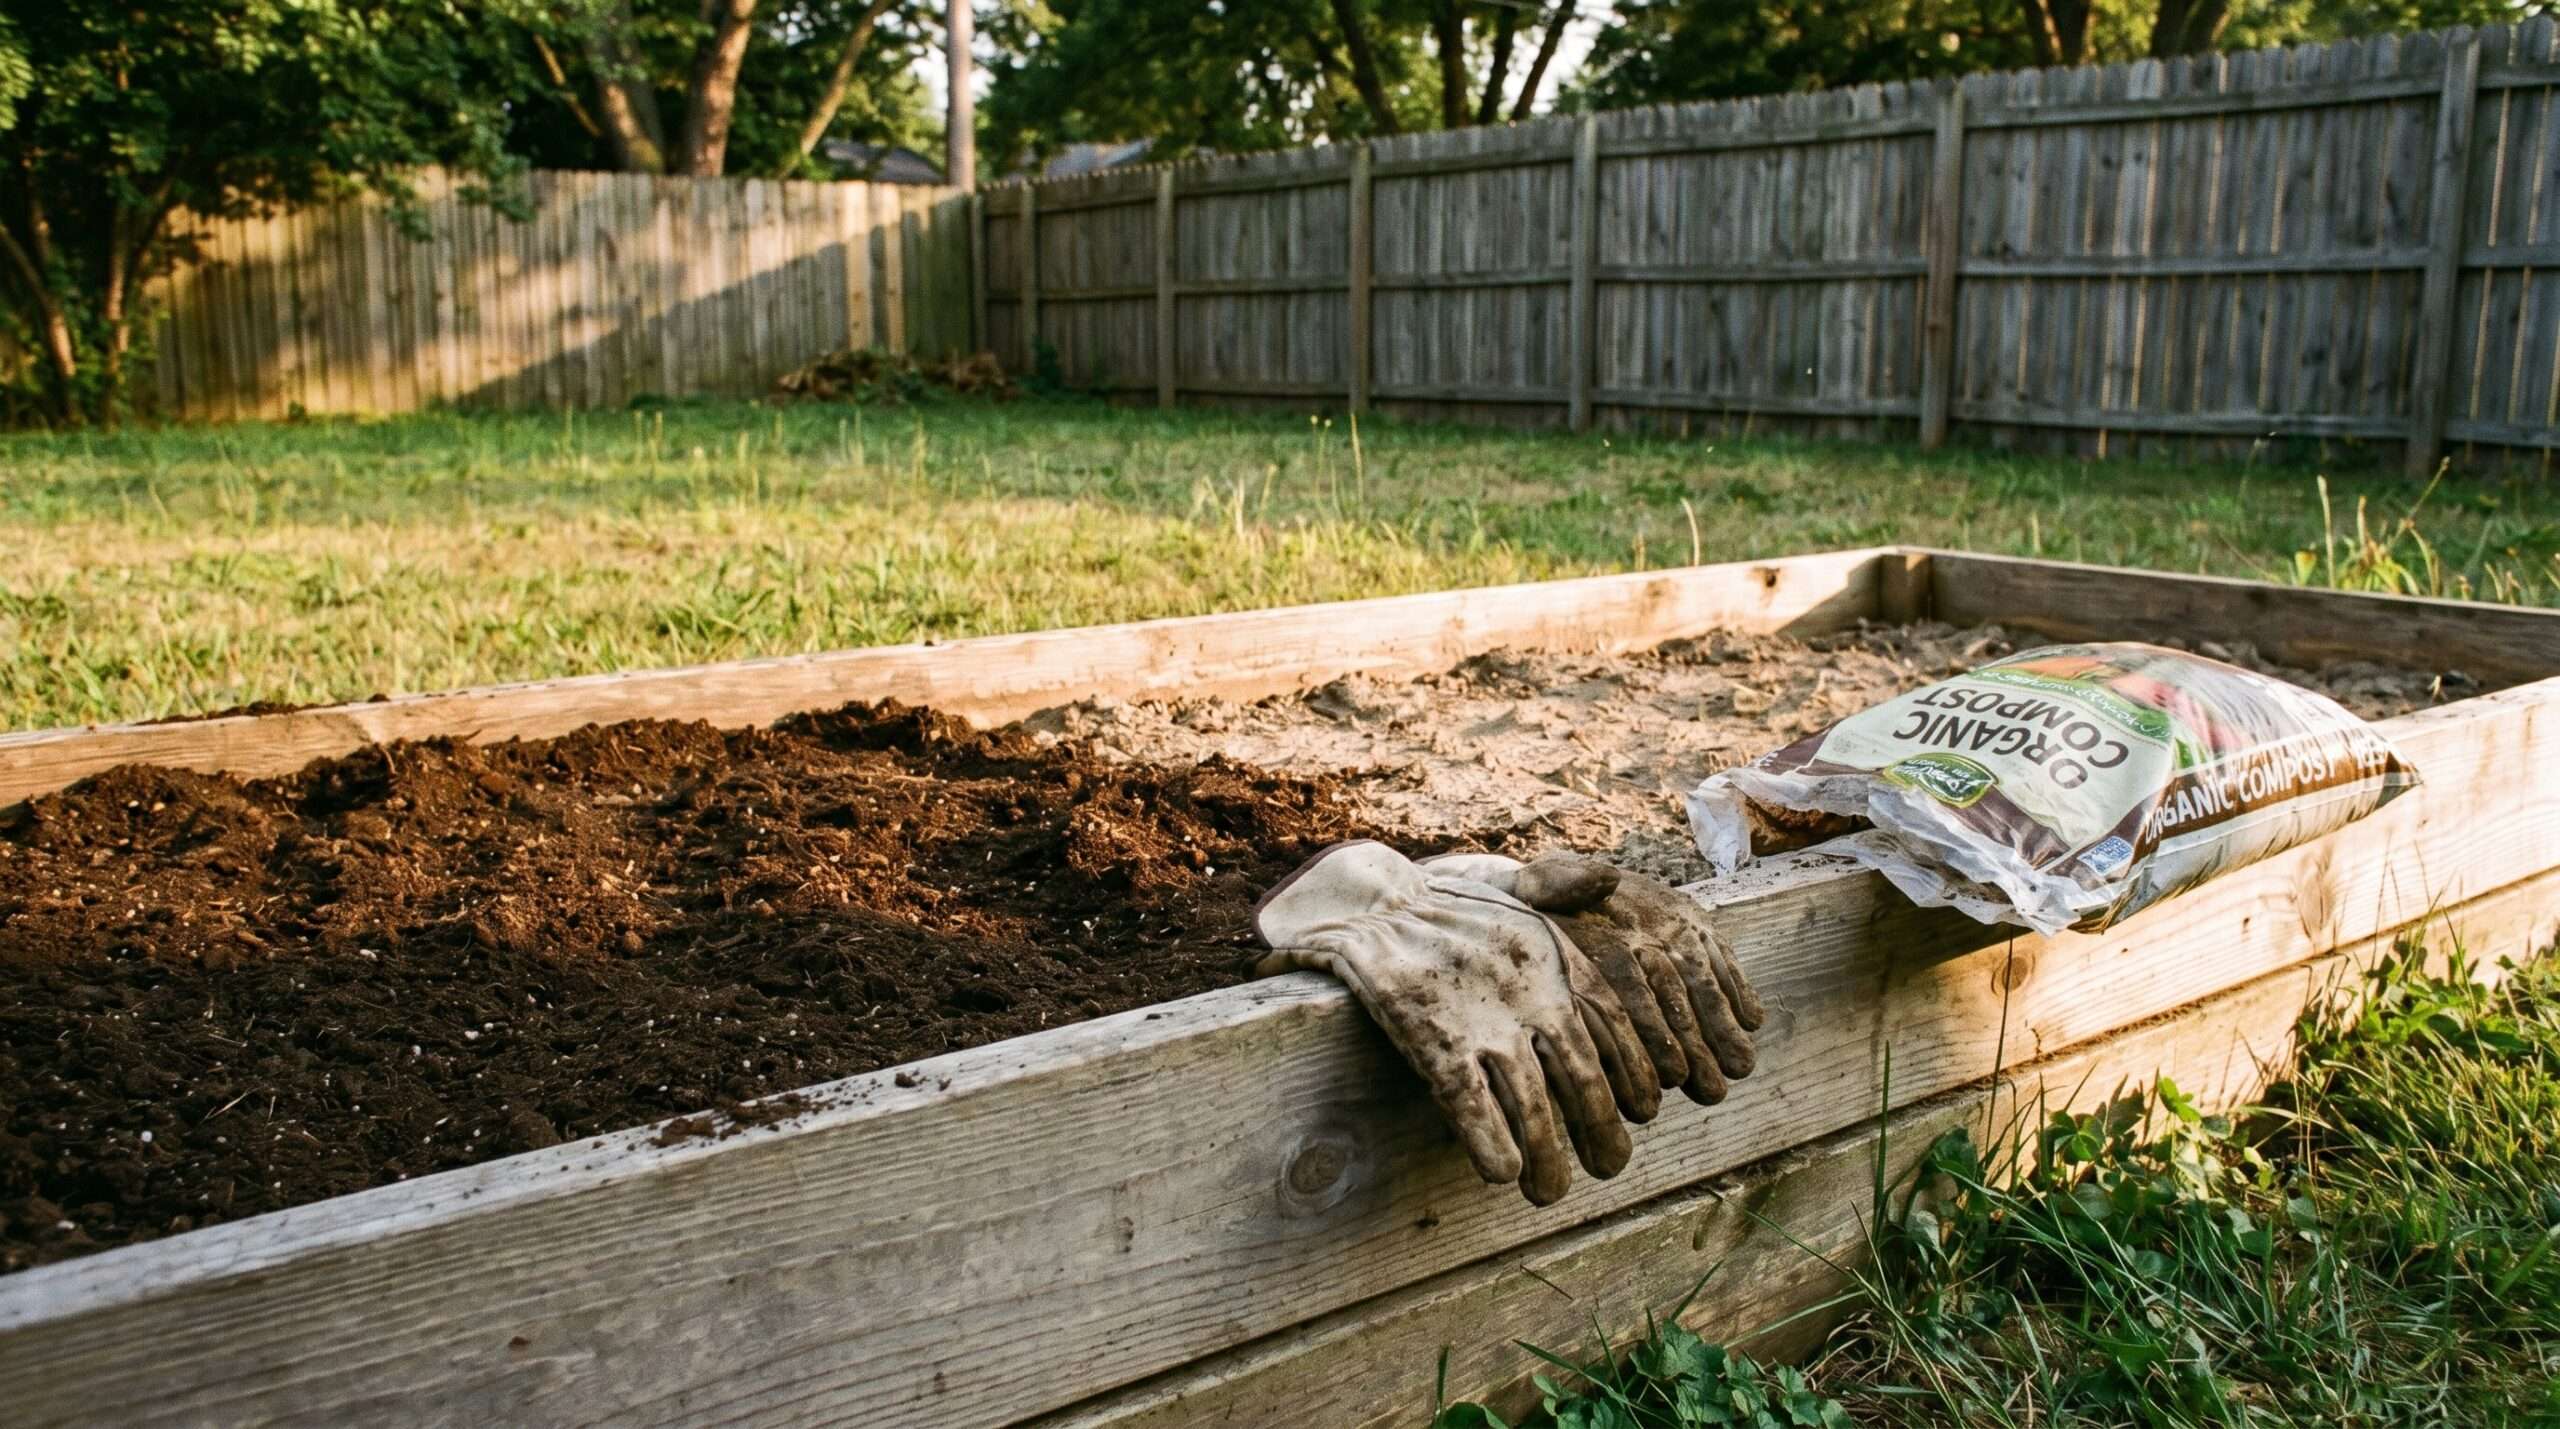
Spread a generous two-inch layer right over the top of your planting area. Don’t worry about mixing it in completely.
If you have time before your fall seeds go in, you can lightly scratch it into the top half-inch with a hand rake just to keep it from blowing away in the wind.
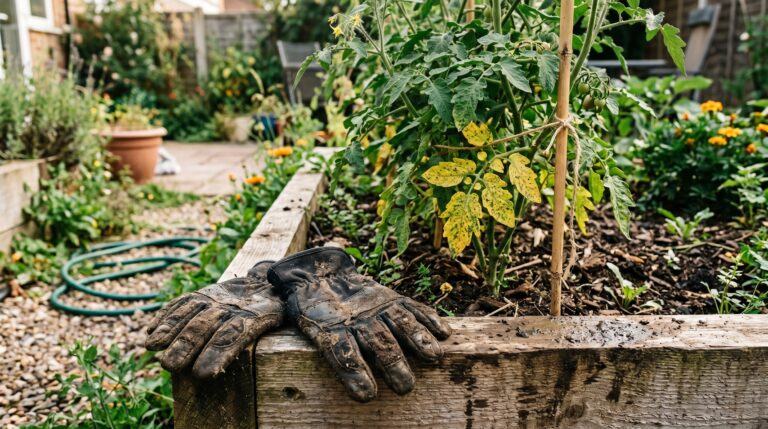
Dealing with the Leftovers
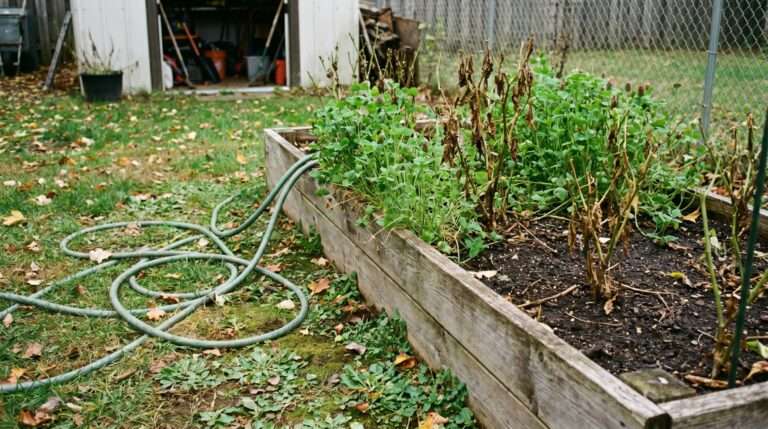
Here’s where most people go wrong: they leave their old, dying summer plants rotting in the ground all through September because they’re too tired to clean them out.
Look, I get it. By August, we’re all a little sick of weeding and watering. But leaving those old zucchini vines and blight-stricken tomato stalks around is an open invitation for pests and diseases to set up camp for the winter.
Get a sharp pair of pruners and cut the old summer crops off right at the soil line.
- Leave the roots in the ground if the plant was healthy. They’ll rot away over winter, creating natural channels for air and water.
- If the plant had powdery mildew, blight, or weird spots, bag up the whole thing and throw it in the trash. Never put diseased plants in your compost pile.
- Shake off any good topsoil sticking to the base of the plant before you toss it.
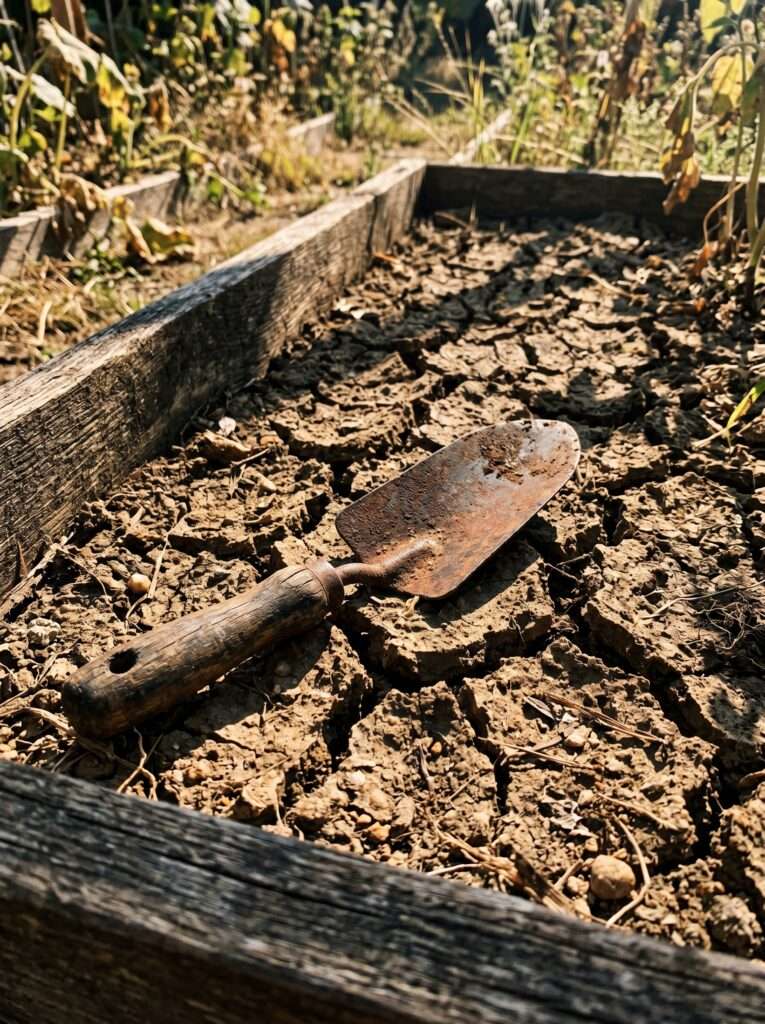
Once the bed is clear, you can see what you’re actually working with. If you notice the soil looks dusty and repels water, give the empty bed a long, slow soak with a sprinkler before you add your nutrients. Adding compost to bone-dry dirt is like throwing dry flour on a countertop—it just sits there and creates a messy crust.
Knowing how to handle these transitions is just as important as watering plants correctly during a July heatwave. It sets the baseline for everything that comes next.
Balancing the Budget for Fall Prep
You don’t need to spend hundreds of dollars at a fancy nursery to get your garden ready for autumn. In fact, most of the best amendments for fall soil are either incredibly cheap or completely free if you know where to look.
| Amendment Type | Average US Cost | Best For | Source Strategy |
| Aged Compost | $5 – $8 per bag | Overall soil life and structure | Buy bulk from local cities or make your own |
| Alfalfa Meal | $15 – $25 per bag | Slow-release nitrogen for greens | Feed stores (cheaper than garden centers) |
| Shredded Leaves | Free | Moisture retention and winter protection | Your front yard or neighbors’ curbside bags |
| Bone Meal | $8 – $12 per bag | Root development for garlic | Local hardware stores |
The best part? You can often find local equestrian centers or hobby farms that will give away aged horse or cow manure for free just to get it off their property.
Just make sure to ask if the animals were fed hay treated with persistent herbicides, as those chemicals can survive through the animal’s digestive system and ruin your vegetable beds for years.
The Secret Magic of Alfalfa Meal
If I could only choose one bagged amendment to buy every autumn, it wouldn’t be a standard 10-10-10 fertilizer. It would be a big bag of plain alfalfa meal from the local agricultural feed store.
Most gardening blogs never mention this because they’re focused on shiny, branded liquid fertilizers, but old-timers know alfalfa is pure gold for tired earth.
Alfalfa meal contains a natural plant growth stimulant called triacontanol. It basically acts as a cup of strong coffee for soil microbes, getting them moving and reproducing rapidly.
It also provides a gentle, slow-release dose of nitrogen that won’t burn your tender young autumn seedlings like spinach or radishes.
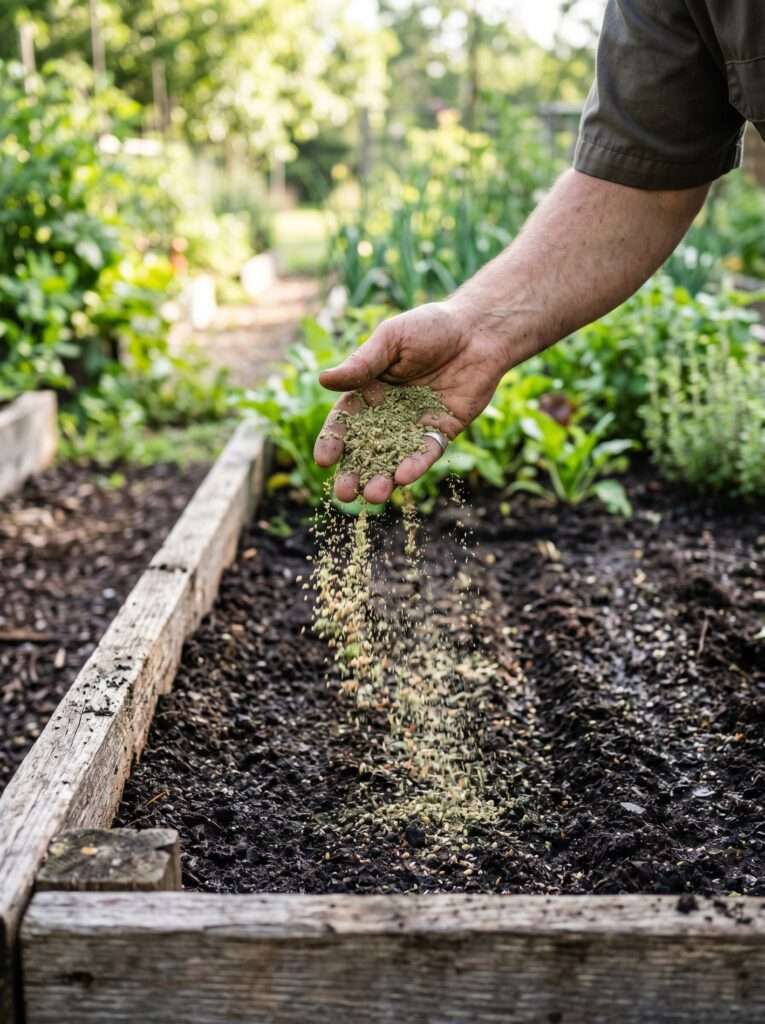
I just scatter a few handfuls over every ten square feet of bed space right before I lay down my compost layer.
But wait, there’s a catch: bunnies and mice love the smell of alfalfa. If you have a major rodent problem, make sure you scratch it down into the dirt well and cover it up so you don’t accidentally invite every critter in the neighborhood to an all-you-can-eat buffet.
Tuck the Beds In for Winter
Once your amendments are down and your fall crops are planted, you absolutely cannot leave that soil bare. Bare soil is defenseless soil. Rain will beat it down until it’s as hard as asphalt, and winter winds will literally blow your expensive topsoil away.
You need to mulch, but you have to use the right material for the season.
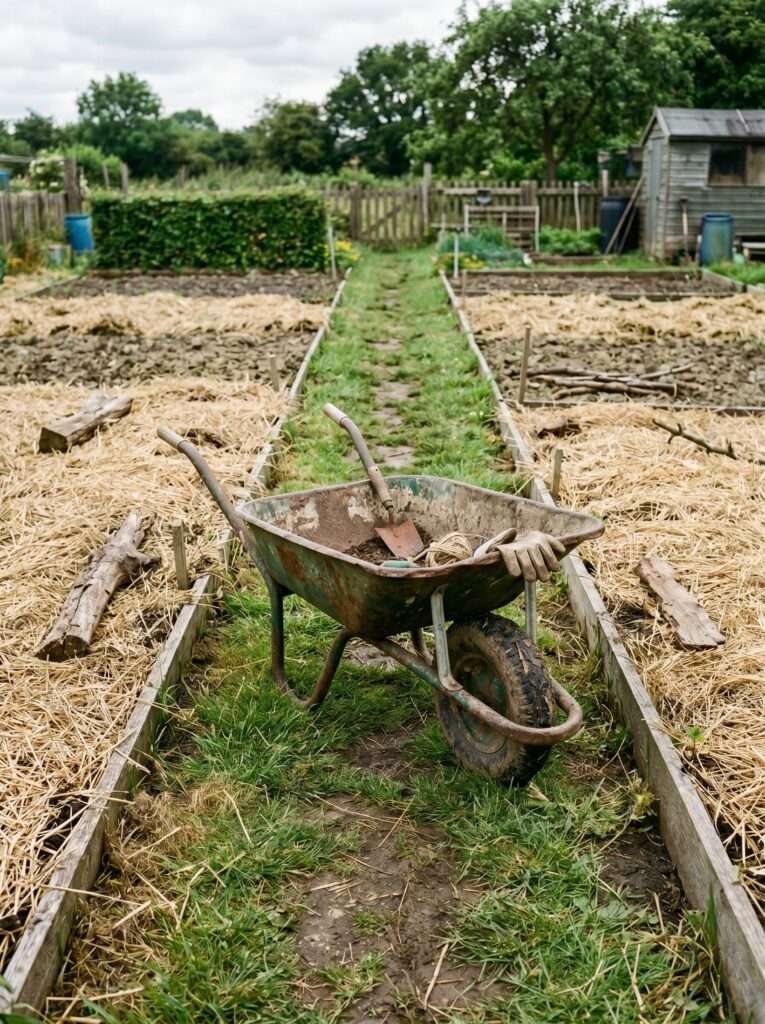
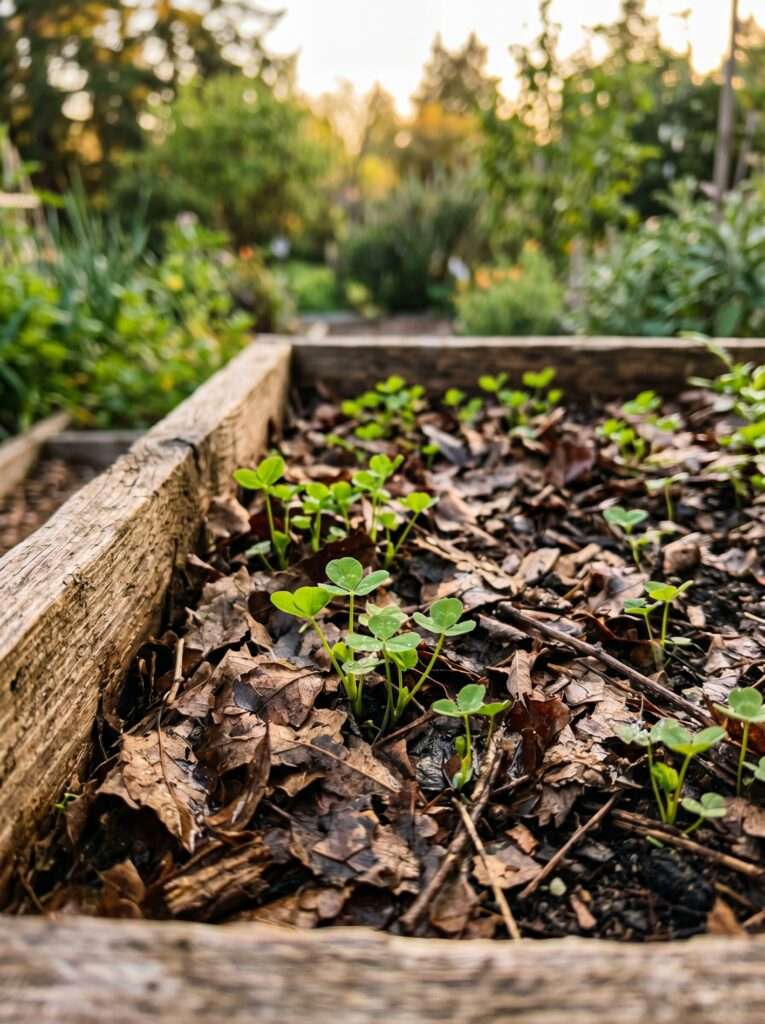
For fall, my absolute favorite mulch is shredded autumn leaves. They’re free, they look beautiful, and they break down gently by spring, turning into beautiful black humus.
I just run my lawnmower over the fallen leaves on my grass a couple of times until they’re chopped up fine, then dump them three inches deep over any empty spots in my beds.
If you don’t chop them up, the large leaves will mat together like a wet tarp, suffocating the soil and preventing water from getting through.
If you can’t get leaves, clean straw (not hay, which is full of weed seeds) works beautifully too. It keeps the soil temperature stable, meaning your fall carrots and beets can keep growing even after the first few light frosts hit your area.
This kind of cozy, textured protection fits perfectly if you happen to love a natural look, similar to how people use rustic elements in a dark cottagecore trend layout to create instant, grounded character.
What Actually Works: The Weekend Soil Rescue Guide
If you only have a single Saturday morning to get your beds ready for fall planting, don’t overcomplicate things. Follow this simple, step-by-step routine that I’ve used on dozens of tired beds over the years.
Step 1: Clear the Surface
Cut down old summer plants at the ground level using sharp hand pruners. Pull up any major weeds by their roots, shaking the attached dirt back into the bed. Leave small, harmless weeds alone for now.
Step 2: Open Up the Earth
Take a pitchfork or broadfork and push it straight into the soil every six inches across the bed. Gently rock the handle back and forth just enough to crack the surface open. Do not flip or turn the dirt over.
Step 3: Hydrate the Core
If the ground is dry, run a gentle sprinkler over the bed for at least 30 minutes. The soil should feel damp like a wrung-out sponge down to at least four inches deep before you add your toppings.
Step 4: Add the Nutrition Layer
Scatter two cups of alfalfa meal or bone meal per 10 square feet. Follow this immediately with a solid two-inch layer of aged compost or well-rotted manure spread evenly across the entire surface.
Step 5: Protect the Work
If you are planting right away, pull back small rows in the compost to sow your seeds. If the bed is taking a break until spring, cover the entire thing with three inches of shredded leaves or clean straw to lock everything in place.
Mistakes I Made (So You Don’t Have To)
Using Fresh Chicken Manure
Back in my fifth year of gardening, I got a truckload of fresh chicken manure from a neighbor and dumped it straight onto my fall greens bed. Within three days, my beautiful kale seedlings looked like they had been hit with a blowtorch. Fresh manure is incredibly high in ammonia and will scald plant roots instantly. Always ensure manure is aged for at least six months until it smells like clean earth, not a barnyard.
The Spring Tillage Habit
I used to think that a clean garden meant a rototilled garden. Every fall and spring, I’d fire up the gas tiller until the soil looked like fine flour. Over time, I noticed my soil became incredibly hard after every rainstorm, drying out into a solid, unbendable sheet.
Tilling destroys the natural glue that holds soil particles together. Once I stopped tilling and switched to top-layer feeding, my plants grew twice as fast with half the watering.
Forgetting the Soil Moisture Before Amending
I once spread three bags of dry compost over a bone-dry bed during a hot August afternoon, assuming the next rain would fix it. The rain didn’t come for two weeks, and when it finally did, the water just rolled off the sides of the bed onto the lawn. Dry soil becomes hydrophobic (water-repellent). Always soak your beds before you lay down your organic materials.
Looking to Next Spring: The Cover Crop Trick
If you have a few raised beds that you aren’t planning to use for fall vegetables or garlic, don’t just leave them sitting there empty all winter. This is the perfect opportunity to let nature do the soil building for you through cover crops.
Every September, I cast a heavy handful of crimson clover or winter field peas into my resting beds. These plants act as a living green blanket during the chilly autumn months.
Their roots grow deep into the compacted summer dirt, breaking up hard pans and pulling nutrients up from deep underground.
When the hard winter freezes finally arrive, these specific cover crops will naturally die back, leaving a protective mat of organic matter on top of the bed.
By the time April rolls around, the worms will have eaten most of it, leaving behind incredibly loose, crumbly soil that is primed for your early spring lettuce and peas.
It takes about five minutes of work in the fall but saves you hours of digging and fertilizing come spring.
Keeping Things in Perspective
It’s easy to get overwhelmed when you read detailed guides about soil chemistry, pH balances, and specific nutrient ratios. But remember, plants have been growing successfully on this planet for millions of years without a single human measuring out fertilizer with a spoon.
Your job as a home gardener isn’t to create a sterile, perfect environment. Your job is simply to provide the basic raw materials—organic matter, moisture, and protection—and then step back and let the natural systems do what they do best.
If your first attempt at a fall garden doesn’t turn out perfectly, don’t sweat it. Every mistake you make is just data that makes you a better grower next season.
Take a walk around your yard, collect those fallen leaves, and start with just one single bed this weekend. You’ll be amazed at what a difference a simple layer of compost can make by next spring.
For those just starting out on this journey, looking over a few straightforward beginner gardening tips can help take the pressure off. You don’t have to get everything right on day one to have a beautiful, productive space.
Common Questions from the Garden Path
You can mix it in to help loosen up heavy clay, but don’t rely on old potting mix for nutrition. Container soil is usually completely drained of nutrients by the end of summer because potted plants use up resources incredibly fast. It’s mostly just peat moss and perlite at that point, so you’ll still need to add plenty of real compost or manure to bring it back to life.
Pull them out now. Clean any dried vine bits off them and store them somewhere dry like a shed or garage. Leaving wood or metal supports out in the freezing winter moisture makes them rot or rust much faster, and it gives overwintering pest eggs a cozy place to hide right next to your growing areas.
If you’re using well-rotted compost and simple alfalfa meal, you can plant your seeds or transplants immediately. Just make sure the alfalfa is distributed evenly and not clumped together in large chunks, which can mold and create localized hot spots that might bother tender young roots.
Unless you are trying to grow specific acid-loving plants like blueberries, or your plants are showing severe, unexplained yellowing, you don’t need an annual test. Adding high-quality organic matter like compost naturally buffers your soil’s pH over time, bringing it closer to the neutral zone that most backyard vegetables prefer anyway.
Yes, but only if you haven’t used any chemical weed killers or synthetic fertilizers on your lawn recently. Many modern lawn herbicides can survive for months on grass clippings and will quickly stunt or kill your garden vegetables if used as mulch. If your lawn is untreated, let the clippings dry out completely in the sun for a few days before spreading them thinly over your soil.
Your garden won’t disappear, but you’ll face a much tougher battle next spring. Bare, un-prepped soil compacts down under heavy winter snow and rain, forming a hard crust that takes a lot of effort to break up in April. You’ll also lose valuable topsoil to winter winds, and your spring crops will start the year with a serious nutrient deficit.
If you’re curious about maximizing what your garden can produce before the cold truly sets in, it’s worth checking out an heirloom tomato secrets guide to make sure you’re getting every last bit of value from your remaining summer vines before clearing them out.
Once you understand the basic cycle of feeding the soil from the top down, the entire process gets much easier. You stop fighting against your dirt and start working with it.
Grab a pair of gloves, find some free leaves, get some compost down, and let nature handle the heavy lifting while you enjoy the crisp autumn air.
Most advice in this article comes from personal gardening experience over the years. Results can vary slightly depending on your specific climate, local soil type, and unique growing conditions. Always observe your own backyard environment and adjust your methods to match what your plants are telling you.
Aagam – Founder of SpruceTouch
Hi, I’m the creator behind SpruceTouch. i am a home and garden enthusiast who shares practical ideas for backyard design, garden projects, patio decor, and small outdoor spaces. Through SpruceTouch, he focuses on simple and budget-friendly ways to improve outdoor living spaces.