Vertical Gardening Hacks: How I Grew 50lbs of Veggies in 10 Square Feet
I used to think you needed a massive backyard to grow a serious amount of food. Every spring, I’d stare at my tiny patch of usable ground and feel completely defeated by the math of traditional row planting. If you follow the standard seed packets, a single squash plant wants a ridiculous amount of space just to stretch its legs.
But then I spent a frustrating summer tripping over sprawling cucumber vines that produced maybe three decent pieces of fruit before succumbing to powdery mildew on the damp ground. That was the year I realized growing out was a losing game for my small space. I had to start growing up.
The turning point came when I stopped treating my garden like a flat map and started treating it like a high-rise apartment building. By using a few simple structural shifts and rethinking how I supported my plants, I managed to pull exactly fifty-two pounds of fresh produce out of a footprint no larger than a small entryway rug. It wasn’t perfect, and I made some incredibly messy mistakes along the way, but it completely changed how I look at small-space food production.
If you’re tired of feeling limited by a small patio, a tight suburban plot, or just a lack of open dirt, here is exactly how I flipped my garden on its head and what actually happened when I did.
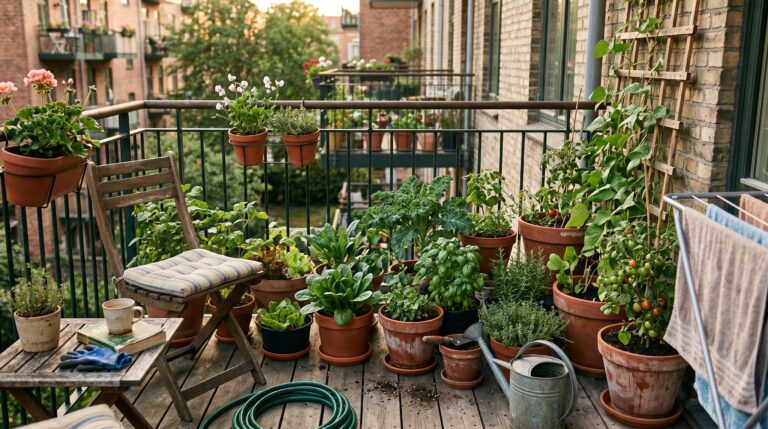
The Reality of the Ten-Square-Foot Footprint
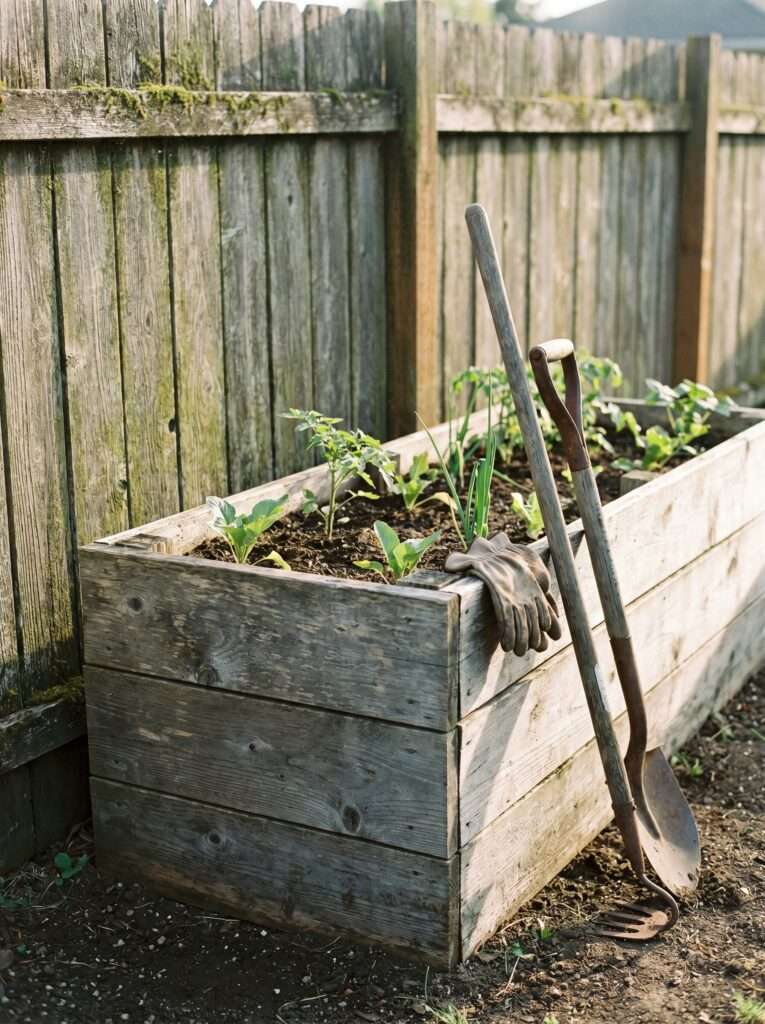
When people hear “ten square feet,” they usually picture a long, skinny strip of dirt or a couple of basic containers. In my case, it was a simple two-by-five-foot raised setup tucked right against a patchy wooden fence that gets decent afternoon sun.
In a traditional garden setup, that amount of space gives you enough room for maybe two pepper plants and a handful of radishes before you run out of real estate. If you drop a single zucchini plant in there, the conversation is effectively over. The leaves spread out like umbrellas, block the light, and smother everything else.
To get fifty pounds of food out of that footprint, you have to completely change your relationship with gravity. You aren’t just planting seeds; you are building a vertical framework that forces the plants to use the air instead of the soil surface.
But here’s the kicker: you can’t just plant regular varieties and expect them to climb. You have to be incredibly intentional about choosing vining types over bush types. The first time I tried this, I accidentally planted a bush variety of green beans next to a trellis, and I sat there for weeks wondering why they refused to climb before I realized my mistake.
Building the Framework Without Spending a Fortune
You don’t need fancy, expensive pre-made metal obelisks from a high-end gardening catalog to make this work. In fact, some of the best climbing supports I’ve ever used were cobbled together from cheap materials sitting in the back of my garage.
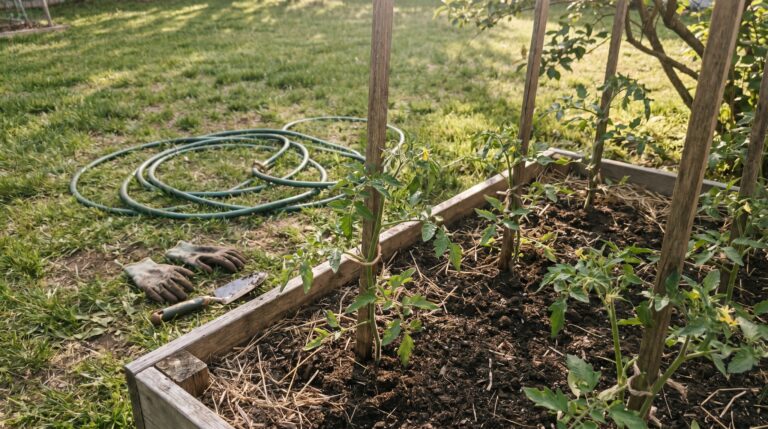
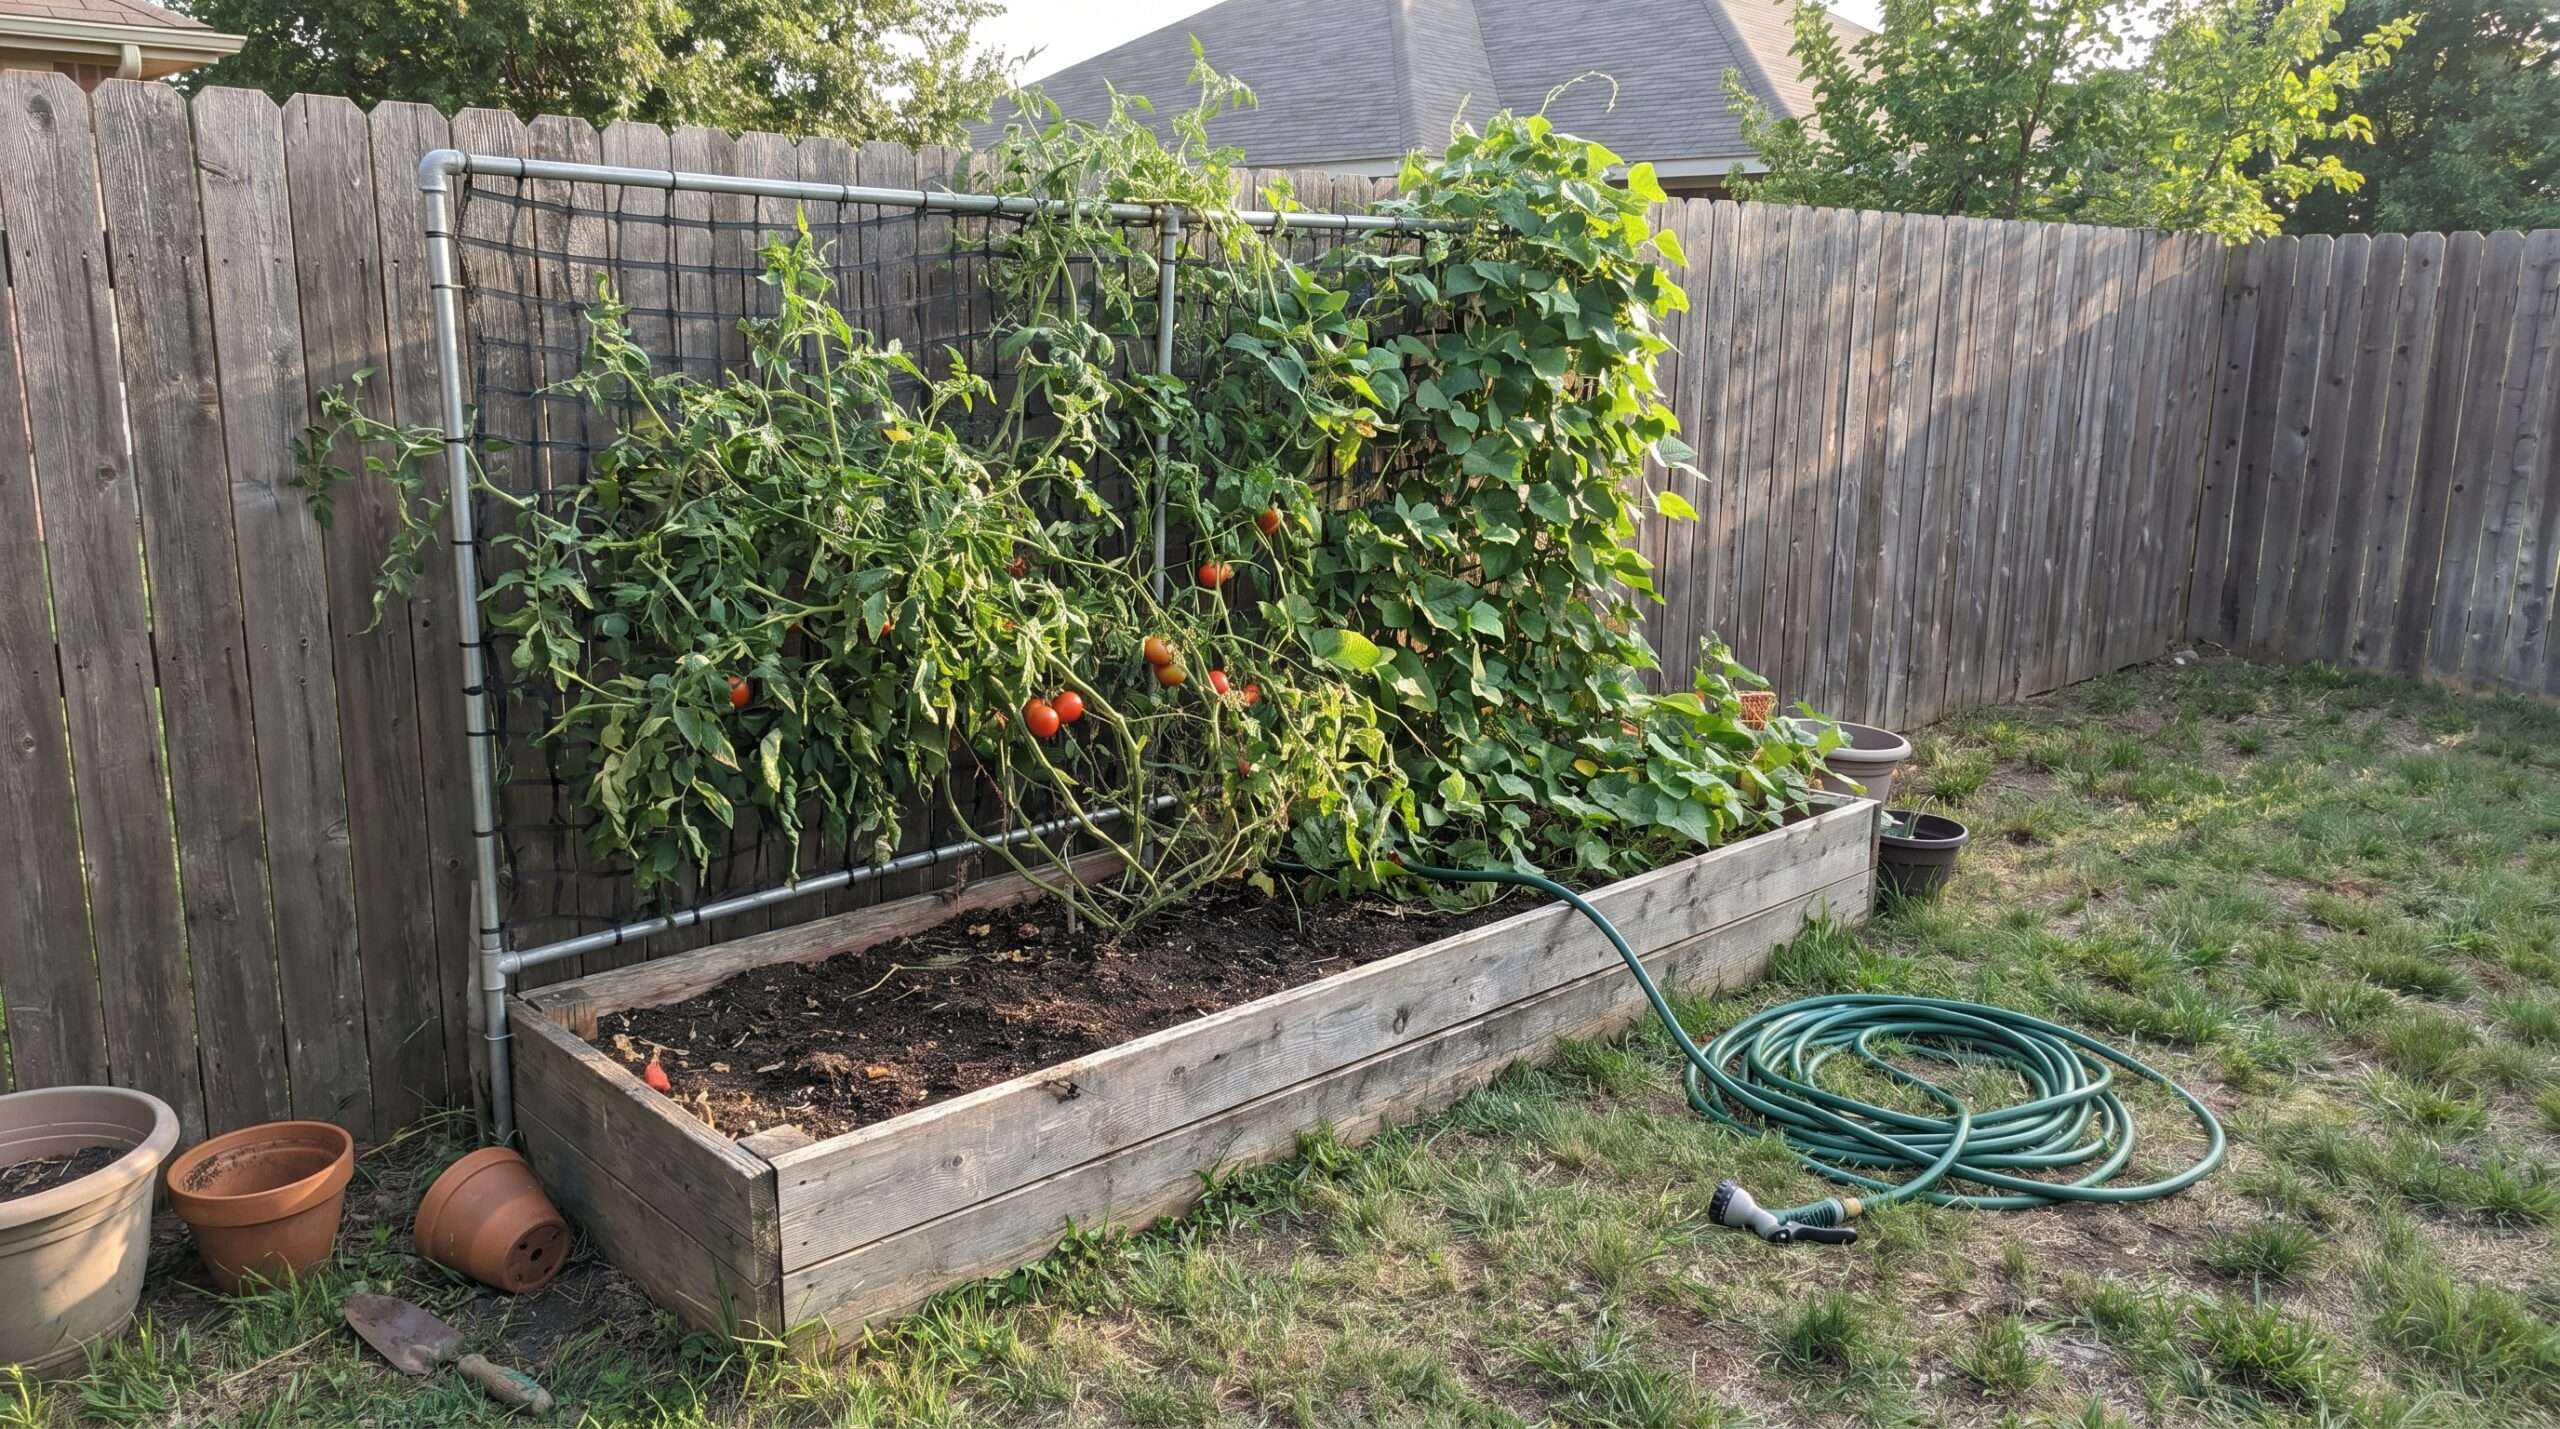
My go-to setup uses simple EMT conduit pipes from the local hardware store and a roll of heavy-duty nylon trellis netting. I drive two pieces of rebar into the ground, slip the conduit pipes right over them, and attach a top bar using corner elbows. It takes about twenty minutes, costs less than a fast-food meal, and it won’t budget even when it’s loaded down with heavy vines.
One thing most people ignore when building vertical frames is the sheer weight of a mature plant filled with fruit. A single tomato plant heavy with Romanello or beefsteaks can easily weigh twenty or thirty pounds when wet from the rain. If your trellis is flimsy, the whole thing will come crashing down in a late-July thunderstorm. I learned this the hard way with a cheap plastic trellis that snapped like a twig right when my harvest was peaking.
The Lean-To Method for Heavy Crops
For things like squash and heavy cucumbers, I prefer using a lean-to style frame made from cattle panels. These are thick, galvanized wire panels that don’t sag or rust.
By leaning the panel at an angle against a wall or fence, you create a shaded little microclimate underneath it. I use that shady under-bed space to grow quick-growing crops that hate the summer heat, like spinach and loose-leaf lettuce. While the squash leaves are baking in the sun up top, the greens stay cool and crisp underneath.
Choosing the Right Visual Layout
If you just pack plants into a small space without a clear plan for light penetration, you’ll end up with a tangled, unproductive jungle where nothing gets enough sun. The key is arranging your vertical structures from north to south if possible, keeping the tallest elements at the very back of the plot.
+---------------------------------------------------+
|               TALL TRELLIS (Back)                 |
|  Indeterminate Tomatoes / Pole Beans / Squash      |
+---------------------------------------------------+
|              MEDIUM ZONE (Middle)                 |
|  Bush Peppers / Eggplants / Shorter Vining Peas   |
+---------------------------------------------------+
|               LOW BORDER (Front)                  |
|  Herbs / Radishes / Strawberries / Strawberries   |
+---------------------------------------------------+
                  [ SUN DIRECTION ]
This simple stair-step layout ensures that your climbing giants don’t cast a permanent shadow over your shorter, sun-loving plants like peppers or bush beans.
The Big Three: What Actually Climbed Successfully
Not every vegetable is cut out for life in the skies. Over the seasons, I’ve found that three specific crops give you the absolute highest return on investment when you force them to grow vertically.
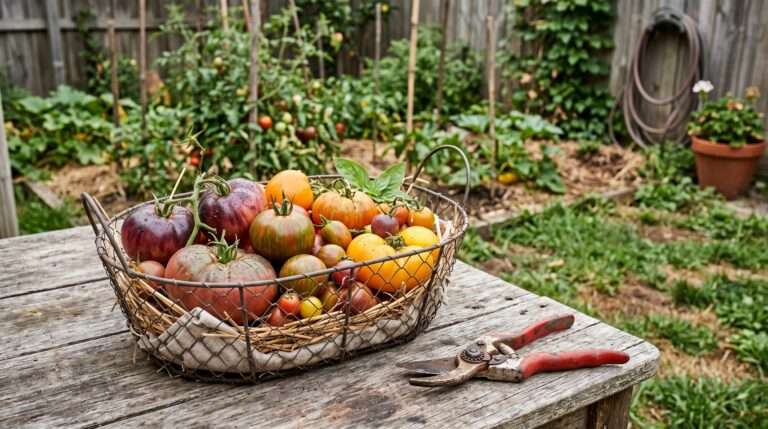
1. Indeterminate Tomatoes
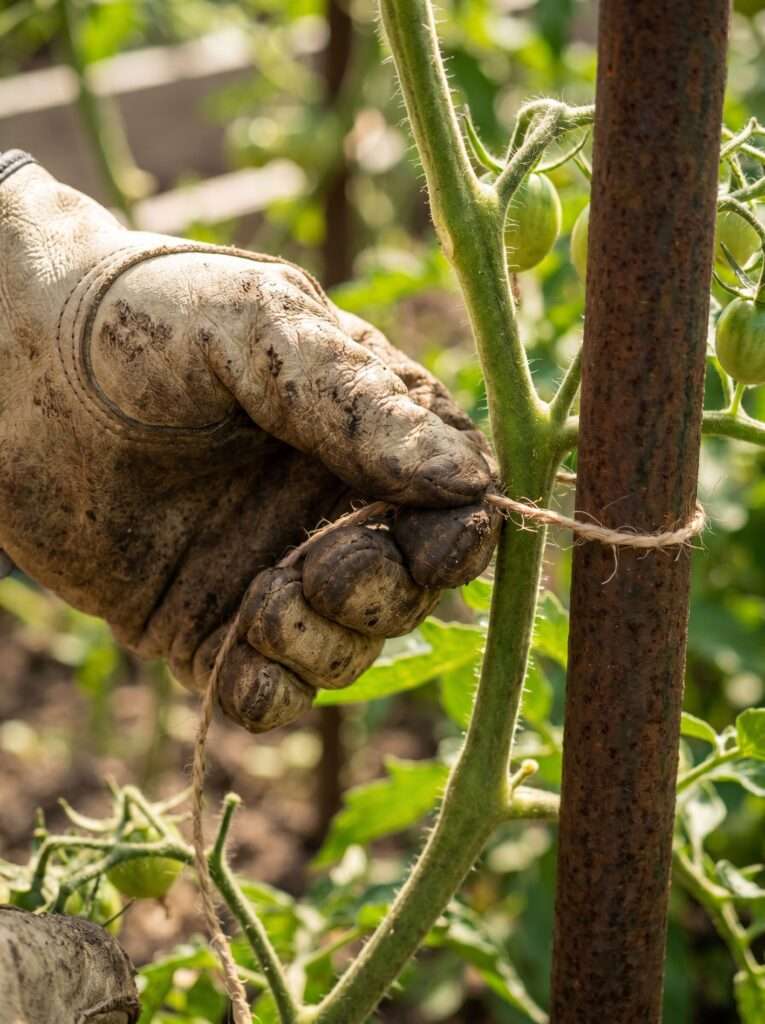
If you’re still growing determinate “bush” tomatoes in a small space, you are leaving dozens of pounds of fruit on the table. Indeterminate varieties will keep growing and producing until the first hard frost kills them off. You just have to train them to a single stem and keep tying them up.
Every single week, I walk out with a roll of soft garden twine and snip off the little suckers that grow in the crotch between the main stem and the branches. It feels a little aggressive at first, but keeping the plant focused on one main upward vine allows you to pack three or four tomato plants into a space where you’d normally only fit one.
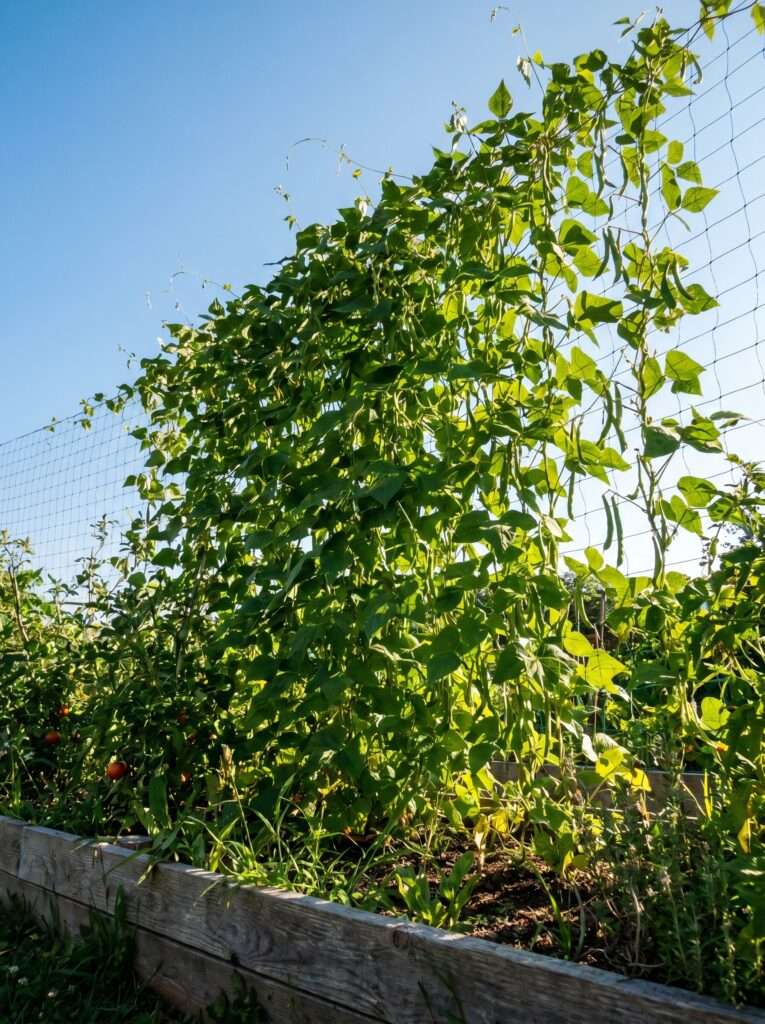
2. Pole Beans vs. Bush Beans
Pole beans are the ultimate vertical workhorse. They don’t even need to be tied down; their little tendrils will find any string or wire nearby and start wrapping themselves around it automatically. I plant these closely at the base of my mesh netting, and within six weeks, they form a solid green wall of foliage.
The yield difference is staggering. A single row of pole beans will produce continuously for months, whereas bush beans tend to give you one big harvest all at once and then call it quits. Plus, picking beans at eye level is infinitely better for your back than spending an hour hunched over the dirt.
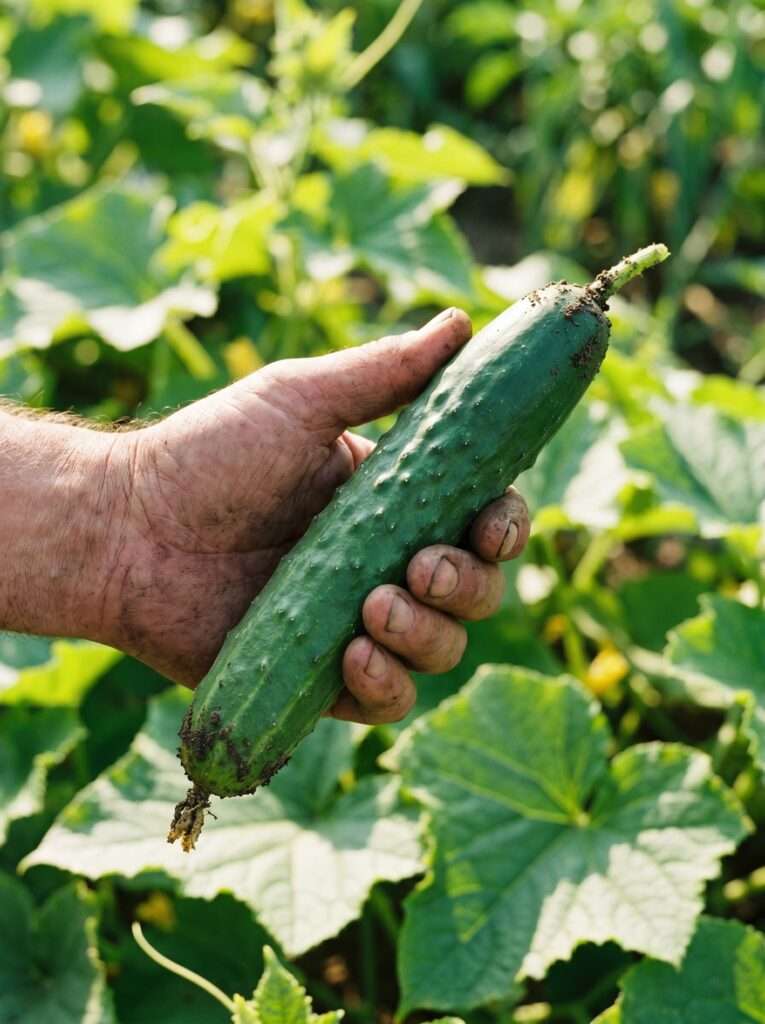
3. Vining Cucumbers
Most people grow cucumbers on the ground, which leads to yellow bellies, dirt-covered skins, and constant battles with slugs. When you train them up a cattle panel, the fruit hangs down completely straight due to gravity. They stay perfectly clean, uniform, and away from the creepy-crawlies living in the mulch.
The Secret to Soil Management in High-Density Plots
When you jam that many plants into ten square feet, your soil has to work double duty. A standard garden bed relies on plants being spread out so their roots can scavenge for nutrients over a wide area. In a vertical high-density setup, those roots are living shoulder-to-shoulder in a crowded underground neighborhood.
Most gardening blogs never mention this, but you cannot use regular garden soil from your yard in a high-density vertical bed. It packs down too tightly, suffocates the roots, and turns into a brick by mid-summer. You need a mix that is incredibly loose, porous, and loaded with organic matter.
I use a simple homemade blend of roughly one-third coarse peat moss, one-third vermiculite for moisture retention, and one-third high-quality composted manure. This structure allows the roots to expand quickly without fighting hard packed dirt, meaning they can absorb nutrients much more efficiently.
Feeding the Beasts
Because these plants are growing fast and furious, they eat through nutrients at an alarming rate. If you just plant them and walk away, your leaves will start turning a pale, sickly yellow by July, and your fruit production will tank.
I top-dress the entire ten-square-foot area with an inch of fresh worm castings or aged compost right around the time the first flowers start showing up. After that, I water them with a heavily diluted organic fish emulsion every two weeks. It smells absolutely terrible for about an hour after you apply it, but the sudden burst of deep green growth is worth the odor.
Watering Tactics That Prevents Mid-Summer Burnout
Watering a vertical garden is completely different from watering a flat plot. Because the plants are elevated, they are exposed to much more wind and air movement, which dries out the foliage and the soil much faster than normal.
If you just spray the bed with a hose every evening, you’re setting yourself up for a massive outbreak of fungal diseases. The water hits the dense leaves, stays wet overnight, and invites every spore in the neighborhood to take up residence.
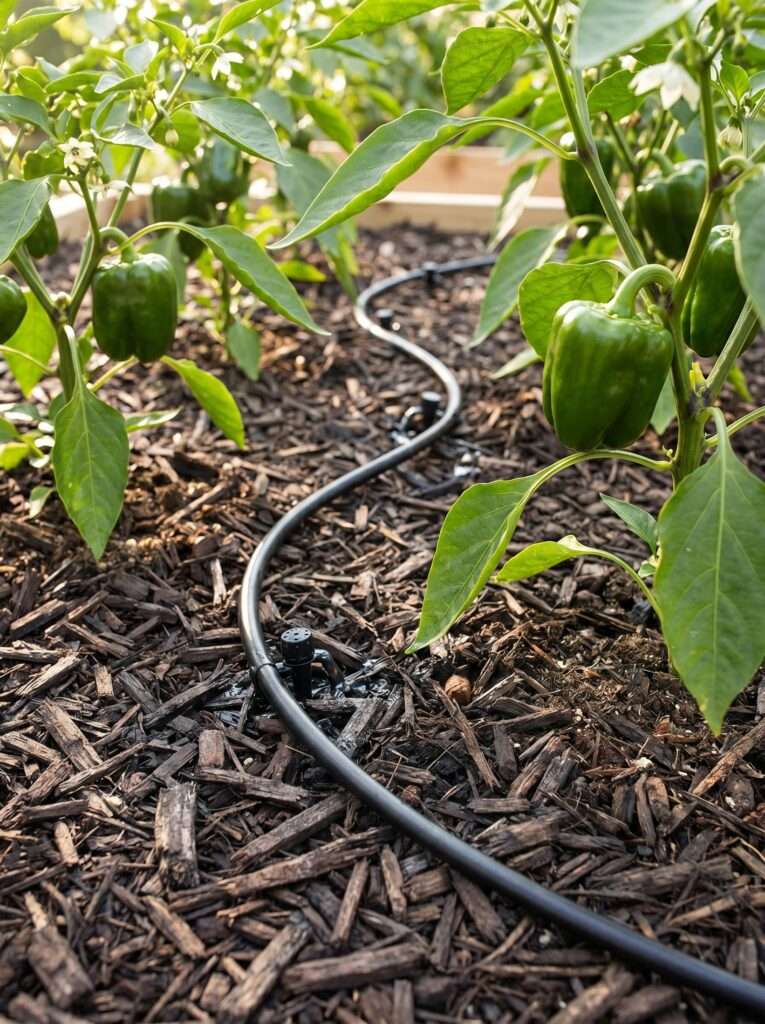
The best part of a small footprint is how incredibly cheap it is to set up a dedicated drip irrigation line. I ran a simple, flexible soaker hose through my two-by-five bed, snaking it right past the base of every single plant, and buried it under three inches of clean straw mulch.
This approach delivers water directly to the soil where the roots can grab it, keeping the leaves completely dry. I set it to run for fifteen minutes early in the morning before the sun gets hot, which gives the plants enough hydration to survive the heat of the day without wasting water to evaporation.
Managing the Jungle: Pruning for Airflow
The biggest mistake you can make with vertical gardening is letting the plants grow completely wild. When you have tomatoes, beans, and cucumbers all climbing up the same framework, they will quickly turn into an impenetrable mass of green chaos.
This surprised me honestly: plants actually produce more fruit when you aggressively cut off their extra leaves. In the beginning, I was terrified to prune anything. I thought every leaf was a little solar panel helping the plant grow. But when the canopy gets too thick, light can’t reach the inner branches, and air stops moving through the space.
Once a week, I take my sharpest shears and remove the lower leaves from my tomato plants, clearing out everything from the ground up to about eighteen inches high. This completely cuts off the pathway for soil-borne fungi to splash up onto the foliage during a heavy downpour.
For a great example of managing your backyard spaces efficiently, look at how you can transform tight areas into functional zones. If you want to optimize your garden layout even further before the season peaks, you can read about creating 17 Cozy Seating Nooks: Build your dream garden corner in one weekend to help visualize how to blend your vertical growing structures into a beautiful, functional living space.
What Actually Works: The Quick-Start Mesh Trellis Setup
If you want to duplicate my fifty-pound setup without spending days planning, here is the exact, stripped-down method I use to build a vertical support frame in less than an hour.
Materials Needed:
- Two 8-foot lengths of 3/4-inch EMT conduit pipe
- Two 4-foot pieces of heavy steel rebar
- One 3/4-inch conduit top-rail corner connector
- A roll of heavy-duty 6-inch mesh nylon trellis netting
- A heavy hammer or mini-sledge
- A handful of plastic zip-ties
Step-by-Step Build:
- Drive the Anchor Points: Measure the exact length of your garden bed. At each back corner, hammer a piece of rebar at least two feet deep into the solid ground outside or inside your frame. Leave about two feet sticking straight up.
- Mount the Uprights: Take your two long conduit pipes and slide them directly over the rebar anchors. The rebar acts as an internal spine, keeping the long pipes perfectly vertical and preventing them from tipping over under heavy wind or weight.
- Connect the Top Bar: Use your corner connectors to join a horizontal piece of conduit across the top of the two upright pipes, tightening the screws firmly with a simple screwdriver.
- Hang the Netting: Unroll your nylon netting and secure it to the top bar using zip-ties every six inches. Stretch the netting tightly down to the bottom of the bed and anchor it to the frame or ground using landscape staples.
- Plant Your Crop: Space your vining seeds or seedlings directly along the base line of the netting, roughly four to six inches apart for beans, or two feet apart for larger tomatoes.
Things That Didn’t Work for Me
I’ve had my fair share of complete disasters while figuring out this vertical system. Here are three specific things that failed miserably so you don’t have to repeat them.
Trusting Cheap Plastic Netting
The first year I tried climbing peas and small melons, I bought a cheap, thin plastic mesh from a discount store bin. It felt like heavy fishing line, so I assumed it would hold. By mid-August, the weight of the vines caused the plastic to stretch, sag, and eventually melt under the summer heat. The whole green mass slumped forward like a wet blanket, breaking several main stems. Always invest in heavy-duty woven nylon mesh or rigid metal panels.
Ignoring the Wind Profile
A vertical garden acts exactly like a giant sail on a boat. If you build a beautiful, lush eight-foot wall of beans but don’t secure the base of your frame deep into the ground, a single severe afternoon thunderstorm will tip the entire structure right over. I once found my entire tomato frame lying face-down in the lawn because I simply stuck the support poles a few inches into loose compost instead of using deep rebar anchors.

Overcrowding the Base Area
It is incredibly tempting to plant a row of carrots, a row of radishes, and a row of herbs right at the feet of your climbing trellises. I thought I was being a space-saving genius. But within a couple of months, the massive root systems of the climbing crops completely choked out the smaller vegetables below, resulting in woody radishes and tiny, thread-like carrots. Give the base of your vertical climbers at least six inches of clear space.
Small Things That Make a Big Difference
- Twist with the Sun: When training young vining tendrils onto your trellis lines, always wrap them in a clockwise direction. Most climbing plants naturally follow the movement of the sun, and forcing them counter-clockwise can cause them to untwist themselves overnight.
- The Melon Hammock Trick: If you are ambitious enough to grow small melons or personal-sized pumpkins up a trellis, use old t-shirts or nylon pantyhose to create little supportive slings for the individual fruits once they reach the size of a tennis ball. Tie the sling directly to the rigid frame to take the weight off the vine.
- Reflective Mulching: In tight spaces against walls or fences, the very bottom of the bed can get dark quickly. Using a light-colored straw mulch instead of dark wood chips helps reflect precious sunlight back up onto the lower leaves of your plants.
- Keep Your Shears Clean: When you are pruning high-density beds weekly, carry a small jar of rubbing alcohol with you. Dip your blades between plants to avoid accidentally spreading a disease from a sick tomato plant to a healthy cucumber vine.
The Late-Season Transition
As summer winds down, a vertical garden changes dramatically. By August, your tall green walls will be working overtime, but they will also start to show their age. This is around the time you need to stop letting the plants produce new growth and start forcing them to ripen what they already have on the vine.
For example, with my indeterminate tomatoes, I perform an action called “topping” around late August. I walk out and cut off the main growing tip at the very top of the frame. This stops the plant from climbing any higher or wasting energy on new flowers that won’t have time to mature before winter. Instead, the plant funnels all its remaining sugars directly into turning those final green clusters into deep, sweet red fruit.
It’s also the perfect time to start thinking about what happens to your soil after such an intensive growing season. After pulling fifty pounds of food out of a tiny plot, that soil is completely spent. If you leave it bare and exposed all winter, the rain will leach out any remaining nutrients, leaving you with dead, lifeless dirt next spring.
To keep your dirt protected during the cold months without spending a fortune on synthetic bags, you can learn about Cover Crops for Beginners: Protecting your soil during the off-season to see how easy it is to plant a simple, cheap green blanket that keeps your vertical plot fertile and ready for next year’s climbing rotation.
Dealing with Pests in the Canopy
One thing I absolutely love about vertical gardening is how much easier it makes pest control. In a traditional garden, finding hornworms or squash bugs requires getting down on your hands and knees and flipping over hundreds of wet, dirty leaves near the soil.
When your plants are up on a trellis, you can simply walk along the green wall at eye level and inspect the front and back of the leaves with zero effort. The increased airflow also makes life miserable for pests that thrive in stagnant, humid conditions, like spider mites.
But wait, there’s a catch: because the fruit is hanging out in the open at eye level, it’s also highly visible to birds and squirrels. I noticed my local mockingbirds taking casual peck marks out of my highest ripening tomatoes.
To solve this without wrapping the whole yard in ugly netting, I started hanging a few old, scratched compact discs from the top bar of the conduit frame using fishing line. The random spinning flashes of light completely throw off the birds, keeping my top-shelf harvest perfectly intact.
Keeping the Momentum Going Into Autumn
Once your summer crops finally cross the finish line and the vines begin to yellow, don’t just abandon the frame until next spring. That vertical infrastructure is just as useful for cool-weather crops that thrive in the autumn chill.
As soon as the old cucumber and bean vines are pulled down and thrown into the compost pile, I immediately plant sugar snap peas and winter peas along the base of the nylon mesh. They love the crisp fall air, can handle light frosts without blinking, and will happily use the exact same support system until the deep freezes of December set in.
If you are planning your garden changes well in advance of the cold weather, you might also want to figure out your flower rotations for the following spring. It’s always smart to check out the Fall Bulb Guide: Why you must buy your Tulip and Lily bulbs in June to make sure you get your spring-blooming bulbs ordered early, ensuring your small yard stays packed with vibrant, beautiful color the moment the winter snows melt away.
Tracking the Numbers: Was It Really Fifty Pounds?
I keep an old, battered digital kitchen scale out on my back patio table, right next to my muddy harvest baskets. For a long time, I never bothered weighing anything; I just ate what came out of the ground and was happy with it. But when you are trying to maximize a tiny ten-square-foot space, keeping track of the data becomes weirdly addictive.
Here is how the numbers roughly shook out during my best vertical season:
| Crop Type | Total Yield (Pounds) | Space Used | Support Method |
| Indeterminate Tomatoes | 24.5 lbs | 4 sq ft | Single-Stem Conduit Frame |
| Vining Cucumbers | 16.2 lbs | 3 sq ft | Slanted Cattle Panel |
| Pole Beans | 11.5 lbs | 3 sq ft | Nylon Mesh Netting |
When you look at those individual numbers, they don’t seem impossibly large. Anyone can get sixteen pounds of cucumbers if they have enough patience. But when you stack them all on top of each other inside that tiny two-by-five-foot rectangle, the density of food produced is incredible.
The Importance of Structural Timelines
If you want to maintain this level of productivity year after year, timing your planting and pruning schedules is absolutely critical. You cannot afford to let a single crop sit idle on the vine past its prime.
For instance, if your summer squash or cucumbers are starting to slow down in early August, you need to make the tough call to pull them out early rather than waiting for them to slowly wither away. This opens up the bed for your next rotation immediately.
If you are also managing fruit trees on your property alongside your vertical vegetable beds, late summer is an incredibly busy structural window. To keep your entire backyard ecosystem balanced and productive, take a look at the guide on Late Summer Pruning: How to shape fruit trees in August (Common Mistakes) to make sure you are trimming your larger trees correctly, preventing them from casting unwanted, overgrown shadows over your high-density vegetable trellises.
Embracing a Little Bit of Garden Chaos
When you read a lot of modern gardening content online, everything looks like a pristine museum exhibit. The lines are perfectly straight, the wood is spotless, and there isn’t a single yellowing leaf or weed in sight.
In a real, high-volume home garden, things get messy quickly. Vines will occasionally break, bugs will chew a few holes in your pristine bean leaves, and your trellis might look a little lopsided after a big windstorm.
That is completely normal and part of the process. I used to obsess over making my small plot look like a magazine cover, but I quickly realized that plants don’t care about aesthetics. They just want reliable support, decent soil, consistent water, and enough sunlight to do their job.
If you enjoy experimenting with unconventional, low-stress planting methods rather than over-analyzing every single seed placement, you’ll love reading about The “Chaos Gardening” Experiment: My real results from May seed sowing to see what happens when you just let nature take the wheel in a corner of your yard without worrying about perfect rules or structures.
FAQ
Yes, absolutely. Because you are packing multiple plants into a tiny footprint, their roots are competing for the same limited pool of nutrients. I use high-quality compost blends at planting time and follow up with a diluted organic liquid feed every two weeks during the peak growing season to keep them from starving.
You can, but you have to select a true vining zucchini variety rather than the common bush varieties found at most big-box garden centers. You will also need to manually tie the heavy main stem to a strong cattle panel frame every few inches as it climbs, since zucchini plants don’t have natural climbing tendrils.
The secret is avoiding flimsy plastic meshes and ensuring your top horizontal support bar is completely rigid. Use heavy-duty woven nylon netting or metal cattle panels, and anchor the frame to solid steel rebar driven at least two feet into the ground outside your garden box.
Simple jute or cotton garden twine works great, but don’t tie it too tightly around the plant’s stem. Always leave a large, loose loop around the vine to give the stem room to thicken up as it grows, otherwise the tight string will choke off the plant’s water supply.
My climbing beans stopped producing in mid-summer, what happened?
When daytime temperatures consistently rise above 90°F, many bean varieties will temporarily drop their blossoms without setting pods. Keep watering them consistently at the base; once the intense summer heat wave breaks in late August, they will start blooming and producing heavily again.
Once you understand the basic mechanics of vertical growing, small-space gardening stops feeling like a compromise. You don’t need acres of land to grow a significant amount of fresh food for your kitchen; you just need to stop thinking flat and start looking at the empty air above your beds.
Most advice in this article comes from years of real gardening experience and trial-and-error in home gardens. Results may vary depending on your specific local climate, daily sun exposure, and regional growing conditions.
Aagam – Founder of SpruceTouch
Hi, I’m Aagam — the creator behind SpruceTouch. I’m a home and garden enthusiast who shares practical ideas for backyard design, garden projects, patio decor, and small outdoor spaces. Through SpruceTouch, I focus on simple and budget-friendly ways to improve outdoor living spaces.